Operation Steps
When used as a Copyboard
The captureboard uses an image scanner to scan characters or diagrams drawn using special markers (four
colors). When the Color Print
or B/W Print button is pressed, the image on the screen is printed out to
the printer. When a USB memory device or computer is connected, the image on the screen is saved as image
data when the Save
button is pressed. (For the memory for computer storage, one sheet’s worth of data is
saved, overwriting previously saved data.)
Furthermore, when network settings are made, image files can be saved on the captureboard or FTP server.
Preparation
• Setupthenewlypurchasedcaptureboardandconnectaprinter.
Seeaseparatemanualtitled“AssemblyandSetupManual.”
• PlugtheACpowerplugsofthecaptureboardandprinterintowallpoweroutlets.
• Afterpurchase,besureto set the captureboard’sclock.Ifnot,theproperdateandtimewillnotbedisplayedon
prints or in image files. See page E-12.
Note
• Whenturningonthepower,waitabout5secondsormoreafterthepowerplughasbeenconnectedbeforepressingthe
ON/Standby button.
• ThecoloroftheimageswhenprintedincolororwhensavedinUSBmemorywilldiffersomewhatfromthemarkercolors.
• Blurredcharacters, thinlines,overlappingof markersandotherfactors cancausecolorsto differinplacesandcan also
resultinportionsthatcannotbescannedsuccessfully.
• ThedatainthememoryforcomputerstorageisdeletedwhentheON/Standby buttonisturnedoff(standbymode)or
theconnectionwiththecomputeriscut.Thedatainthememoryfornetworkstorageisnotdeleted.
Draw on the Sheet Surface
Please draw with the dedicated markers thathave been
supplied.
Ifanythingotherthanthededicatedmarkersoreraserare
used,itmaybeimpossibletoerasethesheetorthesheet
couldgetdirty.
Tomovethesheetmanually,see“Movingthesheetsurface
manually”onpageE-16.
Printing
(1) SetA4orlettersizepaper.
Do not set anything other
thanA4orlettersizepaper.
(2) Press the ON/Standby
button of the captureboard
andswitchonthepower.
(3) Switchontheprinterpower.
For instructions on operating the printer, see the
printer’soperatinginstructions.
(4) PresstheColor Print orthe B/W Print button.
The captureboardwillmove a one-screen portion of
sheet,readtheimage,andstartthecopyoperation*.
See“Printing”onPageE-14.
When Not Using the Captureboard
(1) Byallmeans,cleanlyerasethedrawingfromthesheetsurfacewiththededicatederaser.(Leavingthedrawingforalong
periodwillmakeithardertoerase.)
(2) PresstheON/Standby buttonofthecaptureboardandswitchoffthepower(standbymode).
ThepowercannotbeswitchedoffwhiletheUSBmemoryremainsinstalled.(Thisisapreventionfunctionagainstforget-
tingtounplugtheUSBmemory.)
(3) Switchofftheprinterpower.
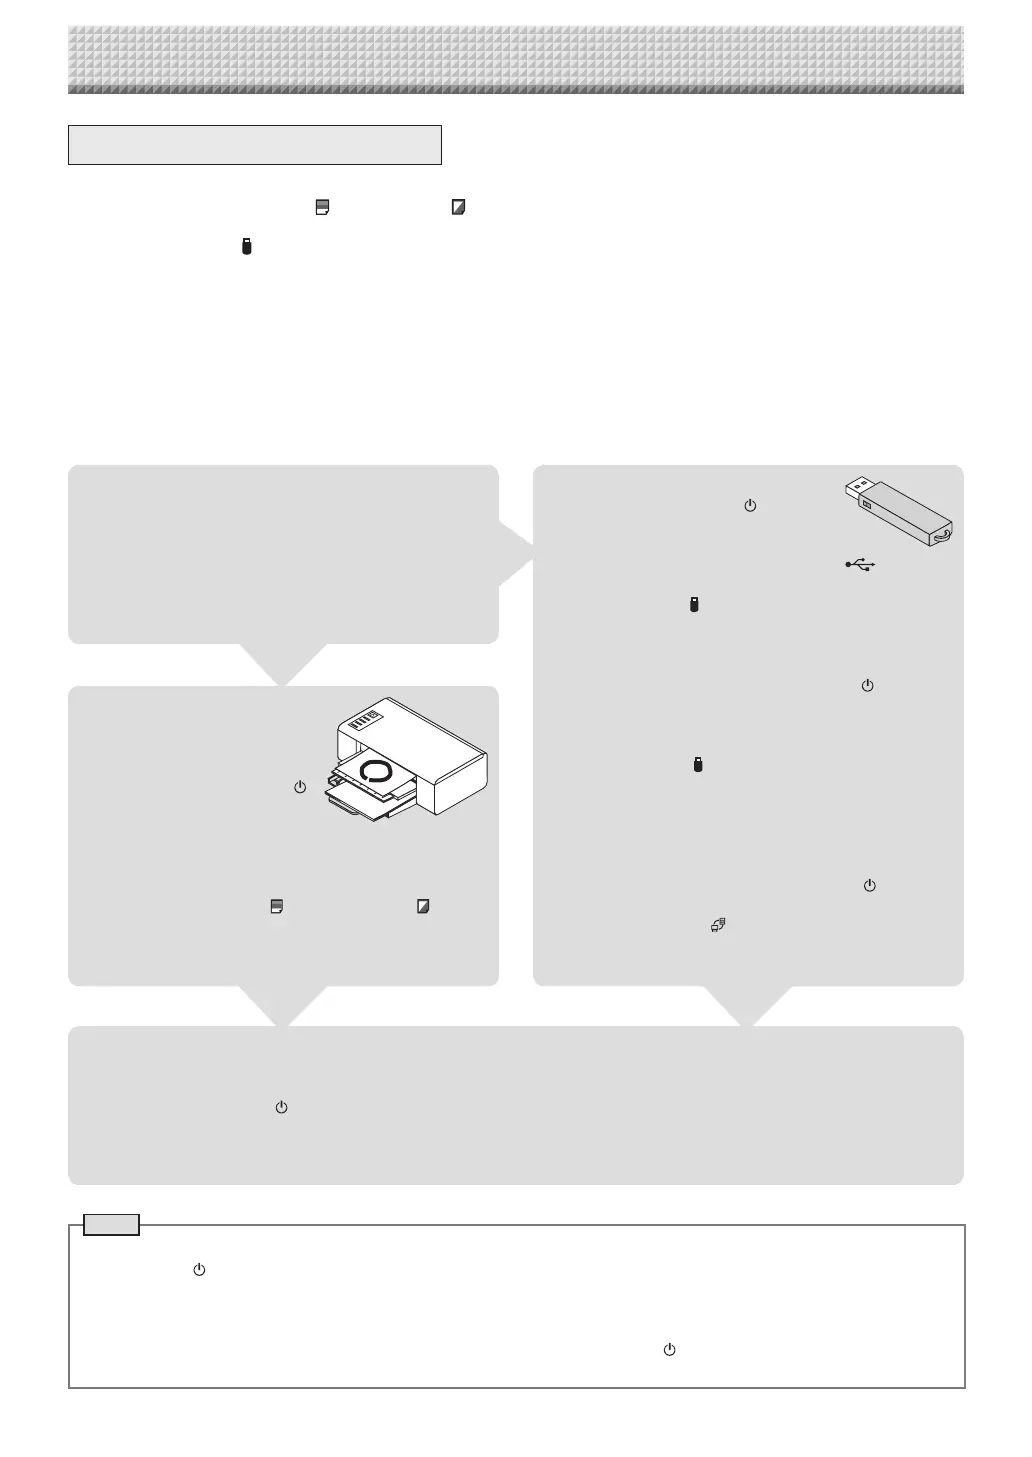
Saving to USB Memory
(1) PresstheON/Standby buttonof
the captureboard to switch on the
power.
(2) InsertUSBmemoryinto theMemory port(USB
Aport)ofthecaptureboard.
(3) PresstheSave button.
See“UsingUSBMemory”onPageE-17.
Saving on a computer
(1) Pressthe captureboard’s ON/Standby ( ) button to
turnthepoweron.
(2) Connectthecaptureboardtothecomputerusingthe
PCdedicatedUSBport.
(3) PresstheSave( )button.
(4) Theimageissavedonthecomputer.
Using a network (via LAN)
(1) Check that the captureboardis connected to a LAN
portonthenetwork.
(2) Press the captureboard’s ON/Standby button to
turnonthepower.
(3) PresstheNetwork button.
See “Using the CaptureboardConnected to a Net-
work”onpageE-23.
https://www.supplychimp.com/