There are three ways to make the device settings: using the captureboard’s operation buttons to make the set-
tings (“CB Setup”), making the settings using a USB connection (simple network settings, and making the set-
tings via LAN (detailed settings: “CB Setup” and “Network Setting”.
CB Setup (operating the captureboard’s buttons)
Basic setting operation
• Checkthatthepowerison(thatthedisplaywindowislit).
• Wheninthe“CBSetup”mode,thecaptureboardwillreturntothenormalmodeifnobuttonsareoperatedfor10seconds,so
operatethebuttonswithin10seconds.
CB Setup and Network Setting Procedure
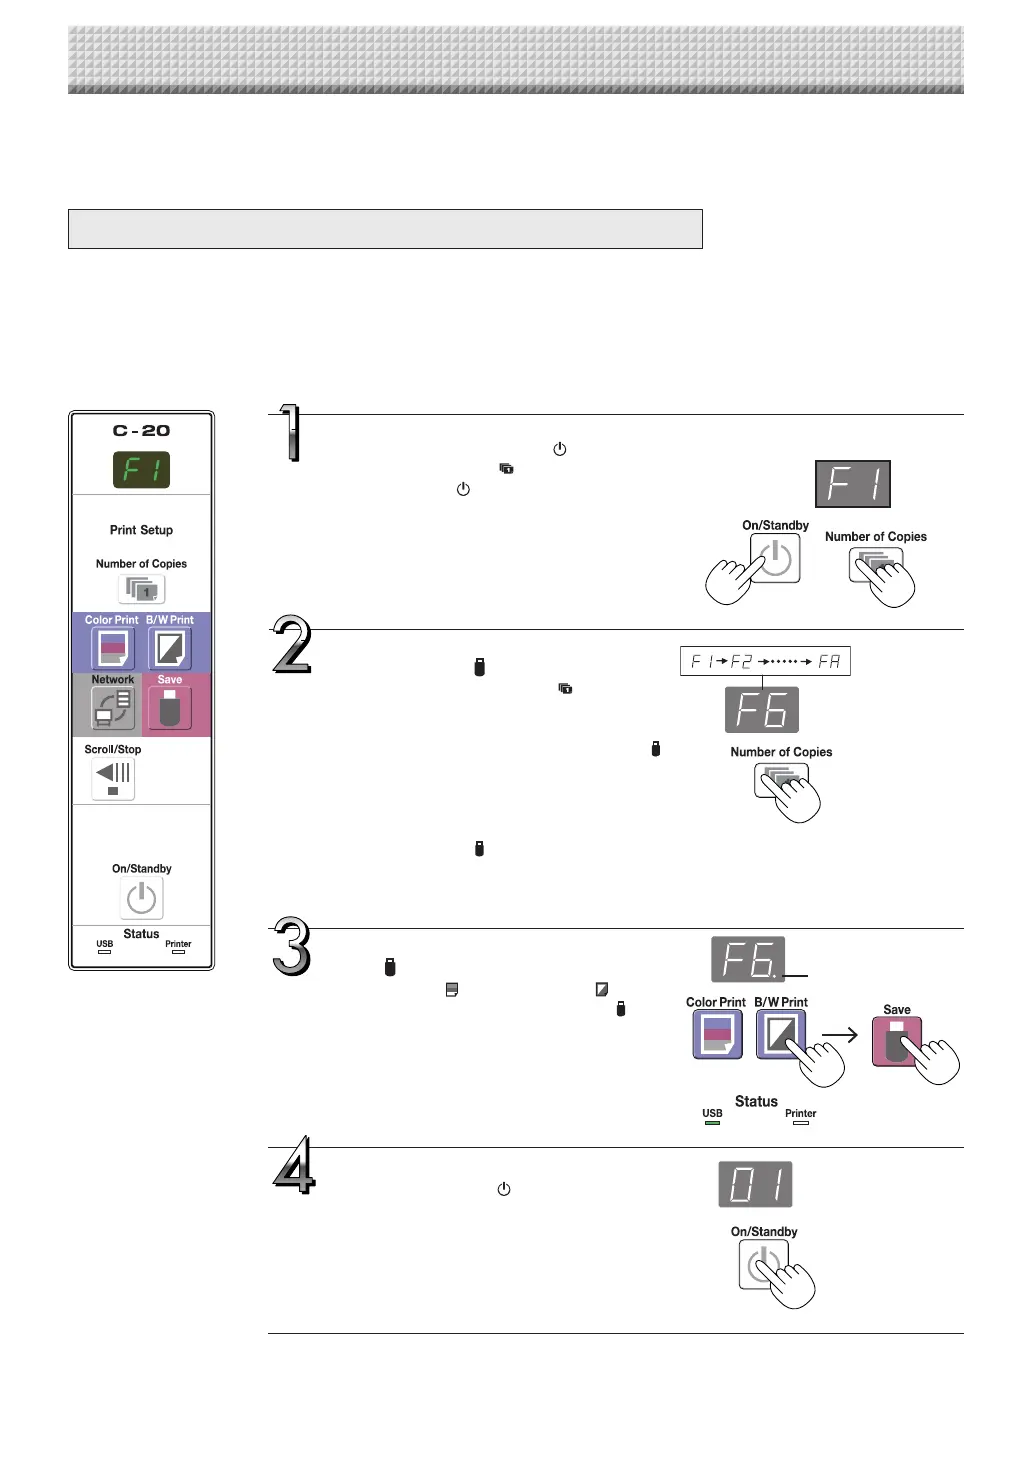
Switch to the CB Setup mode.
WhilepressingtheON/Standby button,press
the Number of Copies button,thenrelease
the ON/Standby button. The captureboard
switchestotheCBSetupmode.
“F1”appearsonthedisplaywindow.
“F1” is the time setting. For instructions on the
timesetting,seepageE-12.
Select“thefunctionnumber”,then
press the Save button.
Pressthe Number of Copies button (the
function switches each time the button is
pressed, returningtoF1 after FA) to select the
desiredfunctionnumber,thenpresstheSave
buttontosetthatfunctionnumber.
Fortheitemnamesofthefunctionnumbers,see
the “Table of Function Numbers and Settings”
onthefollowingpage.
• When the Save button is pressed, the
function number to be changed is set and a
dotlights(ex.:“F6.”).
Select“thesetting”,thenpressthe
Save button.
PresstheColor PrintorB/WPrint button,
check the setting, then press the Save but-
tontoset.
CheckthesettingaccordingtowhethertheUSB
and Printer Status indicators are lit or off. See
the “Table of Function Numbers and Settings”
onthefollowingpage.
Exit the CB Setup mode.
PresstheON/Standby button.The capture-
boardreturnstothenormalmode.
The display window returns to the number of
copiesdisplay.
CBSetupmode
Dotlit
Normalmode
https://www.supplychimp.com/