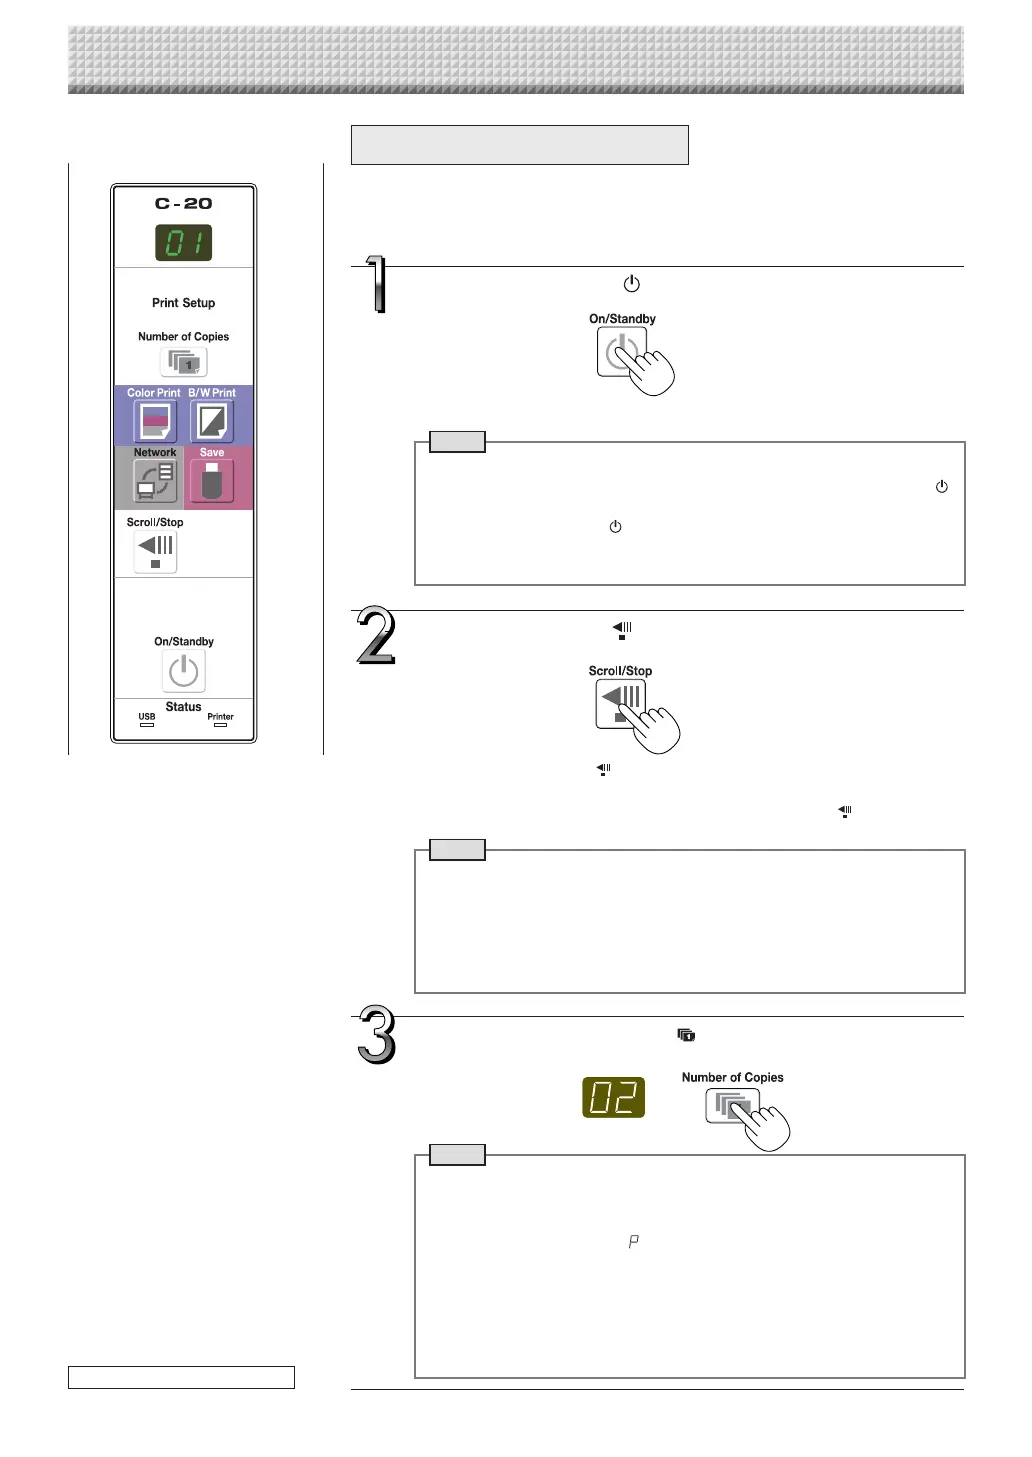
Prepare the printer. (See the previous page.)
Note
• When turning on the power, wait about 5 seconds or more after the
power plug has been connected before pressing the ON/Standby
button.
• PresstheON/Standby buttontoswitchonthepower.TheLEDofthe
displaywindowwilllight.
• Turnonthecaptureboard’spowerbeforeturningontheprinter’spower.
Press the ON/Standby button and switch on the power.
Press the Scroll/Stop button and display the sheet sur-
face you want to print.
ApressoftheScroll/Stop buttonscrollsthesheetsurfaceonescreen
portionleftandautomaticallystopsit.
Tostoptheoperationpartwaythrough,presstheScrol/Stop
buttonagain.
Note
• Theone-screenthatisvisibleisprintableposition.
• To fine-adjustthe sheetsurface position,with the sheetstopped, move
thesheetslowlybyhand.Thesheetcanbemovedeithertotheleftorto
theright.
• Printing of the portion located around the sheet surface might not be
possible.Pleasesee“Effectivereadingsize”onPageE-5.
Press the Number of Copies button and select the num-
ber of copies.
Note
• “01”isselectedwhenthepoweristurnedon.
• Upto10copiescanbespecifiedanddisplayedonthedisplaywindow.
• Thenumber ofcopies increasesby 1each timethe Number ofCopies
buttonispressed,and“ ”isdisplayedafter“10”(thisisusedfortest
printing:seepageE-49).Whenthebuttonispressedagain,thedisplay
switchesto“01”.Thenumberswitchescontinuouslyifthebuttonisheld
in.
• After setting the number of copies, proceed to step 4 within 1 minute.
Thenumberofcopiesisresetto“01”ifnooperationisperformedwithin
1minute.
Basic Printing Operation
Preparation:
Preparation: Check that the AC power plugs of the captureboard and printer are
connectedtowallpoweroutlets.
Printing
continued on next page
https://www.supplychimp.com/