7.5
CVT / TRANSMISSION
7
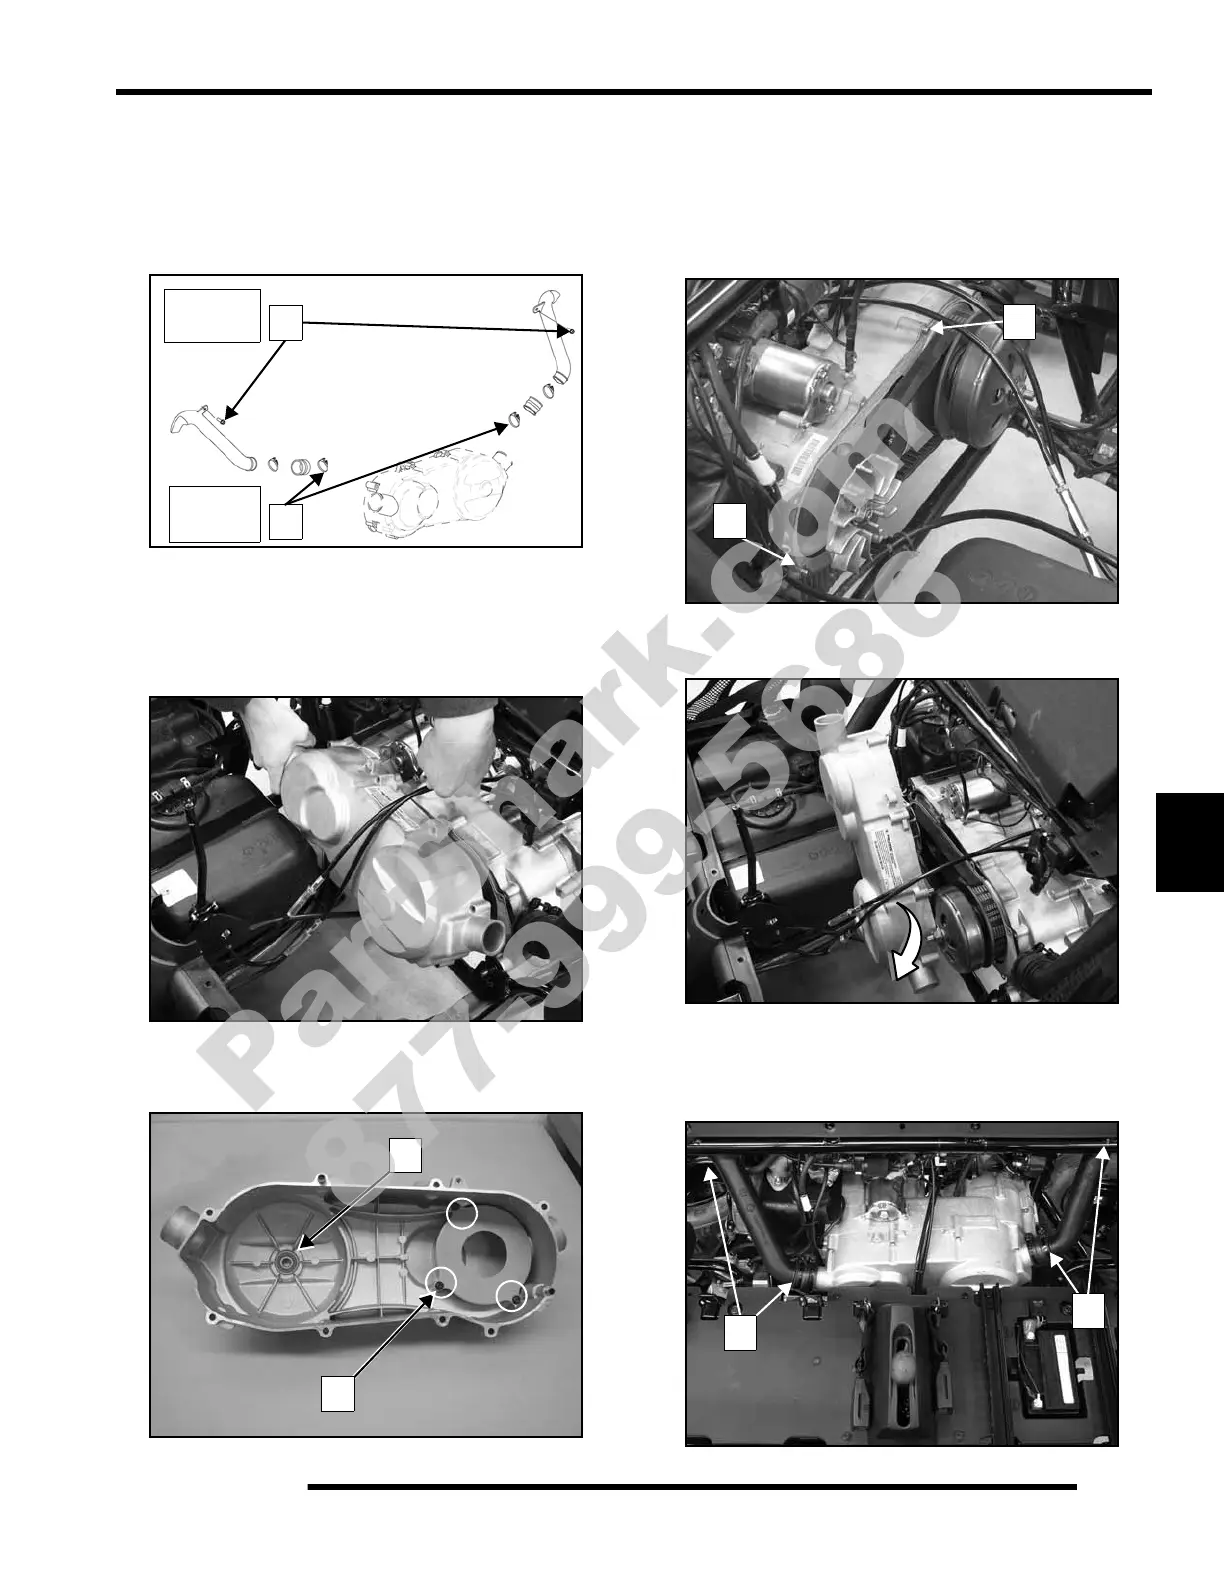
Clutch (CVT) Cover Removal / Inspection
1. Refer to Chapter 5 to remove the seats, rear access panel,
and battery tray panel to access the CVT cover.
2. Remove duct mounting screws (A). Loosen duct clamps
(B) and slide both ducts off cover.
3. Remove (8) cover screws. Tap cover to loosen.
4. Pull cover out until disengaged from dowel pins. Tip
bottom of cover up to clear fuel tank.
5. Carefully guide cover to clear shift cables and tank.
6. Inspect bearing (C). It should rotate freely without binding.
Replace if rough, if inner race is loose, or if bearing is loose
in the cover. Be sure screws for air duct plate (D) are tight.
Clutch (CVT) Cover Installation
1. Clean gasket surfaces and install a new gasket with cover
alignment dowels (E) in place.
2. Install drive and driven clutch with belt. Refer to clutch
installation this chapter.
3. Guide cover through cables and tip in same manner as for
removal in order to clear fuel tank.
4. Install cover and tighten all screws to specified torque.
5. Connect inlet and exhaust air ducts (F) with clamps.
6. Install battery tray panel, rear access panel, and seats.
A
B
36 in-lb.
25 in-lb.
(2.8 Nm)
(4.0 Nm)
PartShark.com
877-999-5686
 Loading...