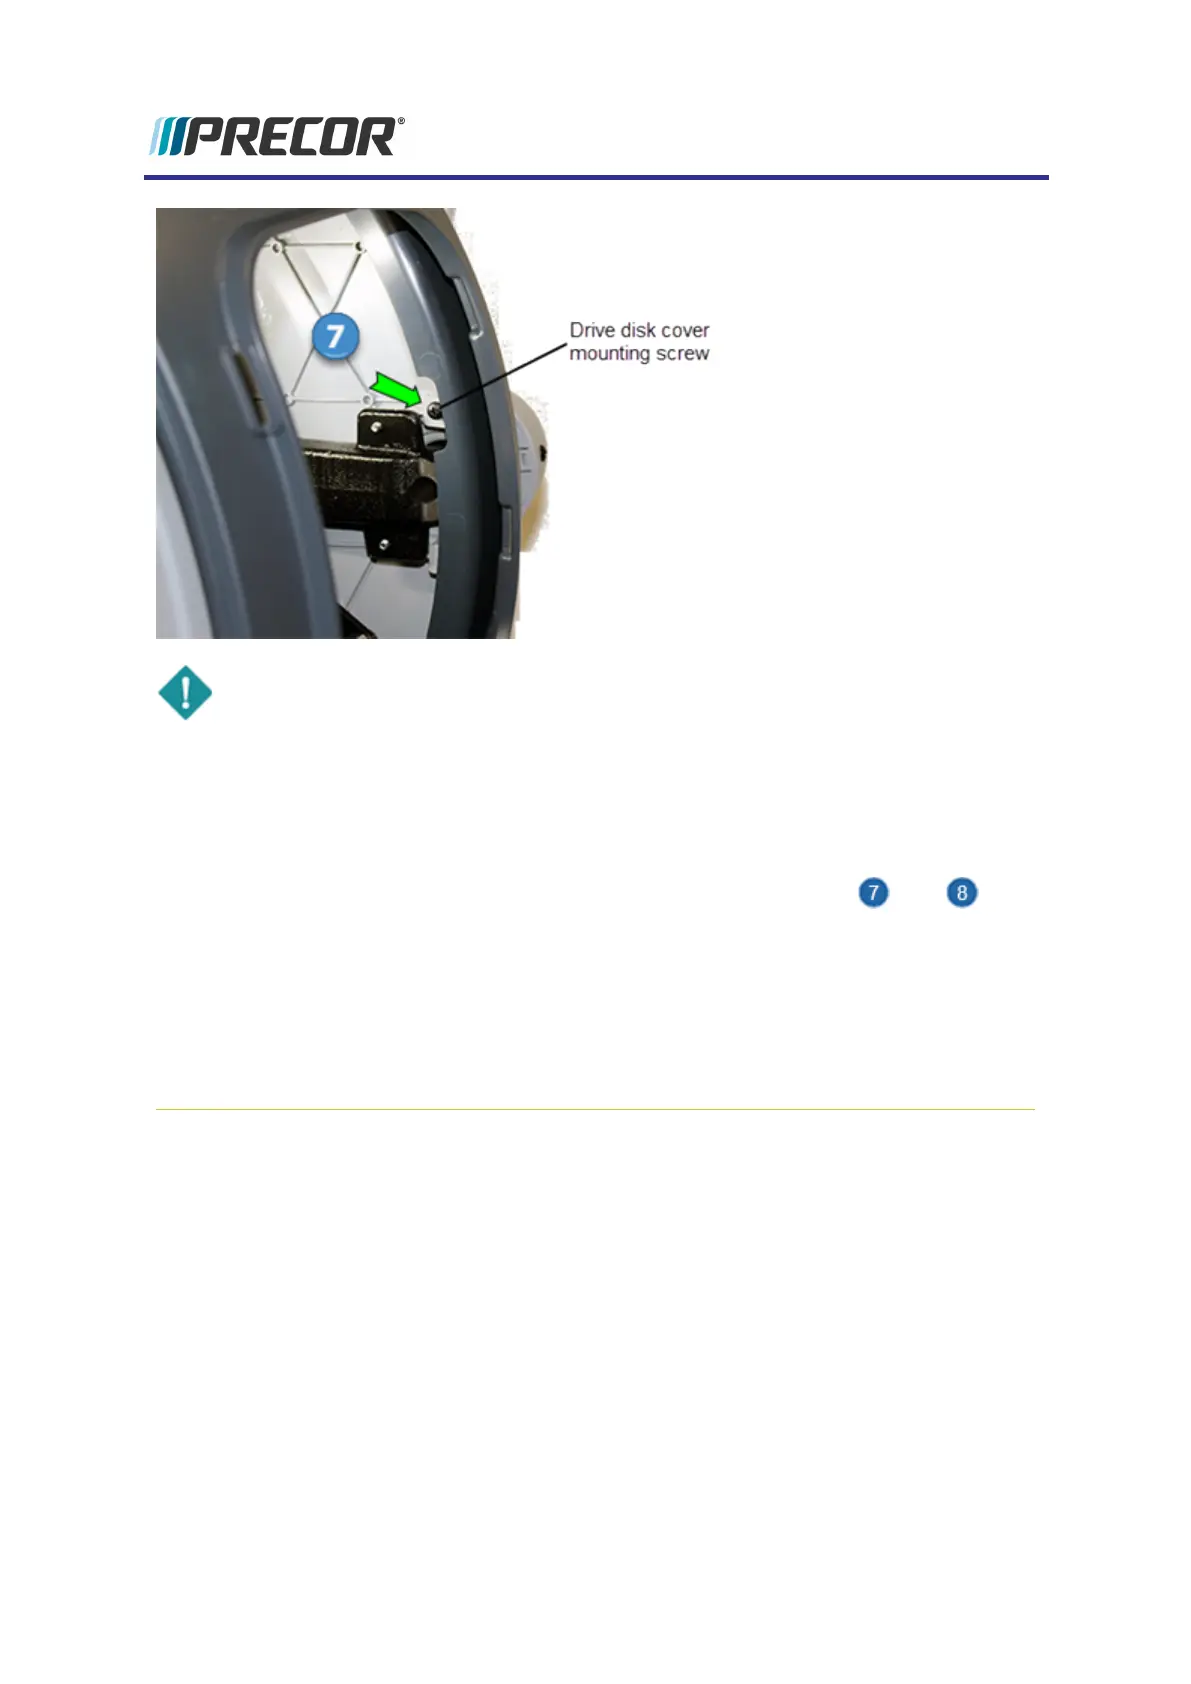
IMPORTANT: Be careful to not allow the screw to drop to the bottom of the drive
housing area while removing. It may be very difficult to retrieve the dropped screw.
3. Press or lightly tap the disk from the inside outward away from the frame to remove.
Installation Instructions
Repeat this procedure for both the right and left drive disk covers.
1.
Position the drive disk cover over the crankarm and press the cover ( right, right)
onto the three latch catch pins located on the input pulley substrate plate.
2. Use the crankarm to rotate the drive disk cover to the drive housing indent (located at
the inside upper right/left side of the frame) to provide access to the mounting bracket.
Use a #2 Phillips screwdriver to secure the two drive disk cover fasteners.
3. Reinstall the drive access cover, see "Drive Access Cover Replacement" on page56.
Experience Series 800 Line EFX
58
5 Replacement Procedures
Covers and Panels Replacement
 Loading...