Device Manual CANlink wireless
Getting started
PROEMION GmbH | Phone: +49 661 9490-600 | Fax: +49 661 9490-666 | info@proemion.com | proemion.com | Version 1.0 81
© 2016RM MICHAELIDES● VX.X ● Device Manual CANlink 5000 series © 2016RM MICHAELIDES● VX.X ● Device Manual CANlink 5000 series © 2016 PROEMION GMBH > 1.0 EN > Device Manual CANlink wireless 3000 series
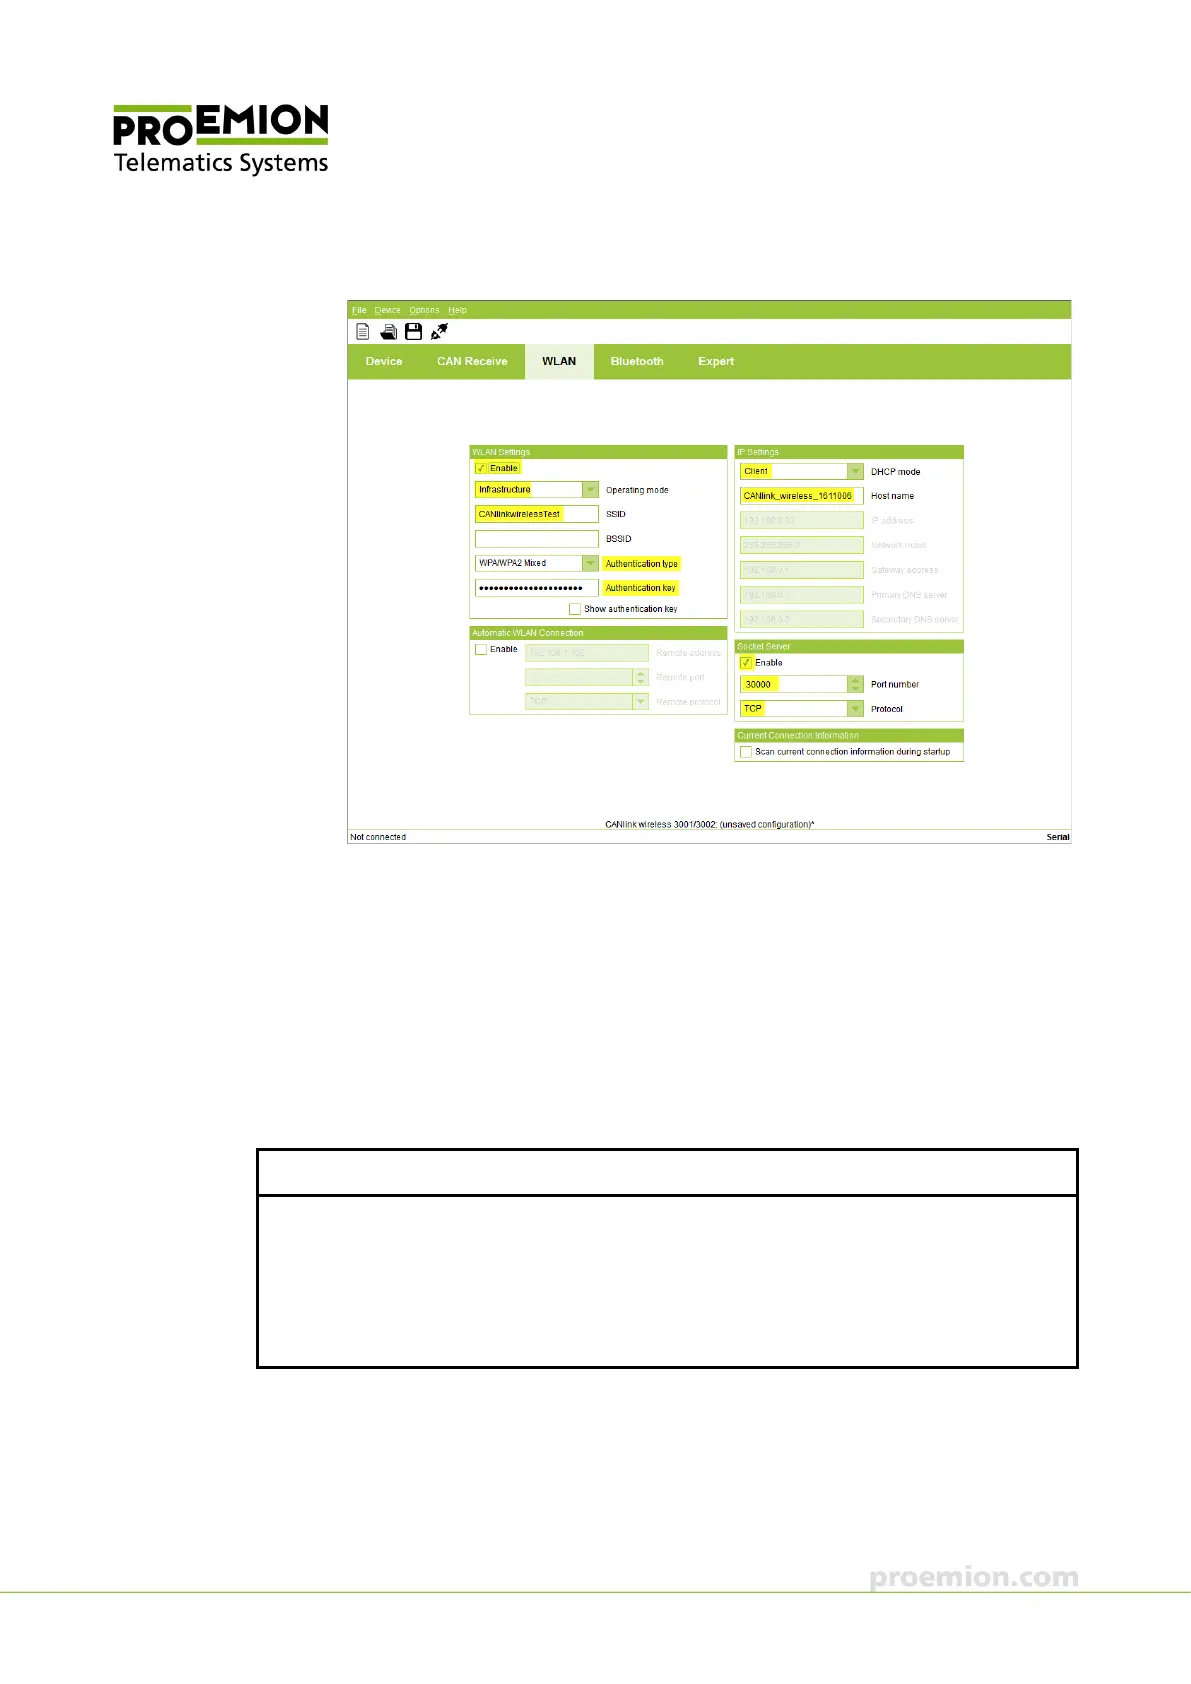
3. Click the WLAN tab.
4. In the WLAN S
ETTINGS field, check the ENABLE box.
5. In the O
PERATING MODE list, select the INFRASTRUCTURE mode.
6. Enter the name of your network in the SSID box.
7. In the A
UTHENTICATION TYPE list, select your network's WLAN code.
8. Enter your network password in the A
UTHENTICATION KEY box.
9. In the DHCP
MODE list, select CLIENT mode.
The settings in the IP S
ETTINGS field are automatically allocated by your network.
NOTICE
If you want to use the device permanently as a CAN-CAN-WLAN Bridge, select the DISABLED
option in the DHCP mode list, then you can configure the IP S
ETTINGS yourself and allocate
a fixed IP address.
It may be necessary to reserve the IP addresses in the network. To do this, contact the
Administrator.