Configuring the MVI56-PDPMV1 Module MVI56-PDPMV1 ♦ ControlLogix Platform
User Manual PROFIBUS DPV1 Master
Page 102 of 251 ProSoft Technology, Inc.
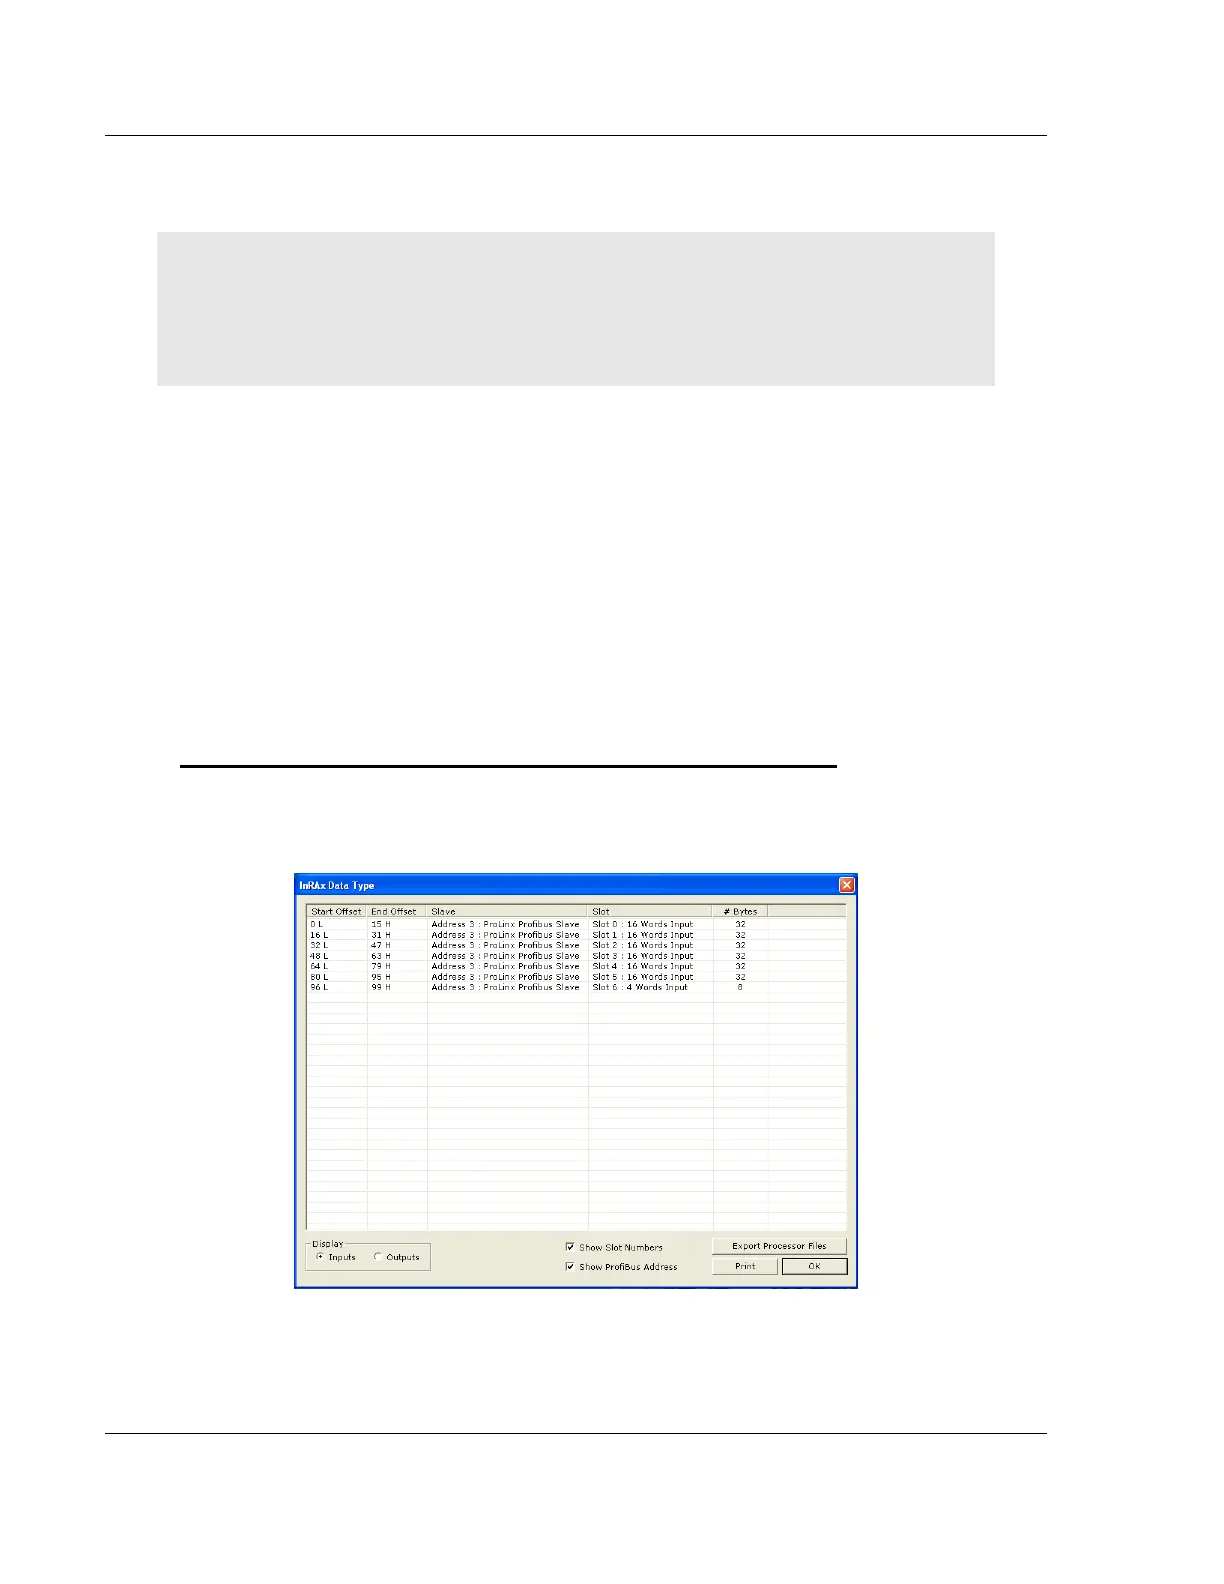
2.3.4 Exporting the Processor Files Prior to PCB v2.2.0
NOTE: This is an optional step which is not required to set up your application, regardless of the
ProSoft Configuration Builder (PCB) version you are using. The release of PCB version 2.2.0 has
made this particular procedure obsolete. This topic has been left in the User Manual solely as
historical reference, in case you need to understand how older versions of PCB previously
functioned.
PCB versions prior to version 2.2.0 will create a text file containing the Processor
Network Memory Map that you printed in the previous step, which can be
imported into RSLogix 5000 as user-defined data types MVI56PDPMV1_PBInF
and MVI56PDPMV1_PBOutF. This simplifies the task of adding data types to
handle input and output from the PROFIBUS slaves in your ladder logic.
The sample program stores the PROFIBUS I/O data into two SINT arrays. If you
choose to use this export option, the data types exported will reflect the data
types that you have configured for your PROFIBUS network slave configuration.
If you decide to use this functionality, you must develop extra ladder logic to copy
the PROFIBUS data between controller tags defined with these data types and
the standard SINT arrays.
To export the processor files from PCB (versions prior to v2.2.0 only)
1 In the inRAx Data Type dialog box, click EXPORT PROCESSOR FILES. ProSoft
Configuration Builder will suggest a file name with the extension .L5X
(RSLogix 5000 export file).
2 Choose a location for the file that you can access easily from RSLogix 5000
(My Documents or Desktop, for example), and then click SAVE.
3 Click OK to close the inRAx Data Type dialog box.