MVI56-PDPMV1 ♦ ControlLogix Platform Configuring the MVI56-PDPMV1 Module
PROFIBUS DPV1 Master User Manual
Page 109 of 251 ProSoft Technology, Inc.
To use the CIPconnect Path Editor, follow these steps.
1 Configure the path between the 1756-ENBT connected to your PC and the
MVI56-PDPMV1 module. If the module is located in a remote rack, add more
racks to configure the full path. The path can only contain ControlNet or
EtherNet/IP networks. The maximum number of supported racks is six.
2 Click CONSTRUCT CIP PATH to build the path in text format
3 Click OK to confirm the configured path.
The following examples should provide a better understanding on how to set up
the path for your network.
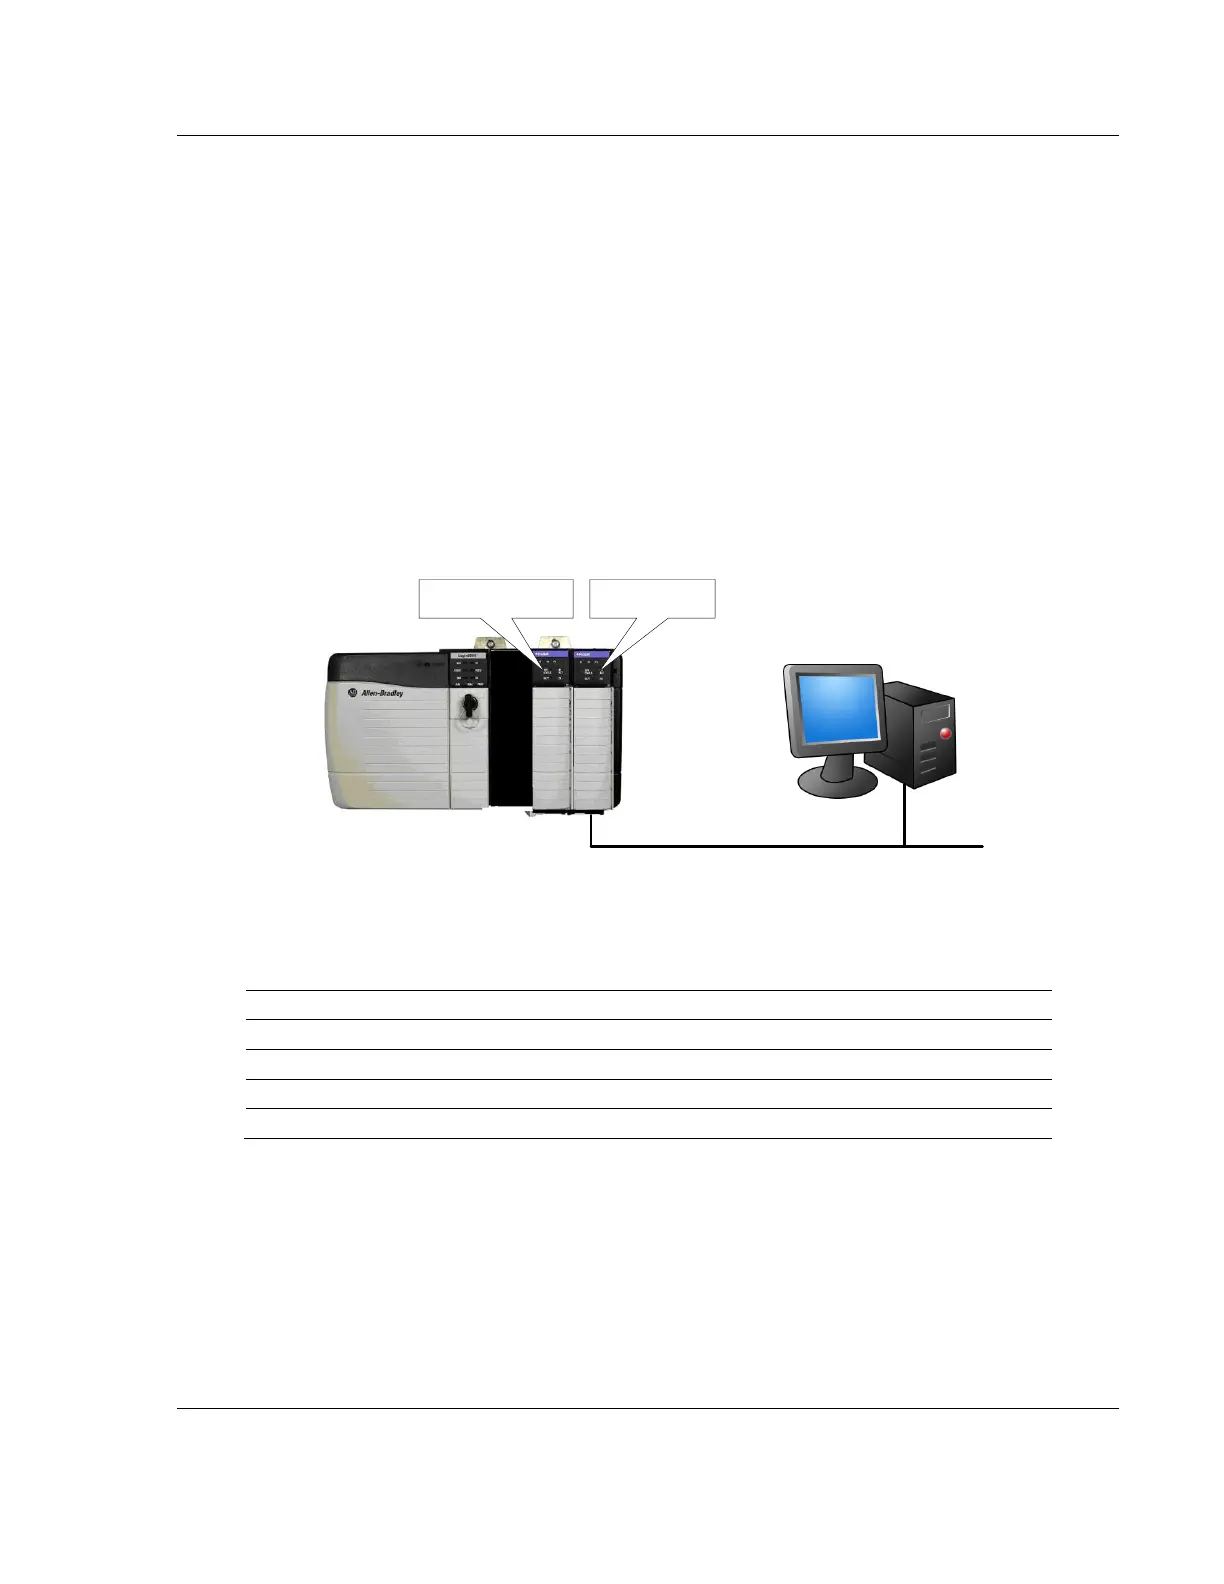
2.4.1 Example 1: Local Rack Application
For this example, the MVI56-PDPMV1 module is located in the same rack as the
1756-ENBT that is connected to the PC.
Ethernet
Rack 1
MVI56-PDPMV1
1756-ENBT
Rack 1