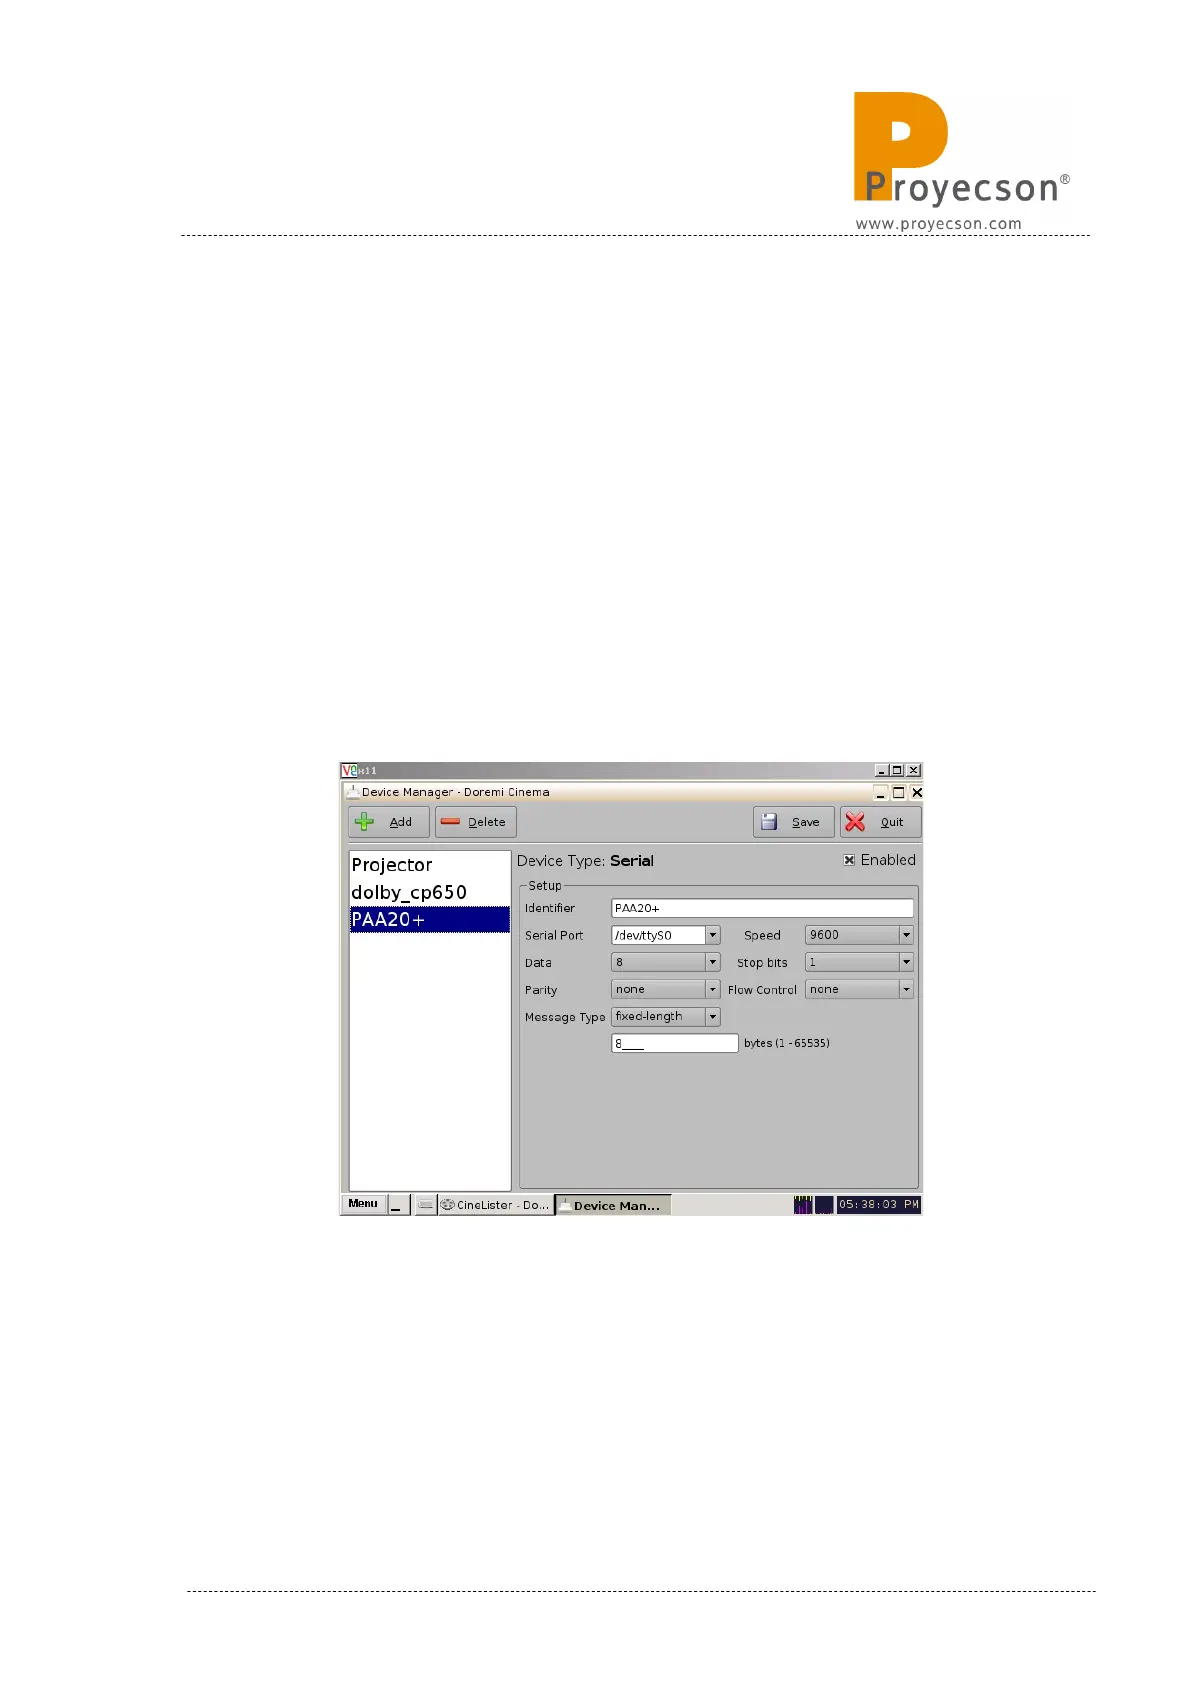
5. Write “PAA20+” in the field “Identifier”.
6. Set the Serial Setup as in Figure 8.2.2B:
a. Serial Port: /dev/ttyS0.
b. Speed: 9600.
c. Data: 8.
d. Stop bits: 1.
e. Parity: none.
f. Flow control: none.
g. Message Type: fixed-length.
h. 8 bytes in the byte length field.
7. Click on the icon “Save” in order to save the new device.
Figure 8.2.2B
8. If not logged as admin you will need to be authenticated.
9. Now the PAA20+ is configured and ready for create the associated
automation and trigger cues to be created.
INSTALLATION MANUAL: PAA20+ V 2.0 (10/2021) 51