MP3-PL Therapy Beam Analyzer T41050
Operating Manual – Installation of the System for Measurement
3.2 Mounting Detectors on the
Moving Mechanism
3.2.1 3D-Detectorblock with 24 PinPoint
Chambers Type 31015
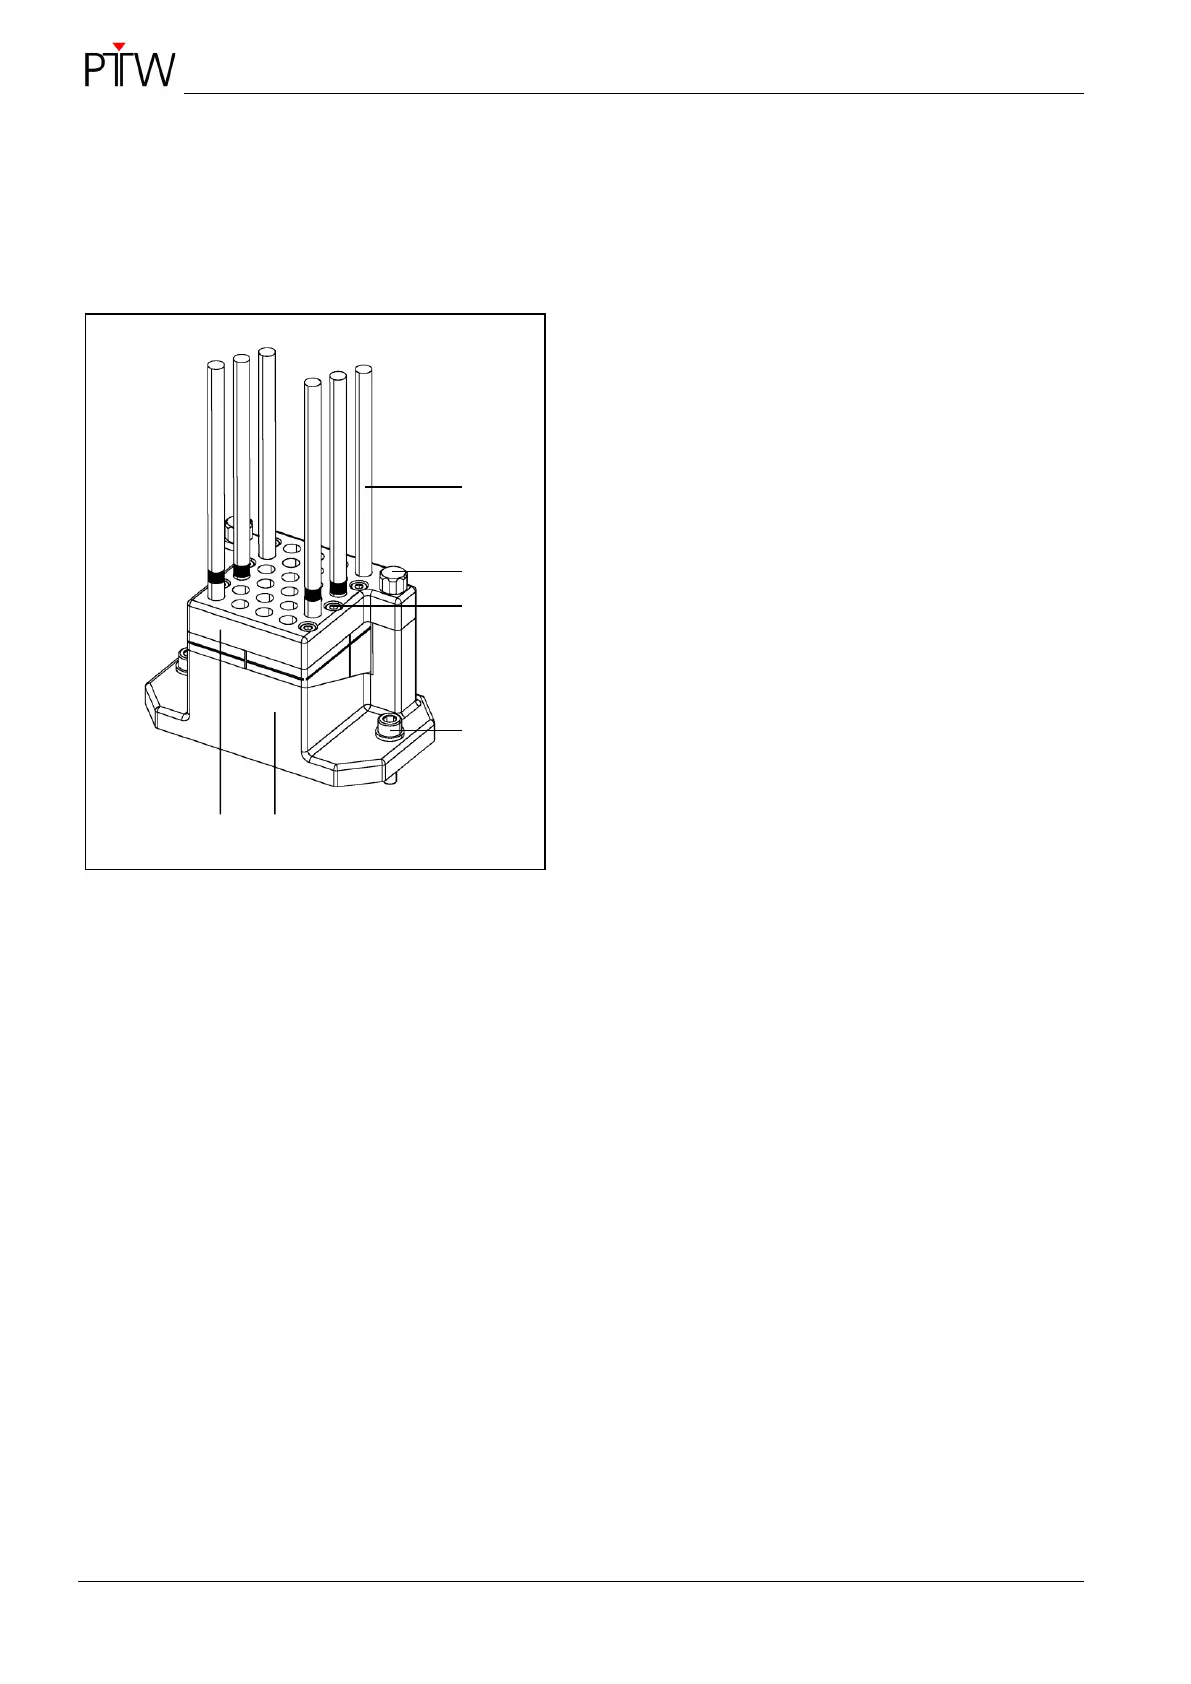
Figure 11: Inserting the 24 PinPoint chambers into
the 3D-detectorblock
1 3D-detectorblock T21003.1.001
2 Holder T21003.1.020
3 PinPoint chamber (24x)
4 Clamping screw (2x)
5 Screw M4x16 (6x)
6 Screw M6x35 and washer (2x)
Place the holder T21003.1.020 on a flat base.
Alternatively you can mount the holder
T21003.1.020 on the robot’s table top using the
two M6x35 screws and the washers.
Mount the 3D-detectorblock T21003.1.001 on
the holder using the two clamping screws ac-
cording to Figure 11.
Loosen the six M4x16 screws.
Insert the 24 PinPoint chambers as shown in
Figure 11 as far as they will go, and secure them
with the six M4x16 screws.
Loosen the two clamping screws and take out
the 3D-detectorblock with the PinPoint cham-
bers.
Secure the holder T21003.1.010 on the C-slider
with the three M4x10 screws (refer to Figure 12).
Mount the 3D-detectorblock with the PinPoint
chambers on the holder T21003.1.010 using the
two clamping screws:
– vertical mounting refer to Figure 12
– horizontal mounting refer to Figure 13