SET-UP & BASIC OPERATION
16
We will now locate this transmitter in Office B using the RSSI Locate function.
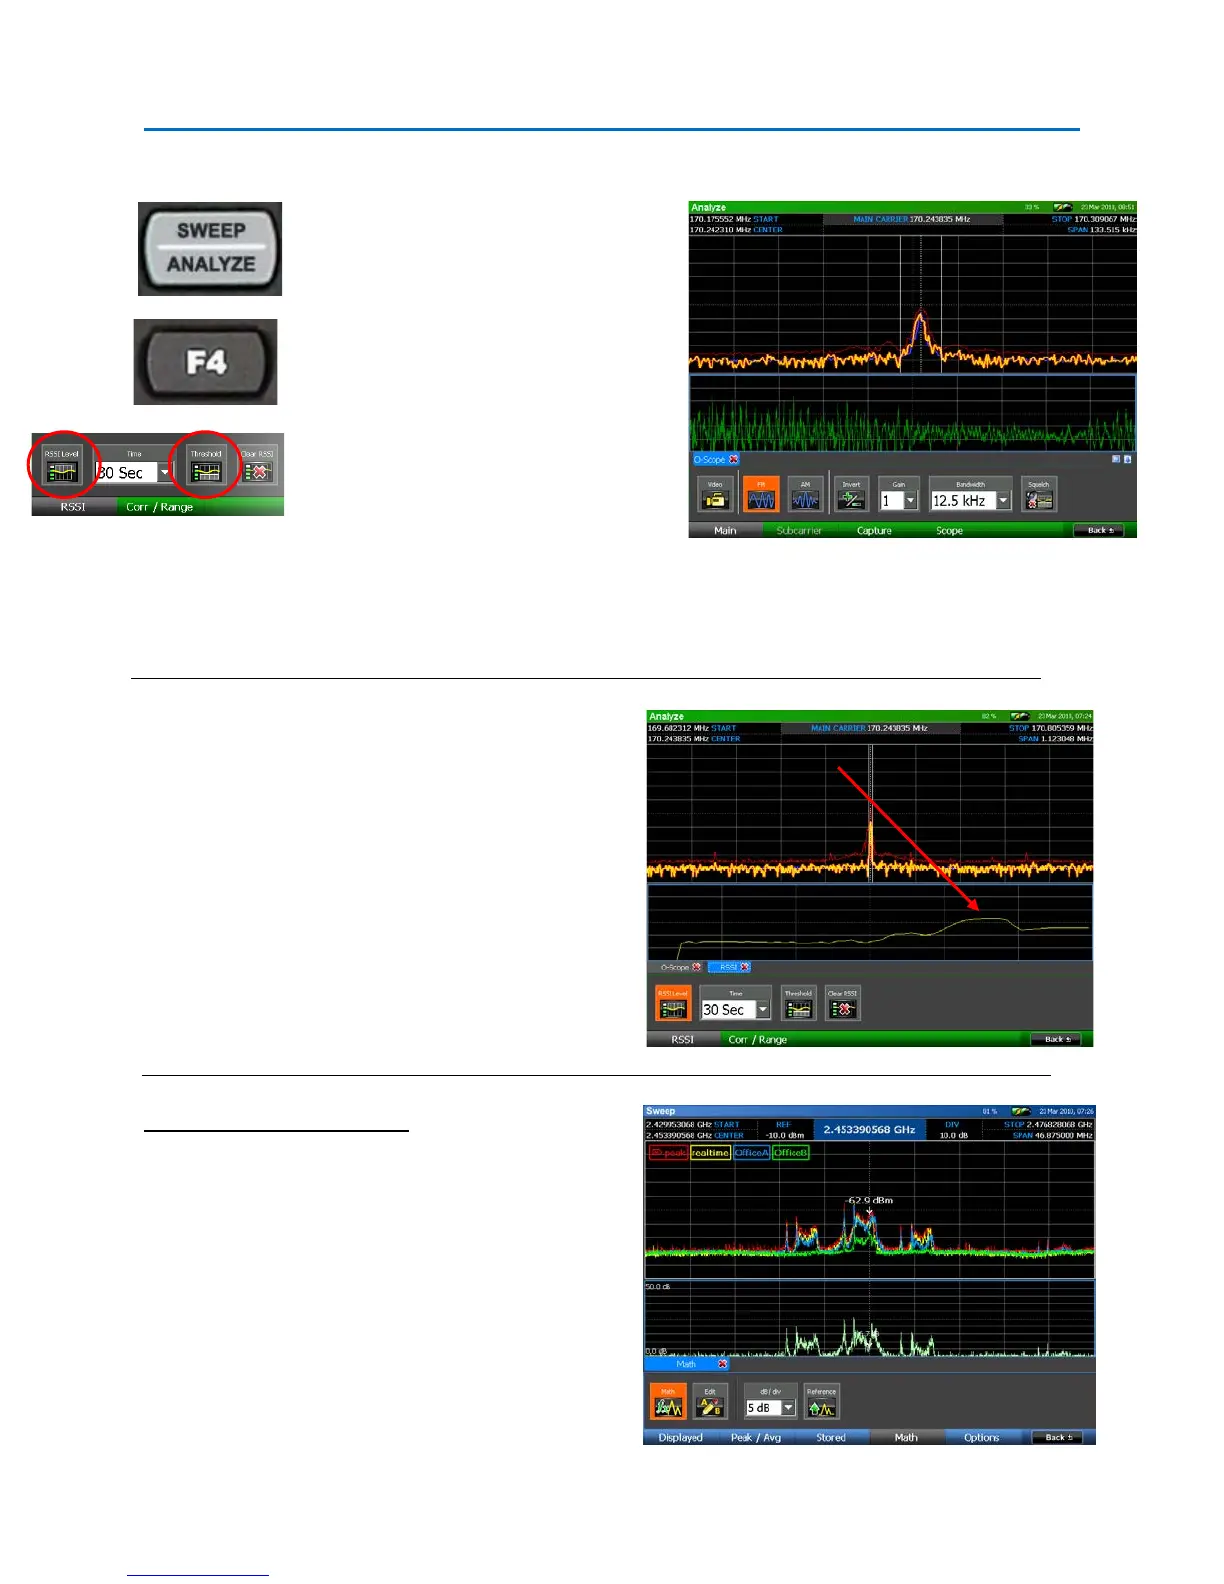
Press Sweep/Analyze to enter Analyze
Mode. In this example, the wireless
microphone was demodulated and
“listened” to using the audio demod.
To Locate the transmitter select Corr /
Locate or press F4.
Select the RSSI Level icon. The oscilloscope
view will be replaced with an RSSI graph.
(Note: RSSI stands for Relative Signal
Strength Indicator.)
Adjust the threshold to be able to see subtle variations in the RSSI level better. Select the Threshold
icon. Using the Rotary Knob, adjust the threshold level slightly below the signal level for your
transmitter. When finished press the OK button.
Begin walking around the room carrying the OSCOR
unit. Observe the RSSI graph on the bottom portion
of the display. As you get closer to the transmitter,
the level of this graph will increase indicating the
close proximity of the transmitter. As you walk
further away from it, the RSSI level will decrease. You
may need to use the Thresholdicon and the rotary
knob to adjust the RSSI level graph; be sure to press
the OK button or the ENTER button to set the
threshold.
Locating the Wireless Camera
Using a similiar procedure, the Wireless Camera is
identified, demodulated, and located.
In this example, there was a Wireless LAN transmitter
in Office A that occupied the same frequency as the
camera. However, careful evaluation of this band and
the video revealed the camera within the 2.4GHz
band.
the OSCOR unit gets
closer to the
transmitter.
 Loading...