11A-167
TOP AND FRONT OF ENGINE
Cylinder head: Removal - Refitting
F9Q
11A
a
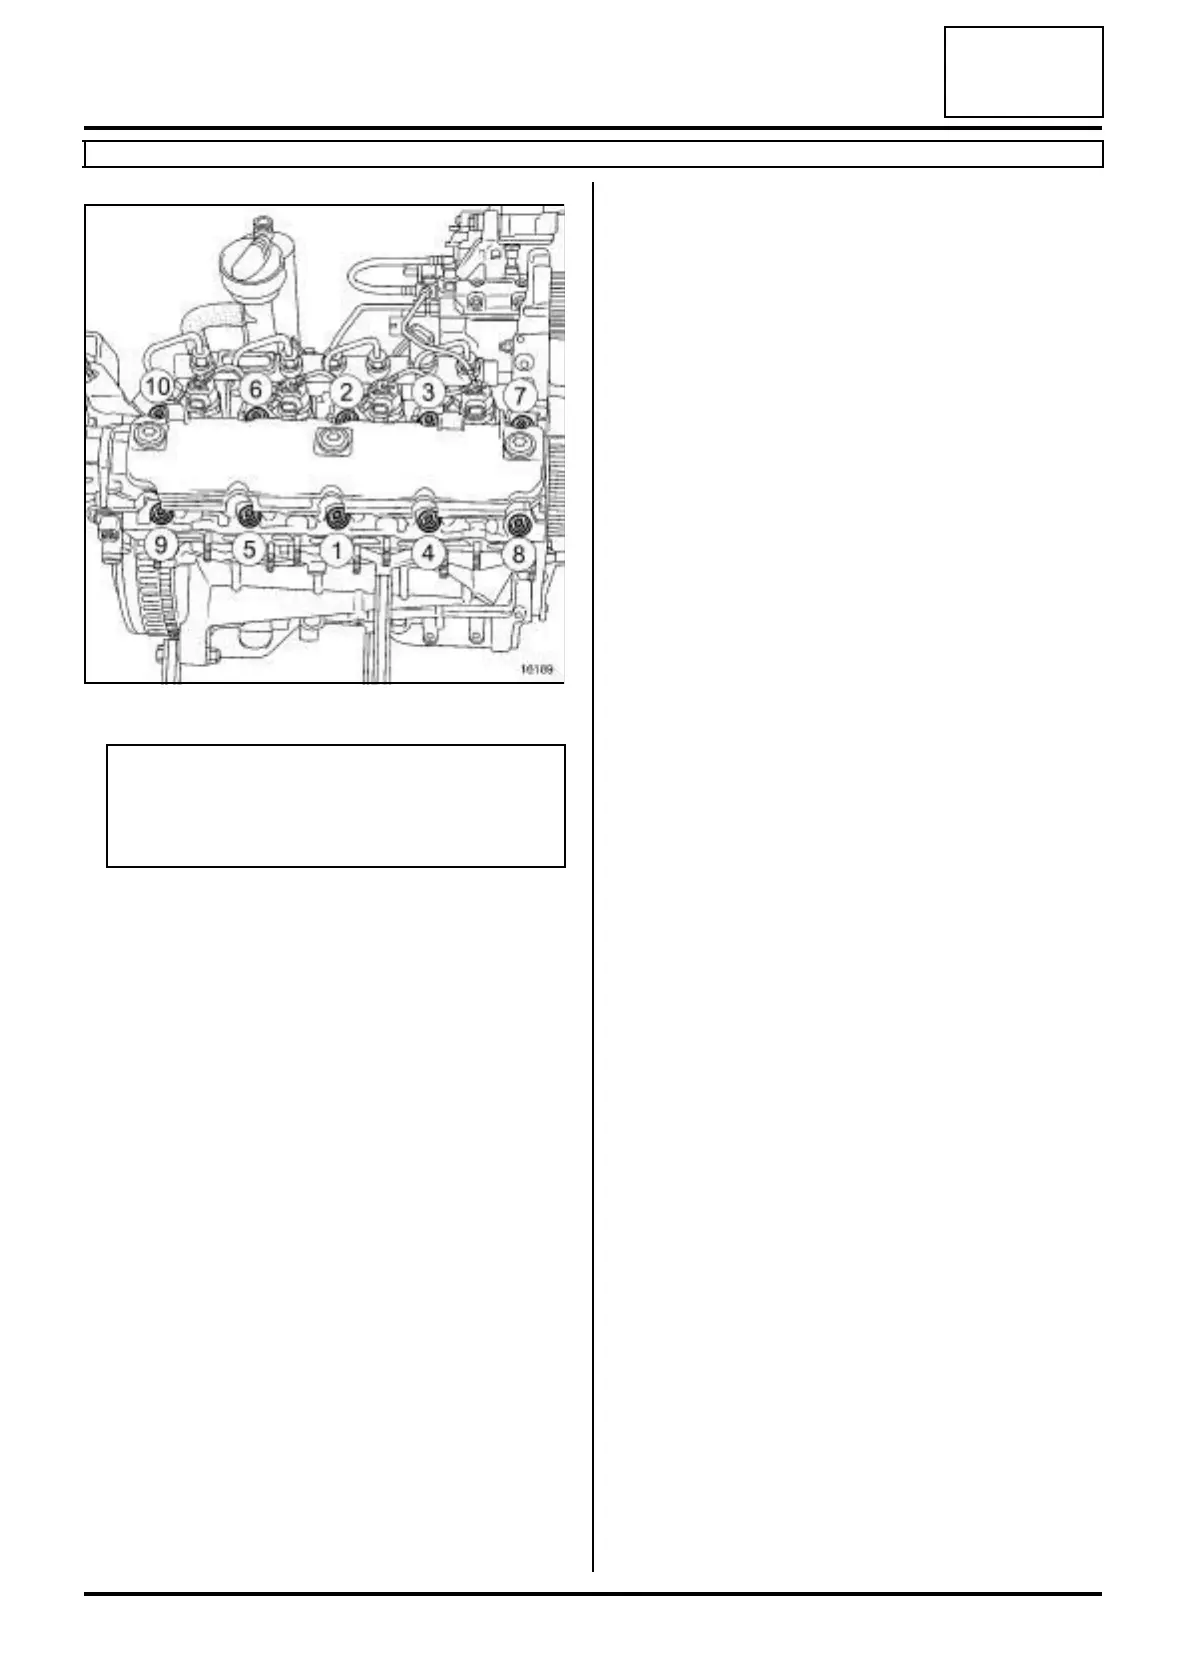
a Pretighten in order and to torque the cylinder head
bolts (initial torque) (30 N.m).
a Check that all the cylinder head bolts are correctly ti-
ghtened to the torque of 30 N.m.
a Angle tighten in order the cylinder head bolts (230˚
±±
±±
6˚).
a Refit the high pressure pump support bolts
a Torque tighten the bolt for the high pressure
pump rear support (30 N.m).
III - FINAL OPERATION
a Position the (Mot. 1453).
a Remove the tool (Mot. 1390).
a Remove the blanking plugs.
a Connect:
-the fuel supply pipe union to the high pressure
pump,
-the vacuum pipe to the vacuum pump.
a Connect the water chamber hoses.
a Fit the hose clips of the water chamber using the tool
(Mot. 1448).
a Connect the coolant temperature sensor connector.
a Fit the injection wiring.
a Connect:
- the heater plug connectors,
- the camshaft position sensor connector,
- the turbocharger control solenoid valve connector,
- the EGR bypass control solenoid valve connector,
- the injector connectors,
- the inlet pressure sensor connector,
- the connector to the damper flap.
a Refit:
- the intercooler air outlet pipe (see 12B, Turbo-
charging, Intercooler air outlet pipe: Removal -
Refitting, page 12B-56) ,
- the oil separator (see 11A, Top and front of engi-
ne, Oil decanter: Removal - Refitting, page 11A-
205) .
- the fuel temperature sensor (see 13B, Diesel in-
jection, Fuel temperature sensor: Removal -
Refitting, page 13B-118) ,
- the injector rail protector (see 13B, Diesel injec-
tion, Injector rail protector: Removal - Refitting,
page 13B-70) ,
- the timing belt (see 11A, Top and front of engine,
Timing belt: Removal - Refitting, page 11A-29) ,
- the right-hand suspended engine mounting (see
19D, Engine mounting, Right-hand suspended
engine mounting: Removal - Refitting, page
19D-18) ,
- the crankshaft accessories pulley (see 11A, Top
and front of engine, Crankshaft accessories
pulley: Removal - Refitting, page 11A-15) ,
- the accessories belt (see 11A, Top and front of
engine, Accessories belt: Removal - Refitting,
page 11A-7) ,
- the turbocharger (see 12B, Turbocharging, Tur-
bocharger: Removal - Refitting, page 12B-8) ,
-the lower engine tie-bar (see 19D, Engine moun-
ting, Lower engine tie-bar: Removal - Refitting,
page 19D-33) ,
- the exhaust gas recirculation assembly (see 14A,
Antipollution, Exhaust gas recirculation as-
sembly: Removal - Refitting, page 14A-18) ,
-the turbocharger oil pipe (see 12B, Turbochar-
ging, Turbocharger oil pipe: Removal - Refit-
ting, page 12B-22) ,
16189
WARNING
In order to ensure that the bolts are correctly
tightened, use a syringe to remove any oil which
may be in the cylinder head mounting holes.