19B-35
EXHAUST
Connector pipe: Removal - Refitting
K9K, and 830 or 832
19B
REMOVING THE CONNECTING PIPE
I - PREPARATION OPERATION FOR REMOVAL OF
THE CONNECTING PIPE
a Position the vehicle on a two-post lift (see Vehicle:
Towing and lifting) (02A, Lifting equipment).
a Cut the exhaust system (see Vehicle: Precautions
for repair) in the cutting zone provided for this
purpose on either side of the connecting pipe (see
19B, Exhaust, Exhaust: Parts and consumables
for the repair work, page 19B-1) .
II - CONNECTING PIPE REMOVAL OPERATION
a
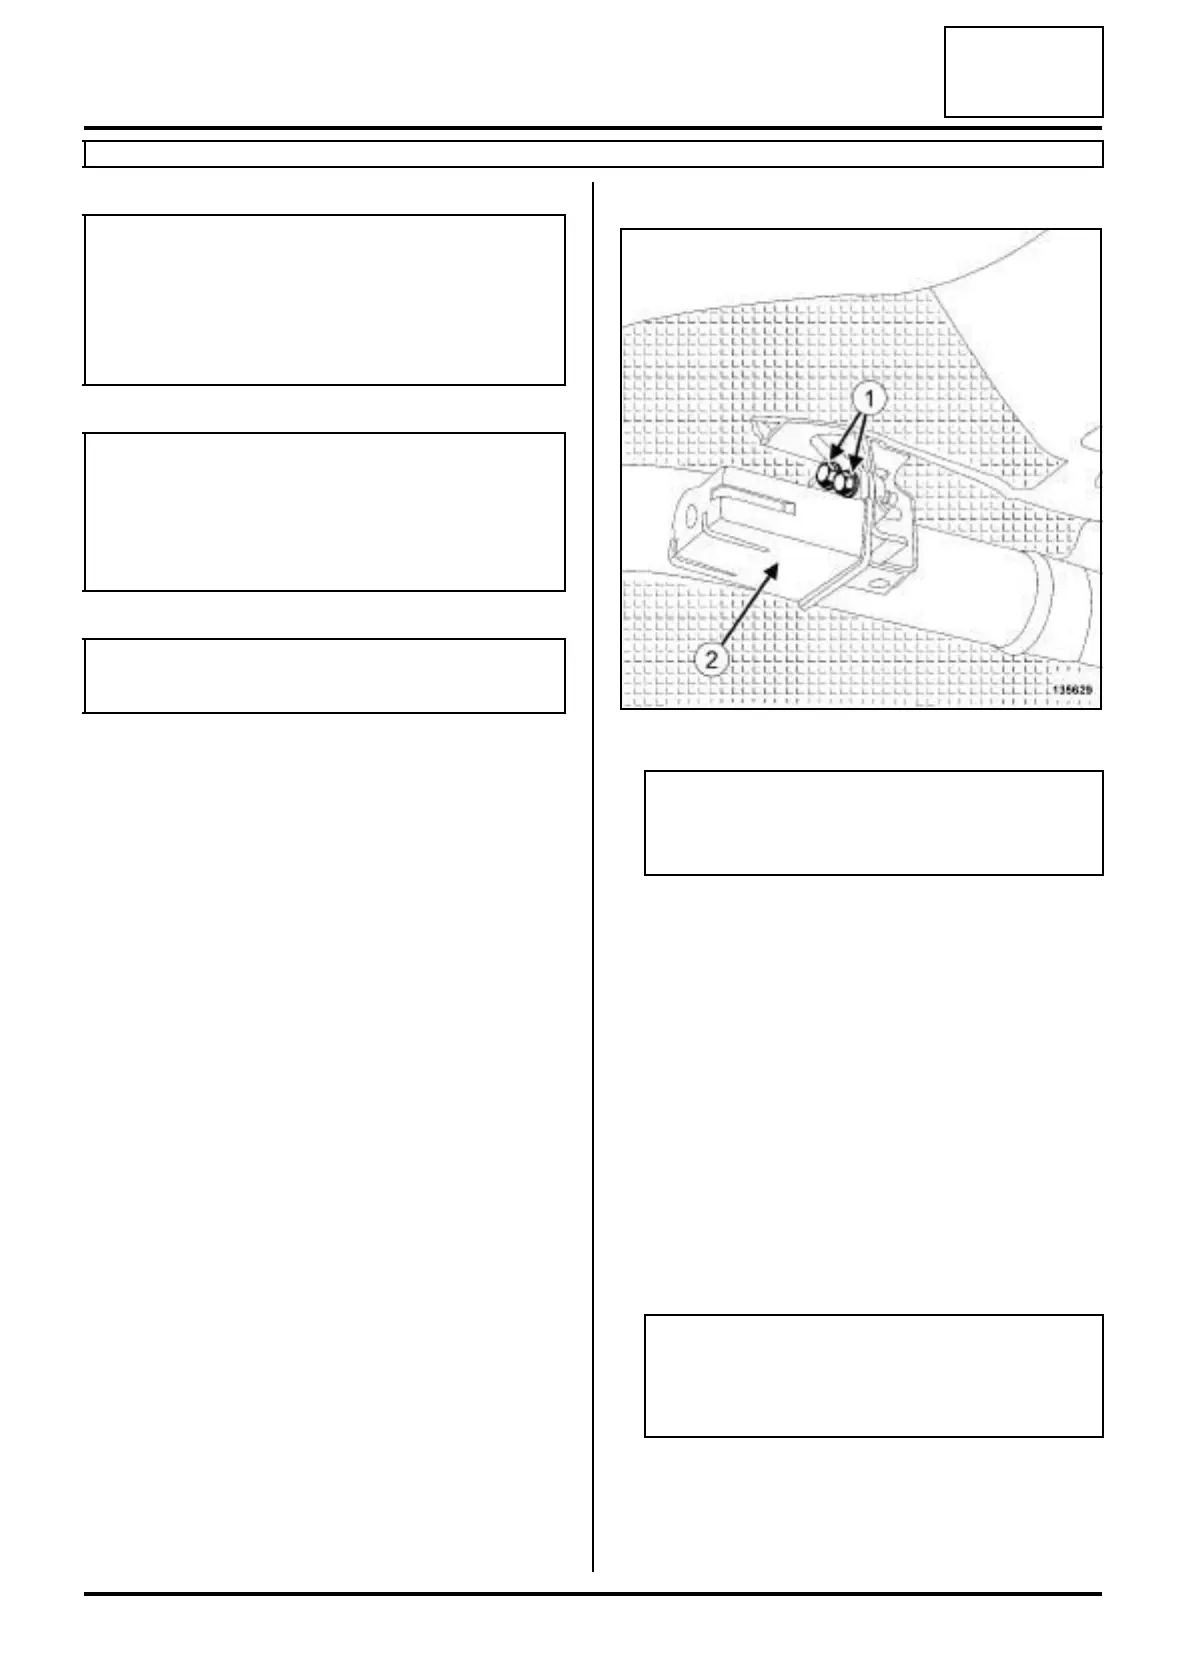
a Remove:
- the connecting pipe bolts (1) ,
- the connecting pipe balance weight (2) ,
- the connecting pipe.
REFITTING THE CONNECTING PIPE
I - CONNECTING PIPE REFITTING OPERATION
a Refit the connecting pipe equipped with the connec-
ting pipe balance weight.
II - FINAL OPERATION
a
a Fit new after-sales sleeves (see 19B, Exhaust, Ex-
haust: Precautions for repair, page 19B-12) .
a Check:
- that there is no contact with the underbody,
IMPORTANT
To avoid all risk of damage to the systems, apply
the safety and cleanliness instructions and opera-
tion recommendations before carrying out any
repair (see 19B, Exhaust, Exhaust: Precautions
for repair, page 19B-12) .
WARNING
To prevent the surrounding components from ove-
rheating, do not damage (tear, pierce, bend, etc.) a
heat shield.
Any damaged heat shields must be replaced.
IMPORTANT
Wear heat protective gloves during the operation.
135629
Note:
If the rubber mounting bush is damaged, it must
always be replaced.
IMPORTANT
Position the « nut and bolt securing the sleeve »
assembly so that the assembly cannot come into
contact with the underbody.