19A-71
COOLING
Plenum chamber: Removal - Refitting
F4R
19A
a
If replacing the coolant outlet unit
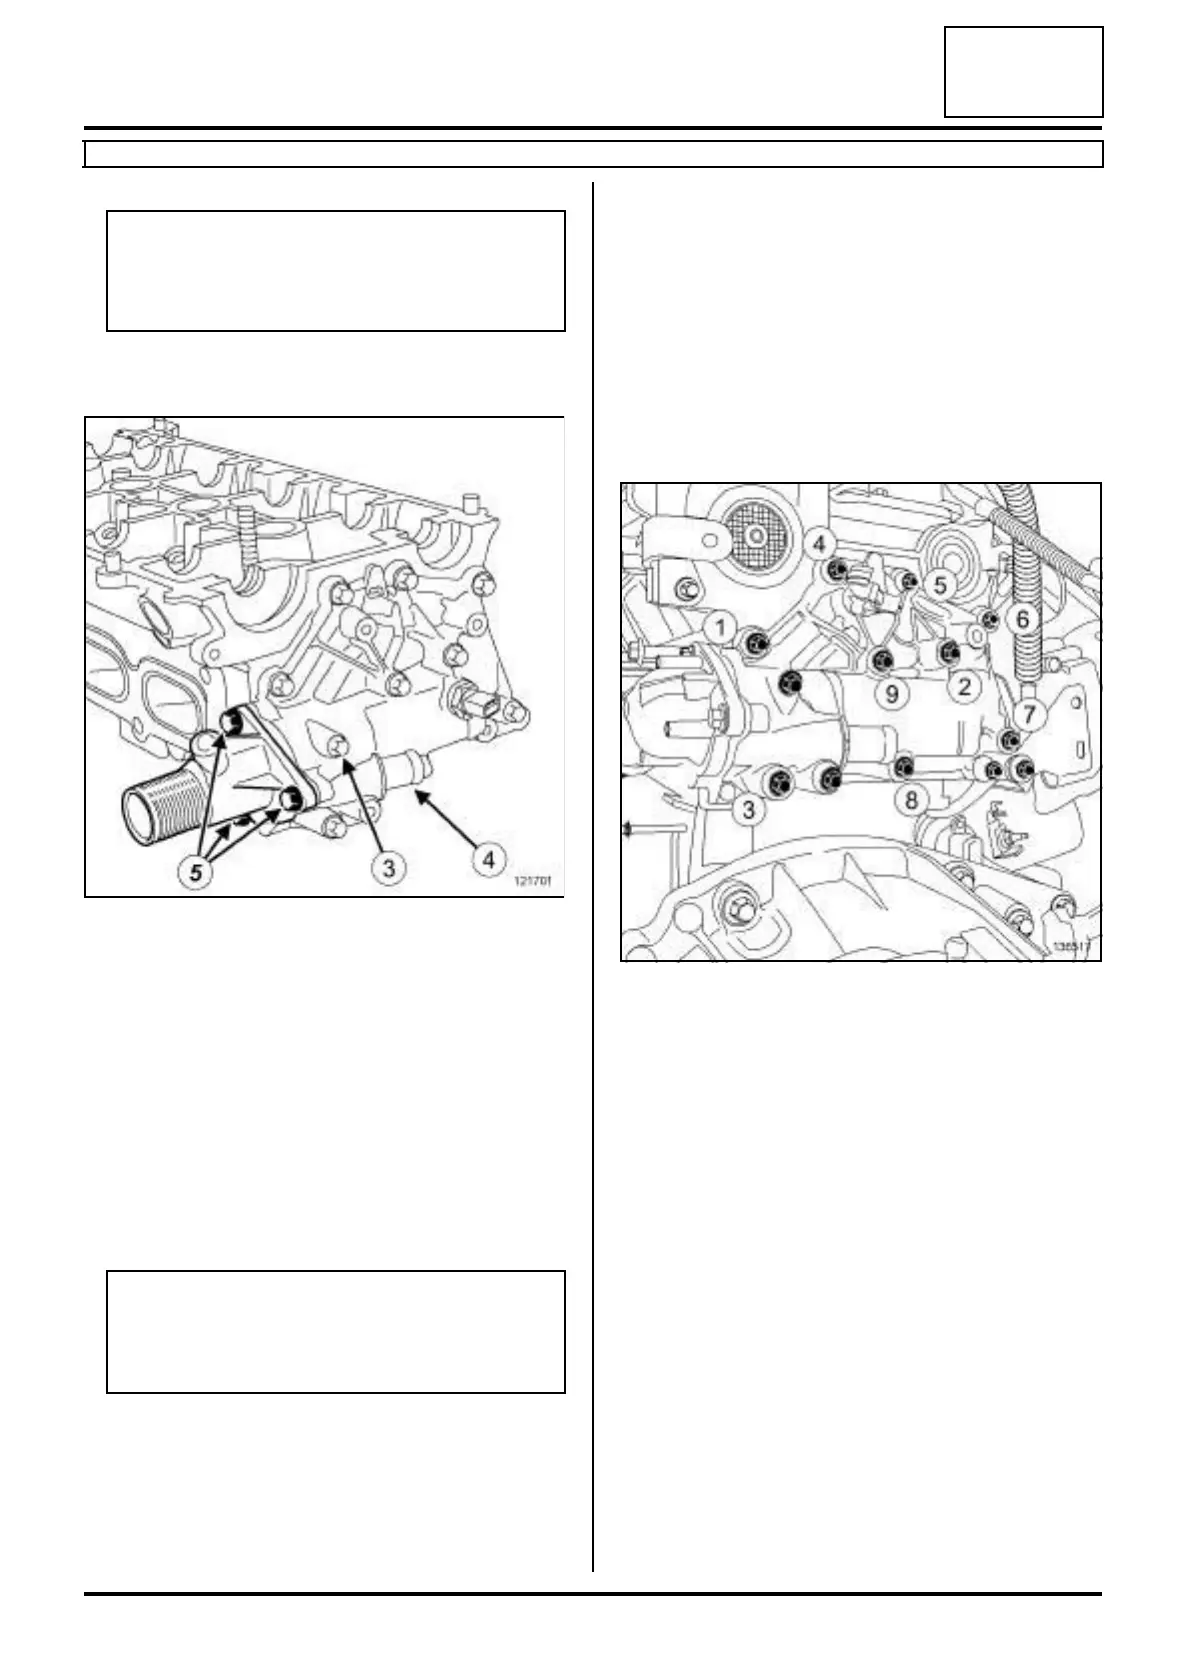
a Remove:
-the bleed screw (3) ,
-the metal tube (4) ,
-the thermostat unit bolts (5) ,
-the thermostat,
-the thermostat seal.
a Use SURFACE CLEANER (see Vehicle: Parts
and ingredients for the repairwork) (04B, Consu-
mables - Products) to clean and degrease the joint
face of the thermostat unit.
a Refit:
-the metal tube,
-the bleed screw,
-the thermostat fitted with a new seal,
-the thermostat unit,
- the thermostat unit bolts.
II - REFITTING OPERATION FOR PART
CONCERNED
a Refit:
-a new seal on the coolant outlet unit,
- the coolant outlet unit.
III - FINAL OPERATION
a Tighten the following in order:
- the coolant outlet unit bolts from (3) to (9) ,
- the coolant outlet unit bolts (1) then (2) .
a Refit the coolant temperature sensor (see 19A,
Cooling, Coolant temperature sensor: Removal -
Refitting, page 19A-101) .
a Connect:
- the top hose on the coolant outlet unit,
- the heater matrix hose.
a Using the (Mot. 1448), fit:
- the heater matrix hose clip,
- the top hose clip of the coolant outlet unit.
a Fill and bleed the cooling system (see 19A, Coo-
ling, Cooling circuit: Draining - Refilling, page
19A-17) .
a Refit:
- the front bumper (see Front bumper: Removal -
Refitting) (55A, Exterior protection).
WARNING
To ensure proper sealing, the gasket surfaces
must be clean, dry and not greasy (avoid any fin-
ger marks).
121701
WARNING
To ensure proper sealing, the gasket surfaces
must be clean, dry and not greasy (avoid any fin-
ger marks).
136517