19B-48
EXHAUST
Particle filter: Removal - Refitting
F9Q, and 870
19B
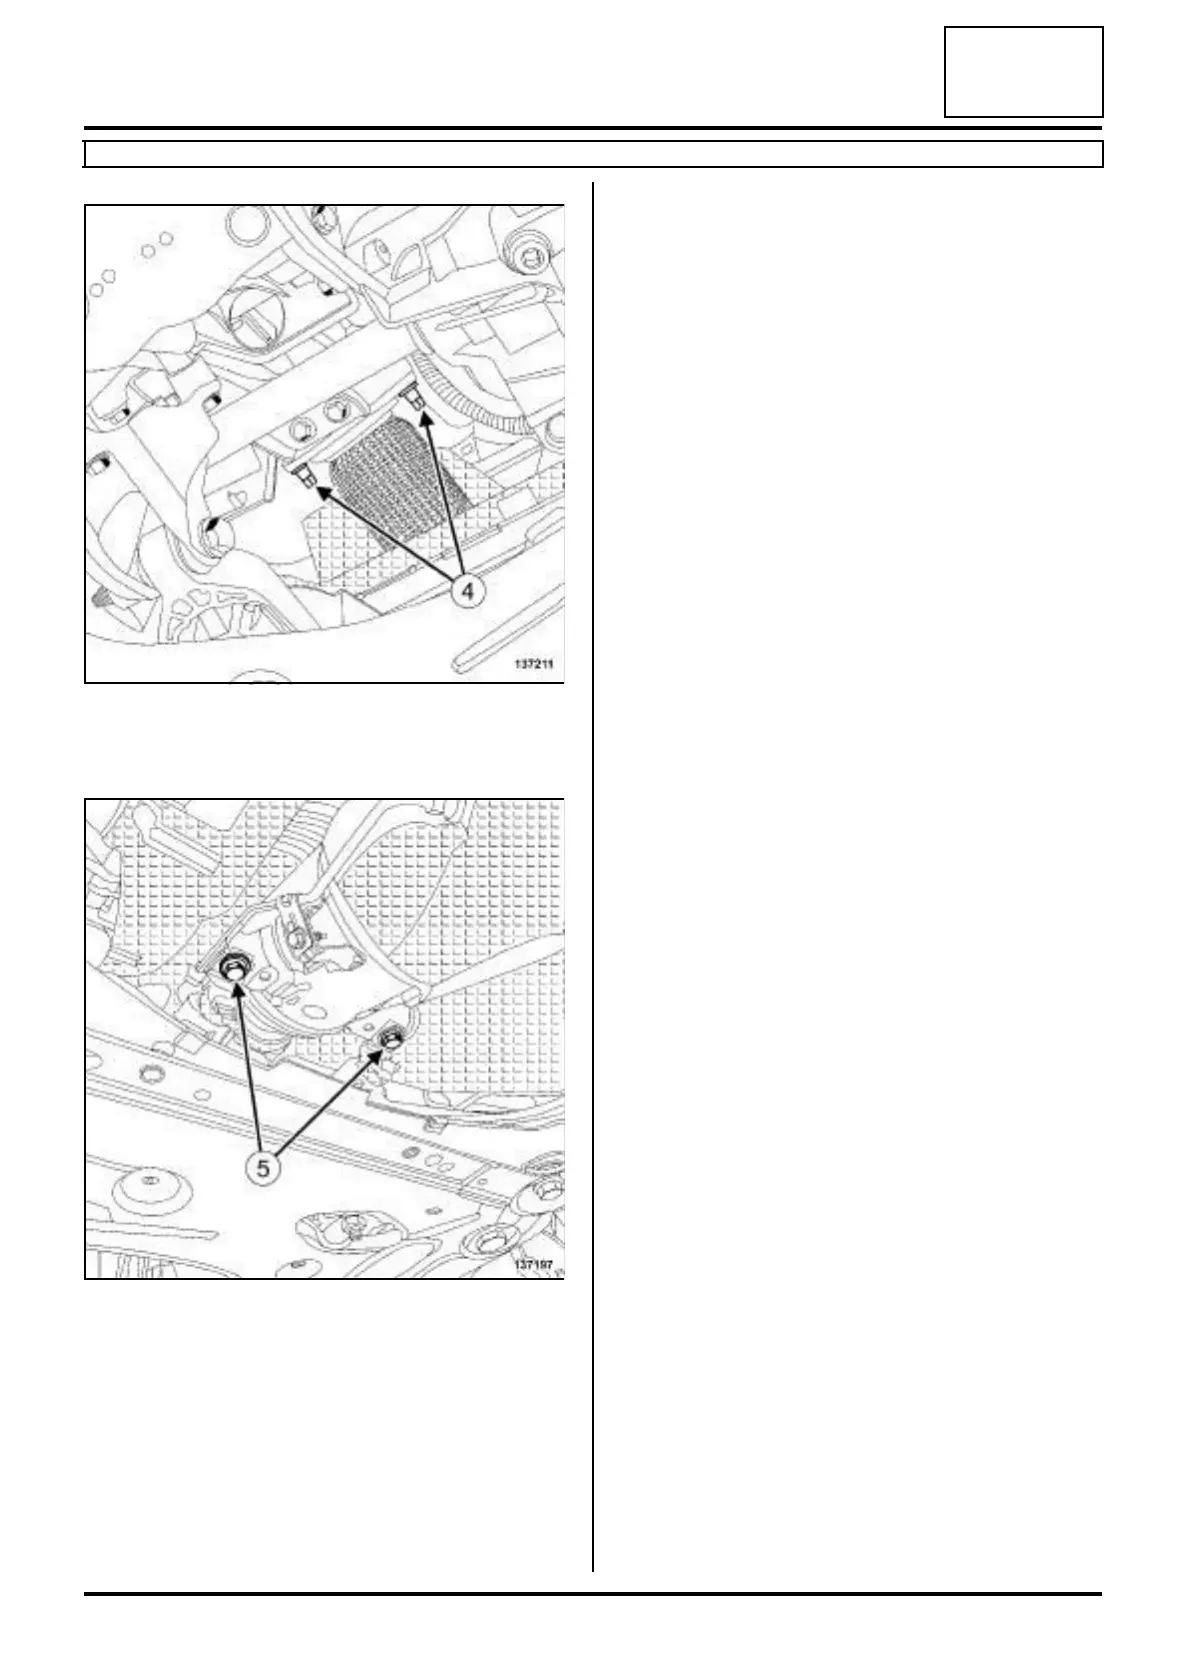
a Remove the nuts (4) from the exhaust bracket.
a Place a component jack under the particle filter.
a Remove:
-the particle filter support bolts (5) ,
-particle filter.
-the exhaust flange seal.
REFITTING
I - REFITTING PREPARATION OPERATION
a Always replace the exhaust bracket seal.
a Use SURFACE CLEANER (see Vehicle: Parts
and ingredients for the repairwork) (04B, Consu-
mables - Products) to clean and degrease the bea-
ring faces between the exhaust flange and the
particle filter.
II - REFITTING OPERATION FOR PART
CONCERNED
a Refit:
-a new exhaust flange seal,
- the particle filter using the component jack,
- the particle filter support bolts,
- the exhaust flange bolts.
a Fit a new After-Sales sleeve and follow the instruc-
tions (see 19B, Exhaust, Exhaust: Precautions
for repair, page 19B-12) .
III - FINAL OPERATION
a Refit:
- the bolt of the particle filter pressure sensor pipe,
- the take-off pipe of the particle filter pressure sen-
sor.
a Refit the take-off pipe of the particle filter temperatu-
re sensor.
a Make sure that there is no contact with the underbo-
dy.
a Connect the battery (see Battery : Removal - Refit-
ting) (80A, Battery).
a Apply the after repair procedure using the diagnos-
tic tool :
- connect the diagnostic tool,
- select « Injection computer » ,
- go to repair mode,
-display the « before/after repair procedure » for the
computer selected,
- select « Particle filters » in the « List of compo-
nents controlled by this computer » section,
- carry out the operations described in the « After re-
pair procedure » section.
a Start the engine.
137211
137197