Secon 7
Integra 3™ Temperature Control
Research Instruments Ltd
7
Repeat procedure for Adjusng Specimen (Setpoint) Temperature
aer performing calibraon.
x
x
x
x
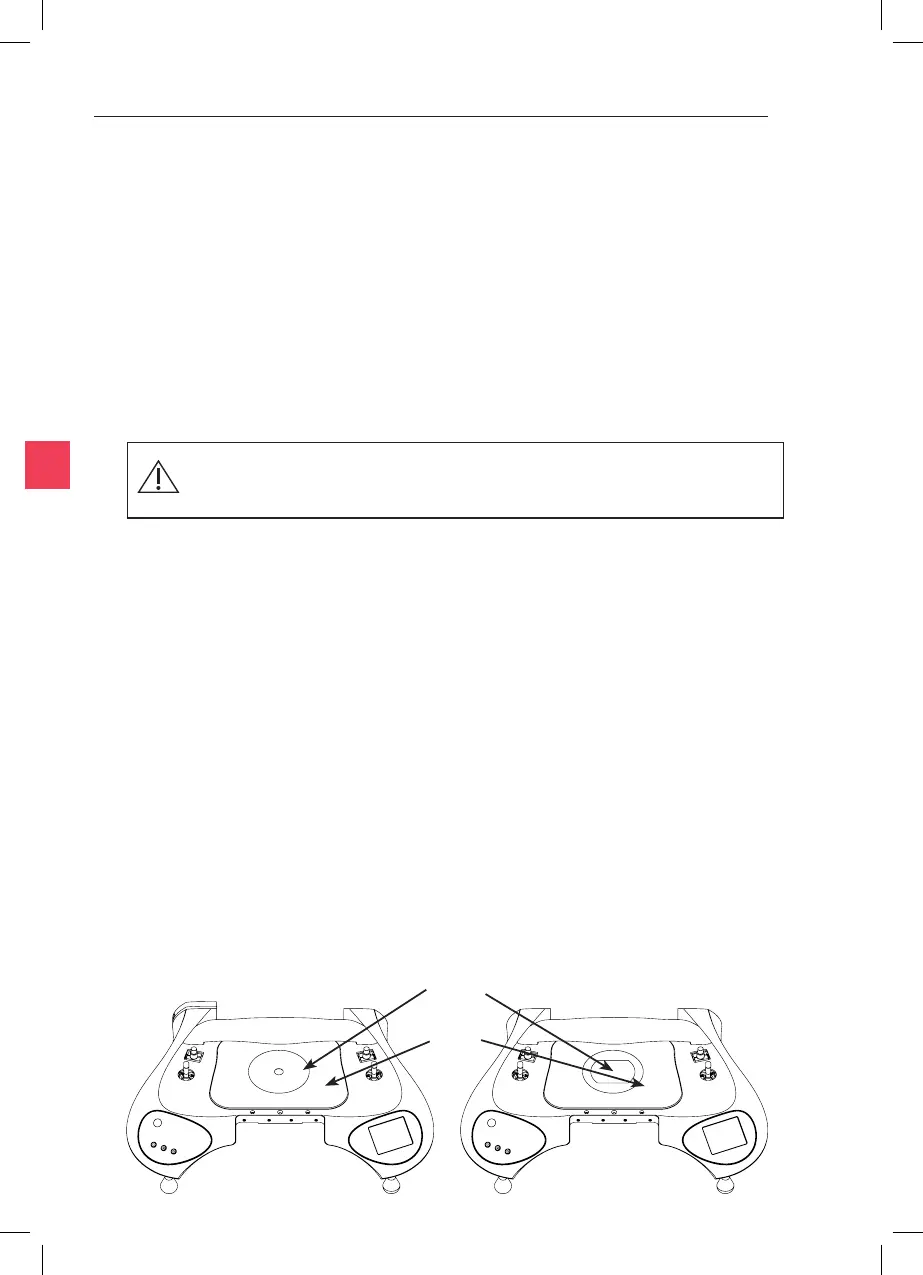
Figure 7-2 Figure 7-3
Place the probe of a calibrated thermometer in good thermal contact
with the surface. Simply touching the probe on the surface is not
adequate. Use a purpose-made surface probe or use thermal transfer
paste. Products sold for computer heatsinks are suitable, and RI can also
supply suitable materials.
When the system is ed with the Heated Stage Plate and Heated
Metal Insert, these must be calibrated independently.
Aer switching on, to allow the temperature to
stabilise before calibrang.
Recommended posions for temperature measurement during
calibraon of heated plates are shown below for both metal
(Figure 7-2) and glass (Figure 7-3) heated stage opons.
Temperature calibraon can be performed on each of the heang opons
listed at the start of the Temperature Control secon. The calibraon
screen is accessed by pressing the icon on the main screen, then
the icon.
The displayed temperature is adjusted using the or
icons unl the value matches that of the thermometer used to perform
the calibraon. Following calibraon and aer returning to the main
screen, it is advisable to leave the probe in posion for a short while in
order to verify that temperatures are as expected. The recommended
method of calibraon is described below.
Place
probes
here