2.11.5 Replacing parts in the air knife casing
Follow this procedure to replace these items:
• Recycle arm and its solenoid
• Recycle arm height sensor
• ADF exit sensor
CAUTION
Do not lubricate the recycle arm to avoid
moving failure.
Removing the air knife casing
1. Turn off the main switch and remove the ADF rear
cover (7 plated screws).
CAUTION
The ADF rear cover is made of metal. So, the
cover may touch electric elements on the
boards shorting them out when you remove the
cover. Be sure to turn off the main switch when
you remove the ADF rear cover.
2. Remove the blower unit.
3. Remove the two air knife casing fixing screws from
the rear side of the ADF.
4. Remove the front and rear magnet catches for the
ADF left cover (one minus head stepped screws
each, front and rear)
5. Remove the ADF front cover (3 plated screws on
the top and 4 on the bottom).
6. Remove the two air knife casing fixing screws from
the front side of the ADF.
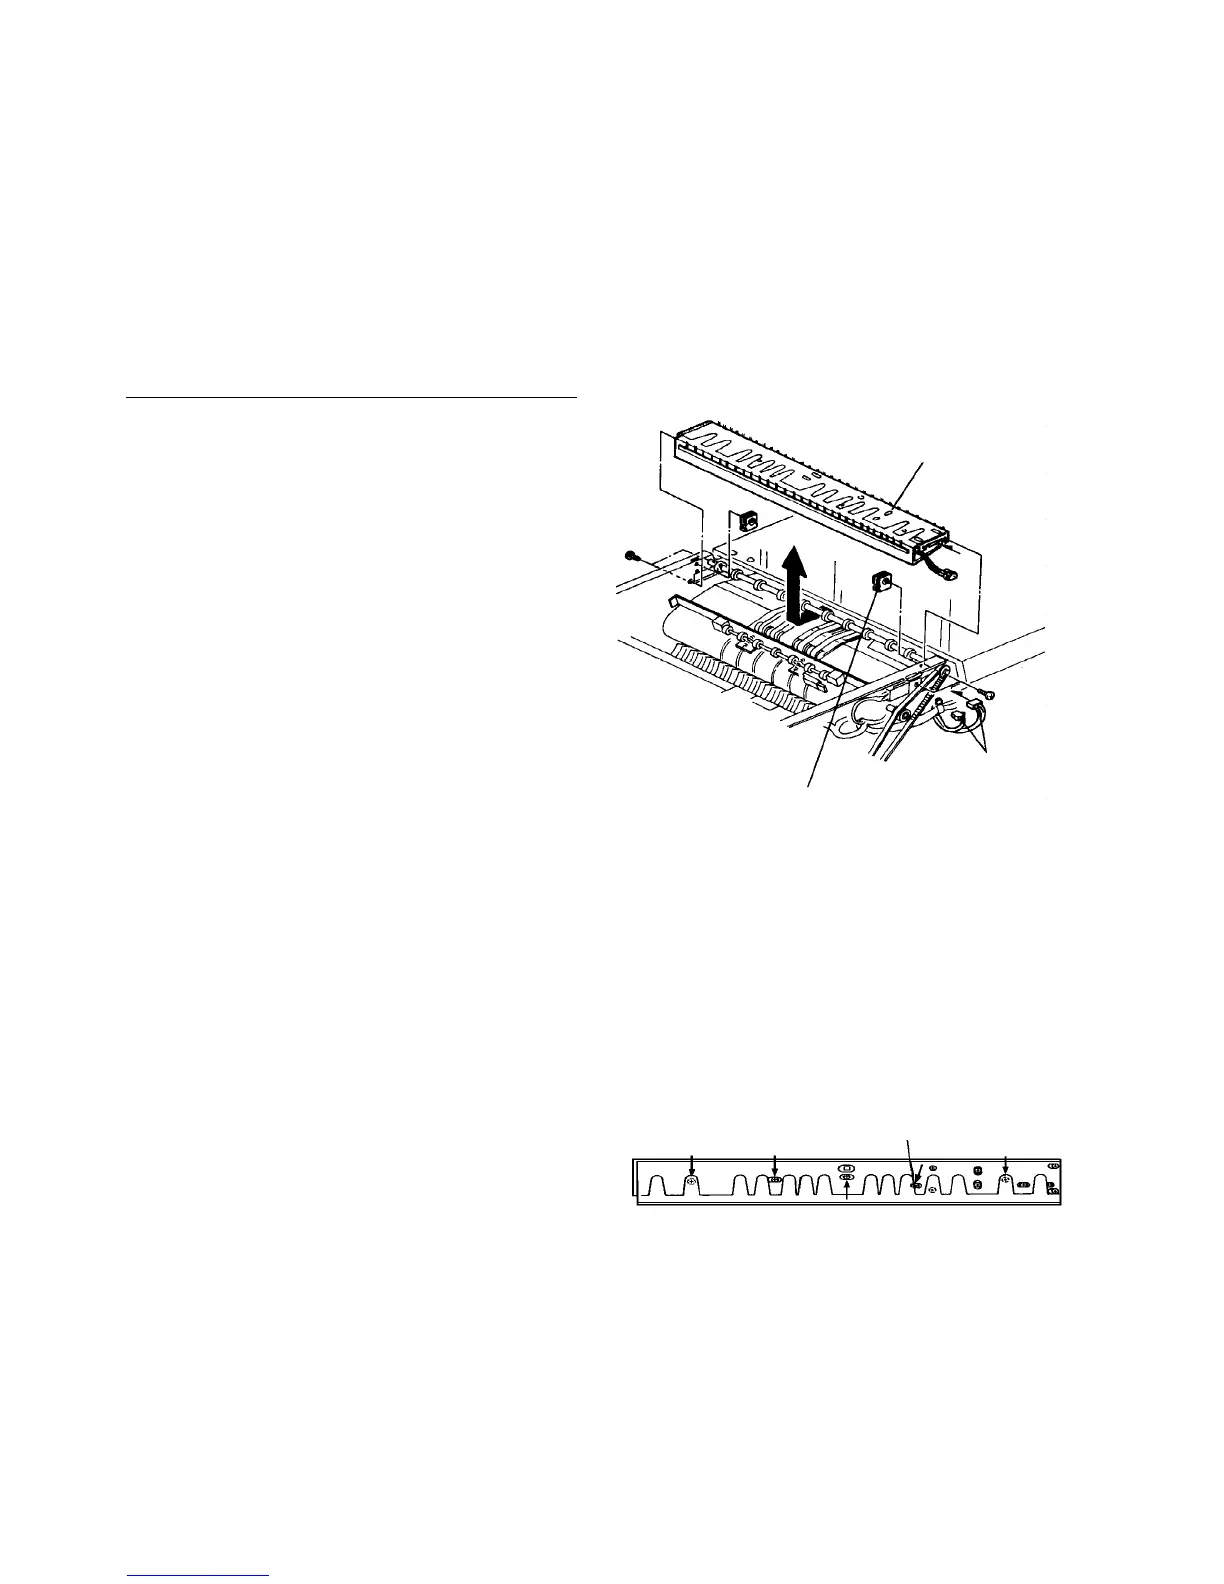
7. Disconnect the connector to the air knife casing.
8. Pull out the air knife casing to the left.
9. Remove five screws to divide the casing into two
parts.
CAUTION
Remove only the five screws shown in the
illustration. The other screws are for securing
the parts inside the casing.
10. After replacing some parts, reassemble in the
reverse order.
CAUTION
Be sure that there is no air leakage from the
casing.
Air knife casing
Connector
Magnet catch
Five screws to be removed