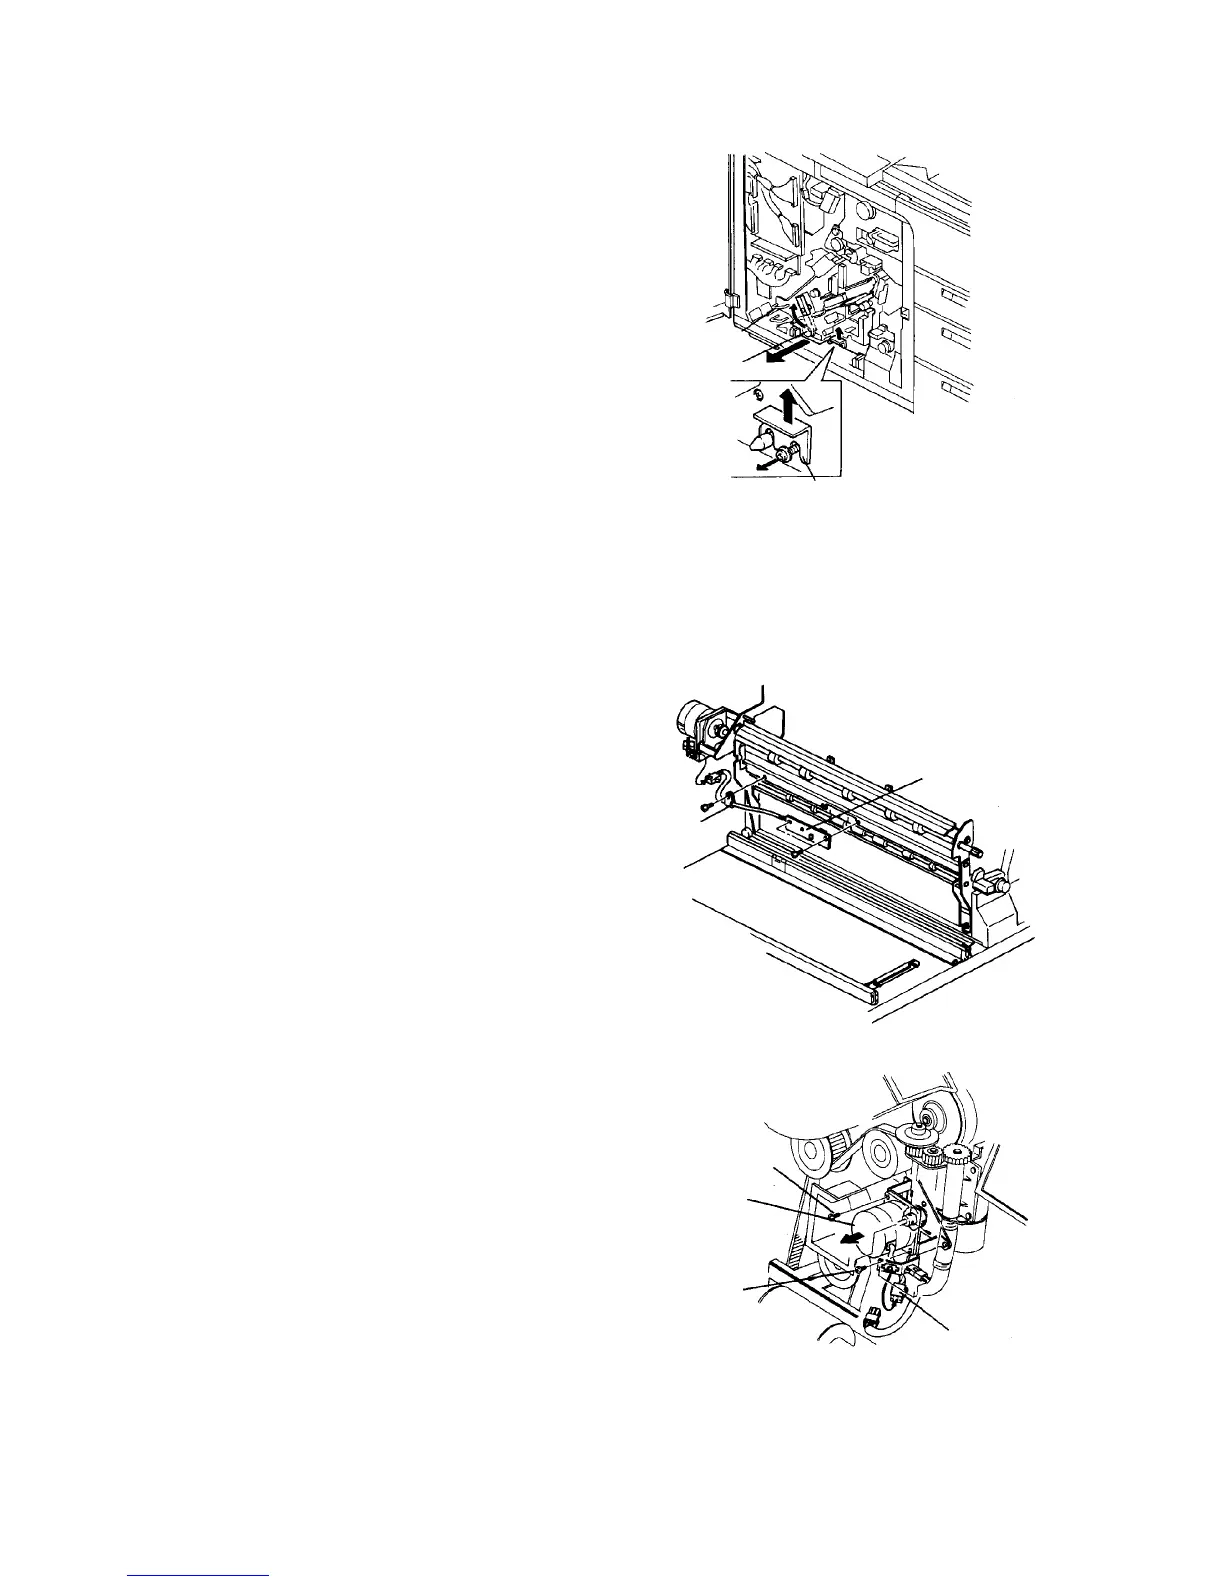
2.1.4 Replacing the registration sensor
1. Turn off the main switch. Open the front door, and
remove two screws to allow it to open further.
2. Remove the inner cover (2 screws and one
connector).
CAUTION
Do not pull the harness to the cooling fan in the
inner cover.
3. Turn the lever to release the development backup
roller of the OPC unit.
4. Remove the development unit fixing plate (one
screw), and slightly pull out the unit to disengage
the joint gear at the rear of the unit.
5. Turn the development knob to collect the
developer on the development sleeve.
CAUTION
Be sure to collect the developer, because the
developer may attach to the side plate of the
OPC unit, fraying or damaging the OPC belt.
6. Slide out the development unit.
7. Remove the registration sensor (2 screws and one
clamp).
8. Remove the main body rear left cover (2 screws).
9. Remove the connector going to the registration
sensor from the back.
10. Reassemble in the reverse order.
CAUTION
Never touch the OPC belt.
2.1.5 Replacing the registration motor
1. Turn off the main switch.
2. Remove the rear left cover, then remove the
cleaning coil cooling fan.
3. Disconnect the connector from the registration
motor.
4. Loosen two screws of the universal joint attached
to the registration motor shaft.
5. Remove two screws fixing the registration motor.
6. Replace the registration motor and reassemble it
in the reverse order.
Lever
Development knob
Fixing bracket
Registration sensor
Clamp
Fixing screw
Registration motor
Fixing screw
Connector for
registration motor