1.10 Printer Installation
1.10.1 Accessories list
Check the quantity and condition of the accessories in
the box according to the following list.
Key counter bracket accessory check
1. Snap Bushing 1
2. Wire Clamp 2
3. Philips Sunken Head Screw - M3 x 8 2
4. Philips Pan Head Screw - M4 x 8 4
5. Philips Plated Screw - M4 x 8 4
6. Grounding Screw with Star Washer 2
7. Philips Plated Screw - M3 x 6 2
8. Key Counter Hole Blind Cover 1
9. Key Counter Fixing Plate 1
10. Printer Connector Hole Blind Cover 1
Printer connector unit accessory check
1. Grounding Screw with Star Washer 2
2. Philips Plated Screw - M4 x 8 1
3. Wire Clamp 1
NOTE:
The printer interface board (P/N A112 5060), printer
harness (P/N A531 5420), 2 connector joint studs
(2 x P/N 1102 4039), and 4 nylon studs (4 x P/N
1105 0193), which are the copier’s accessories, are
required for the printer connector unit installation.
1.10.2 Installation procedure
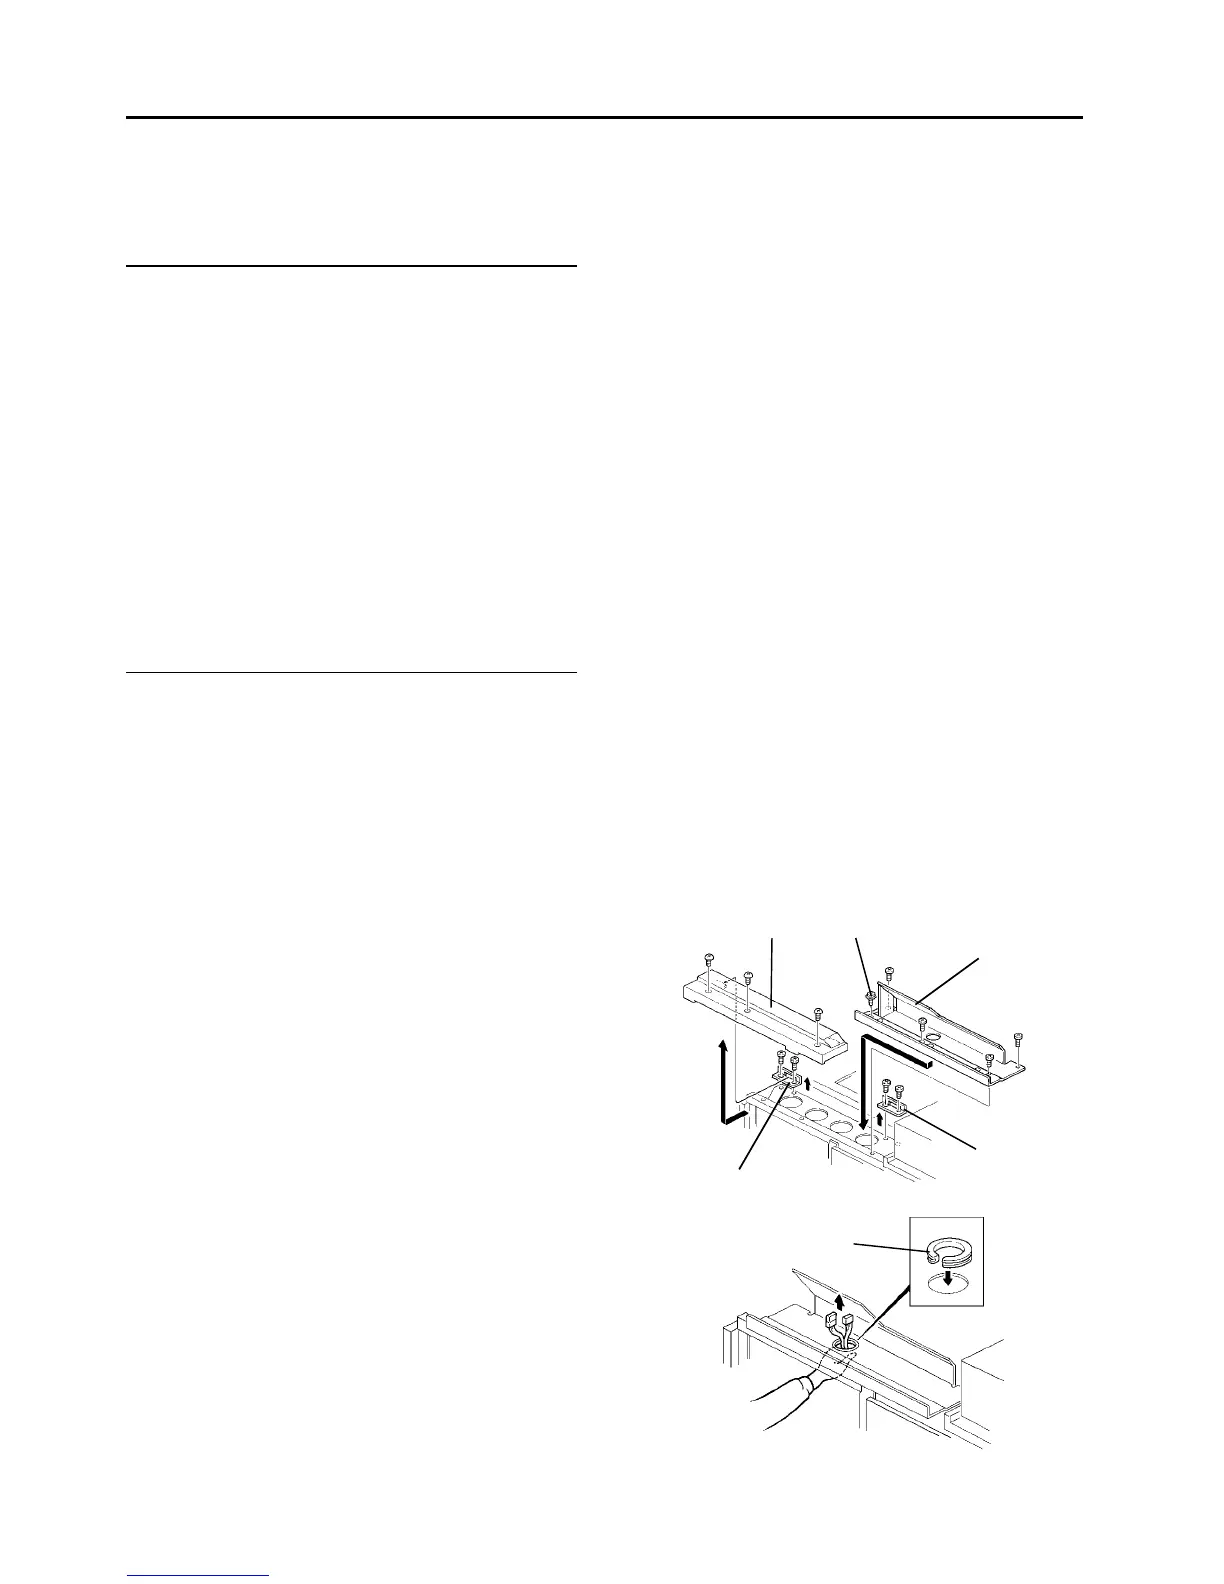
1. Remove the exterior cover in the rear of the copy
tray (3 screws). Then, remove the two cover
brackets (2 screws each).
2. Install the key counter/printer connector bracket
with four M4x8 philips pan head screws and one
grounding screw (accessories).
3. Install the snap bushing (accessory) as shown.
4. Remove the copier rear right cover (2 screws).
5. Take the two connectors which are clamped
behind the key counter/printer connector bracket,
then feed them through the hole in the bottom of
the bracket as shown.
Exterior
cover
Connector
bracket
Grounding
screw
Cover
bracket
Cover
bracket
Snap bushing