2.11.8 Replacing the ADF blower motor
1. Turn off the main switch, and remove the ADF rear
cover (7 plated screws).
CAUTION
The ADF rear cover is made of metal. So, the
cover may touch electric elements on the
boards shorting them out when you remove the
cover. Be sure to turn off the main switch when
you remove the ADF rear cover.
2. Remove the blower unit upper casing (4 screws).
3. Disassemble the blower unit and replace the motor.
4. Reassemble in the reverse order.
CAUTION
• If you disassemble all the blower unit, be
careful when you install the upper and
lower turbine fans because they are
different.
• The nut securing the upper turbine fan has
reverse threads.
• Do not snag the harness when the unit is
installed.
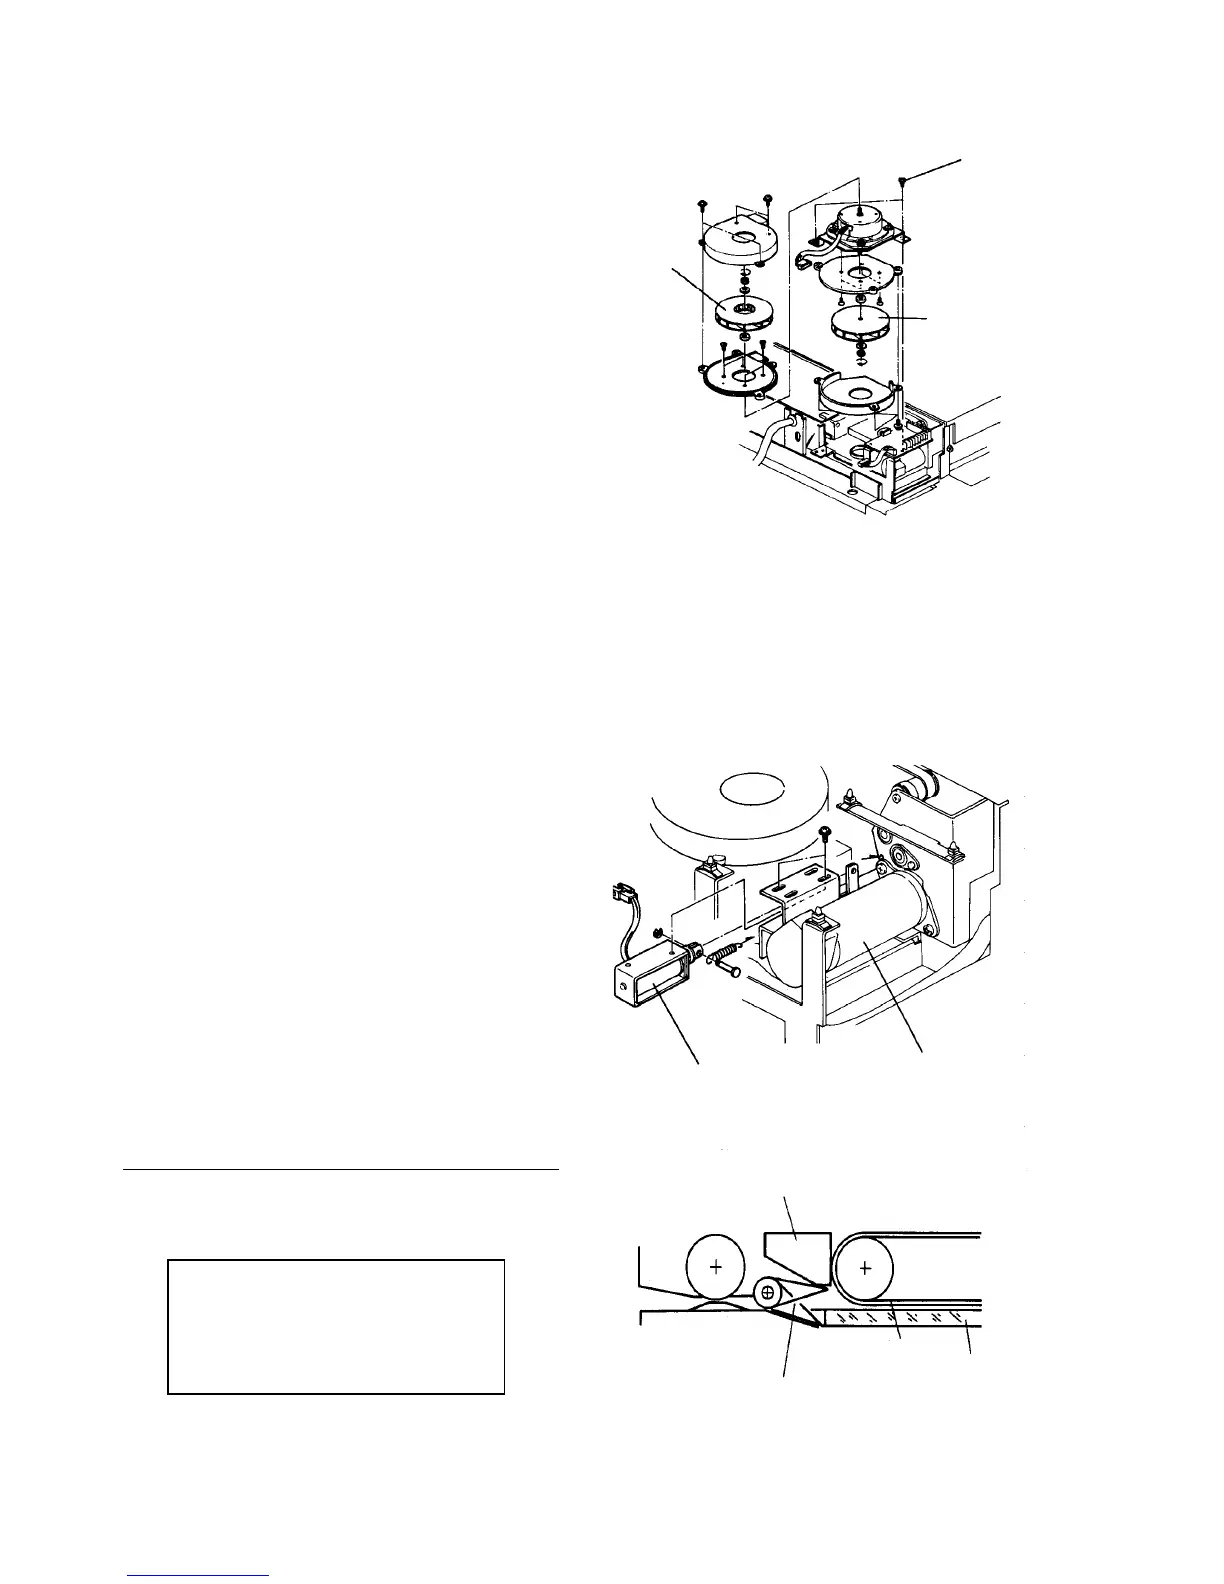
2.11.9 Replacing the SADF exit gate solenoid
1. Turn off the main switch, and remove the ADF rear
cover (7 plated screws).
CAUTION
The ADF rear cover is made of metal. So, the
cover may touch electric elements on the
boards shorting them out when you remove the
cover. Be sure to turn off the main switch when
you remove the ADF rear cover.
2. Remove the blower control board.
3. Remove the solenoid (2 screws) and replace it.
4. Reassemble in the reverse order.
Solenoid position standard
Check the operation of the exit gate plate by pressing
the solenoid plunger manually. Adjust the solenoid
position if necessary.
When the solenoid is energized, the gate
plate touches the reverse guide.
When the solenoid is de-energized, the
gate plate end drops below the under
surface of the exposure glass.
Unit fixing screw
Lower turbine fan
Upper
turbine
fan
SADF exit gate solenoid
Reverse motor
Reverse guide
SADF exit gate plate
Transport belt
Exposure
glass