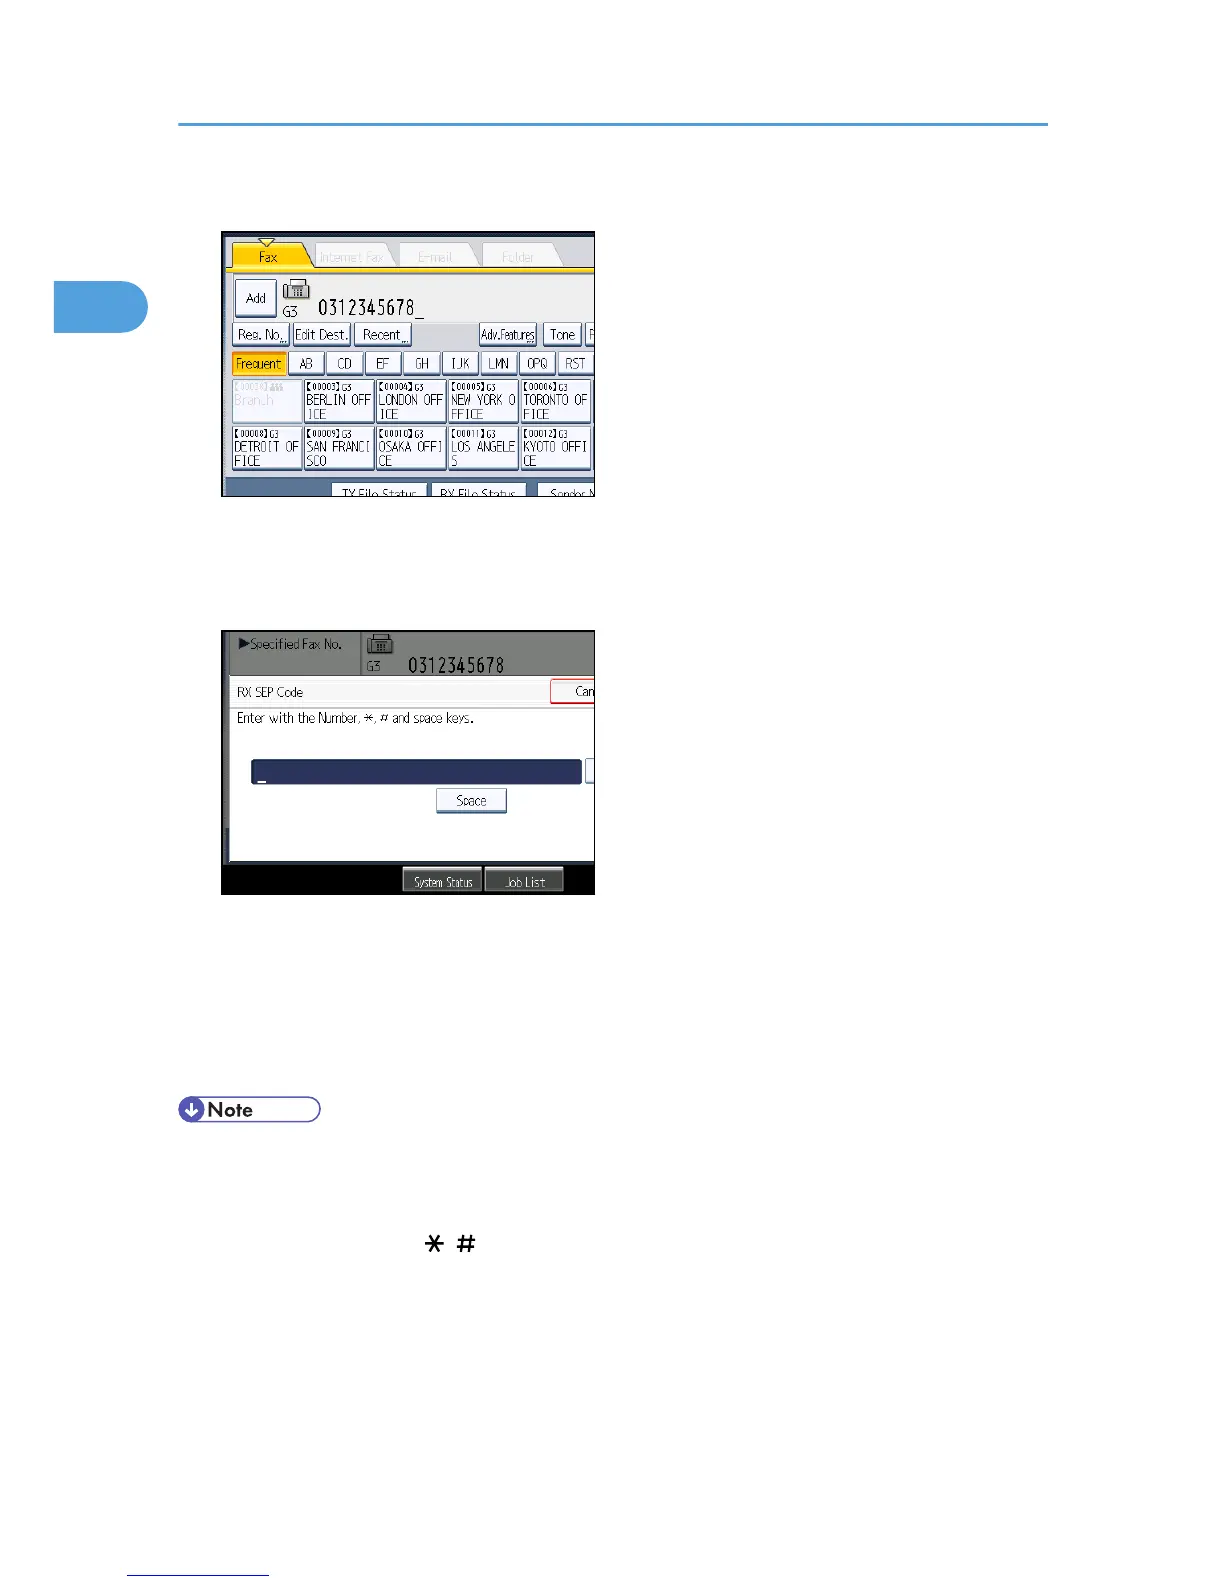
6. Press [Adv.Features].
7. Make sure that [SEP Code] is selected.
8. Press [Reception SEP Code].
9. Enter a SEP Code, and then press [OK].
If you make a mistake, press [Clear] before pressing [OK], and then try again.
10. When a password is required, press [Password (PWD)], enter the password using the
number keys, and then press [OK].
11. Press [OK].
12. Press the [Start] key.
• Make sure the number of digits in the SEP Code matches the specification of the machine from
which you are receiving. For the maximum number of digits for the SEP Code of this machine, see
“Maximum Values”.
• You can enter numbers, , , and spaces.
• You can store SEP Codes as well as names and fax numbers in the destination list and Keystroke
Programs. For registering into the destination list, see “Registering Addresses and Users for
Facsimile/Scanner Functions”, Network and System Settings Reference. For registering into the
Keystroke Programs, see “Registering and Changing Keystroke Programs”.
• When a SEP Code is stored in the destination list, the SEP Code can be modified or deleted after
selecting a destination using the Destination keys.
1. Transmission
148

 Loading...


