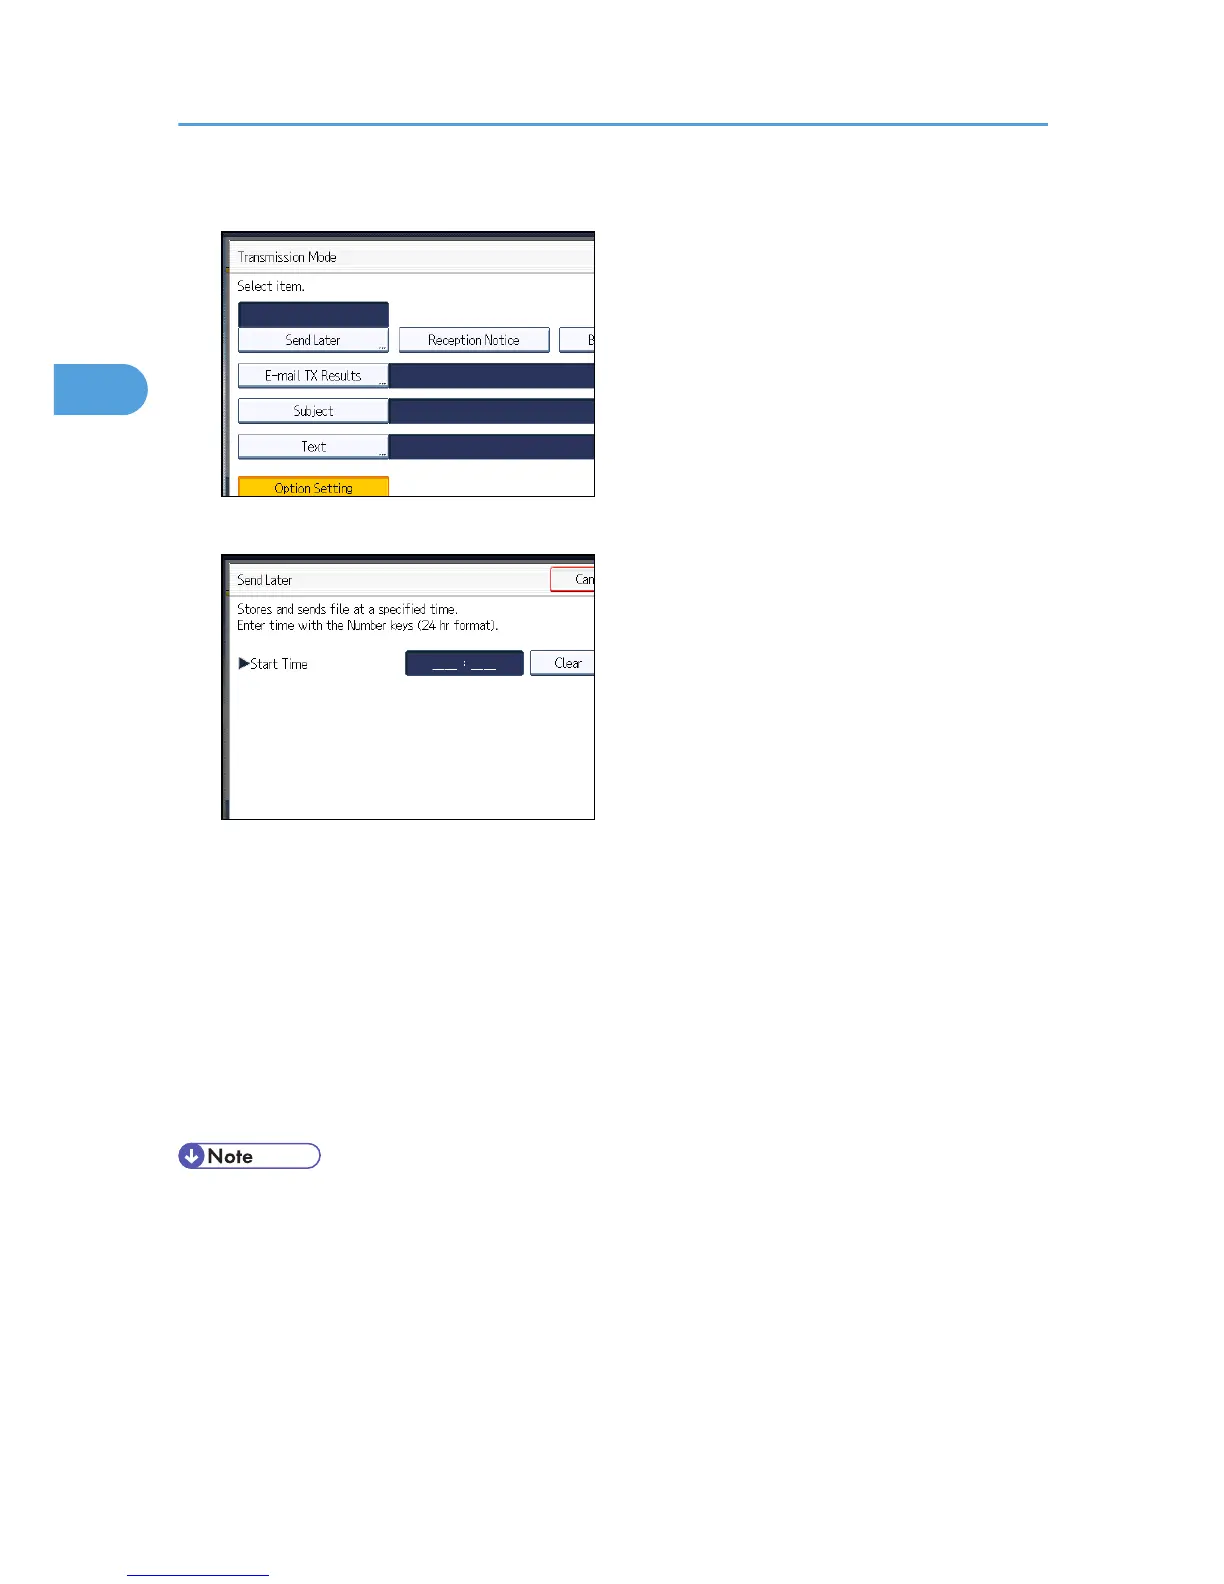
3. Press [Send Later].
4. Enter the time (24 hour format) using the number keys, and then press [OK].
When entering numbers smaller than 10, add a zero at the beginning.
If you make a mistake, press [Clear] before pressing [OK], and then try again.
To cancel Send Later, press [Cancel]. The display returns to that of step 3.
The specified time is shown above the highlighted [Send Later].
5. Press [OK].
The standby display appears.
To check the settings, press [TX Mode].
6. Specify a destination, and then press the [Start] key.
• You can specify a time within 24 hours of the current time.
• If the current time shown is not correct, change it using [Set Time] under [System Settings]. For
details about the setting, see “Timer Settings”, Network and System Settings Reference.
• You can program one of the Quick Operation keys with operations for this function. Using the
Quick Operation Key allows you to omit step 2 and 5. For details about Quick Operation Key, see
“General Settings”.
• You can cancel the transmission setup for Send Later. See “Canceling a Transmission”.
2. Other Transmission Features
164

 Loading...


