EasyManuals Logo

Ricoh SP 5200S User Manual

Ricoh SP 5200S
444 pages
To Next Page IconTo Next Page
To Previous Page IconTo Previous Page
Page #69 background imageLoading...
Page #69 background image
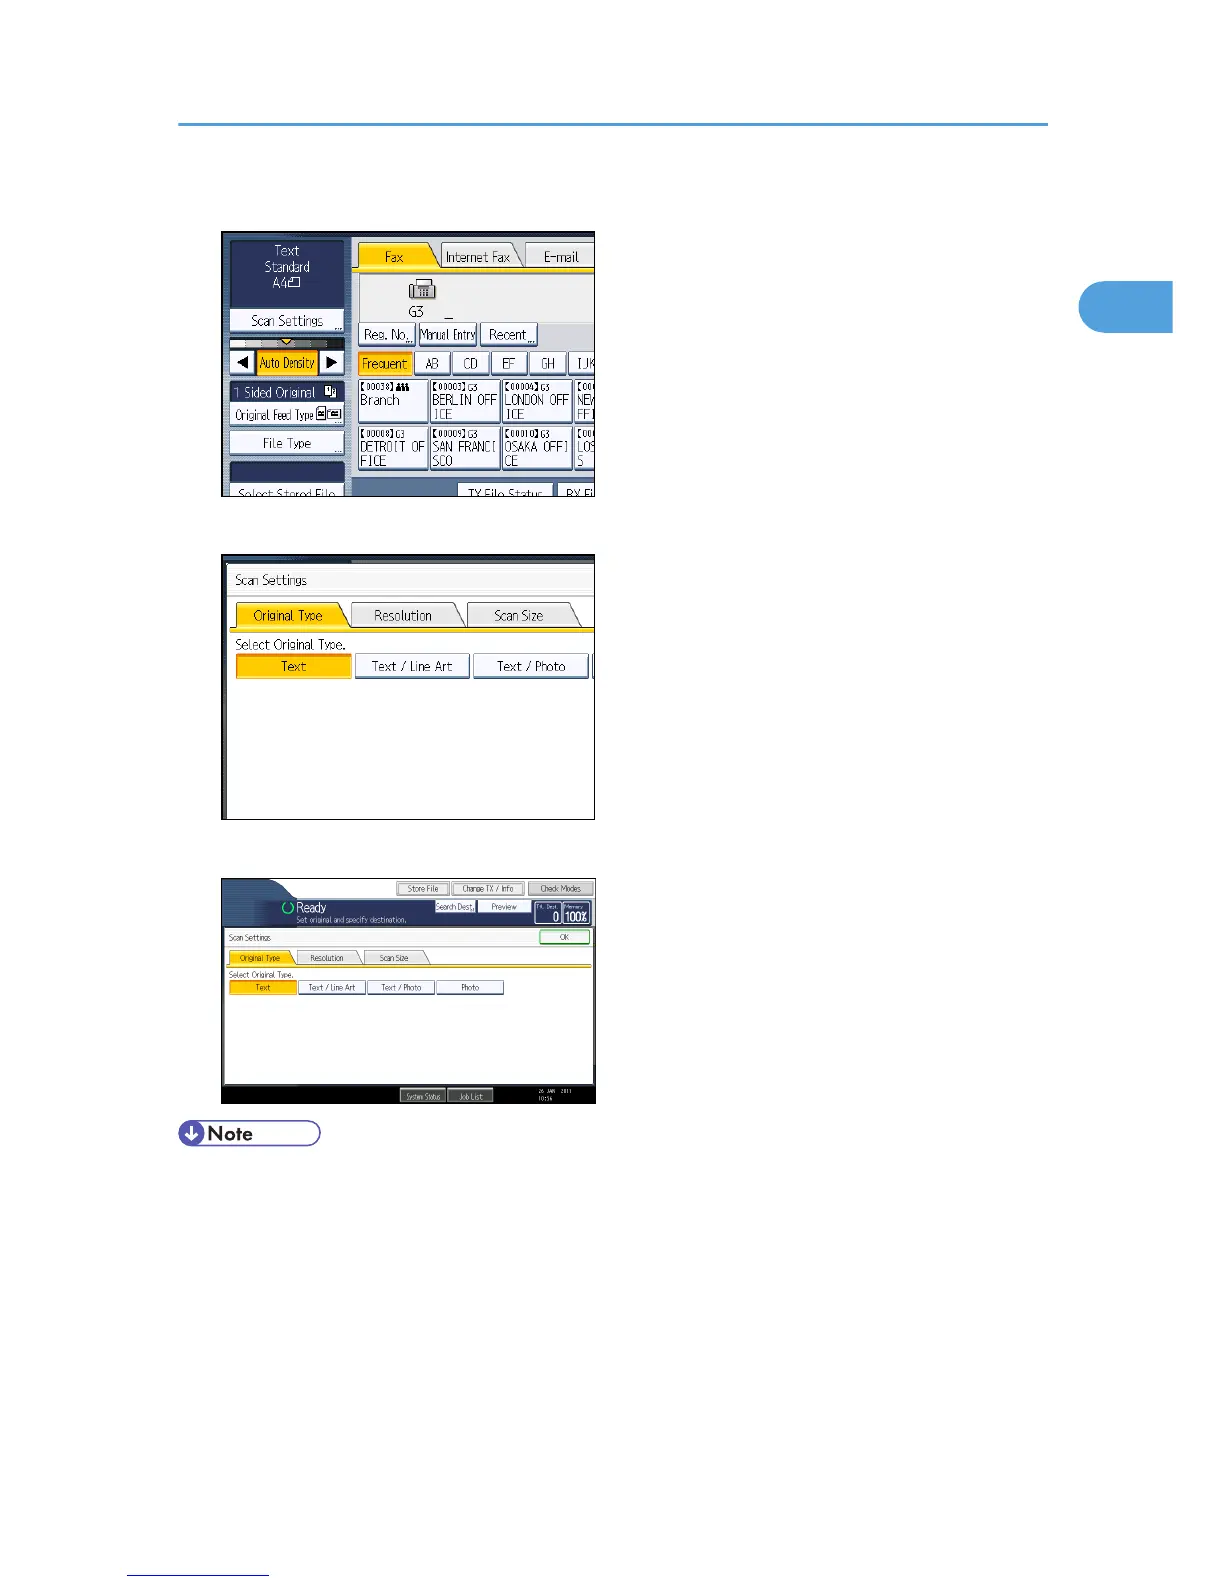
1. Press [Scan Settings].
2. Make sure that [Original Type] is selected.
3. Select the original type you require, and then press [OK].
If you select [Text / Line Art], [Text / Photo], or [Photo], the transmission will take longer than when
[Text] is selected.
If you send a fax document with [Text / Line Art], [Text / Photo], or [Photo] and the background of
the received image is dirty, reduce the density setting and resend the fax. For details about setting
the image density, see “Density (Contrast)”.
You can set the original type that is selected right after the machine is turned on or whenever the
[Clear Modes] key is pressed. See “Changing the Default Functions of the Fax's Initial Display”.
Scan Settings
67
1

Table of Contents

Other manuals for Ricoh SP 5200S

Questions and Answers:

Question and Answer IconNeed help?

Do you have a question about the Ricoh SP 5200S and is the answer not in the manual?

Ricoh SP 5200S Specifications

General IconGeneral
Print TechnologyLaser
Print Resolution1200 x 600 dpi
Duplex PrintingYes
ADF Capacity50 sheets
FunctionsPrint, Copy, Scan, Fax
Maximum Paper SizeA4
Operating System CompatibilityWindows, Mac OS, Linux
Scanner TypeFlatbed, ADF
ConnectivityUSB 2.0, Ethernet
Network ConnectivityEthernet
Print SpeedUp to 47 ppm

Related product manuals