22
Basic Operation
Compositing Using Picture-in-Picture
This display an inset screen on a dierent background video.
Setting the Position and Size of the Inset Screen
1. Follow the procedure in “Selecting the Video Sources for Composition” (p. 21) to assign the video sources.
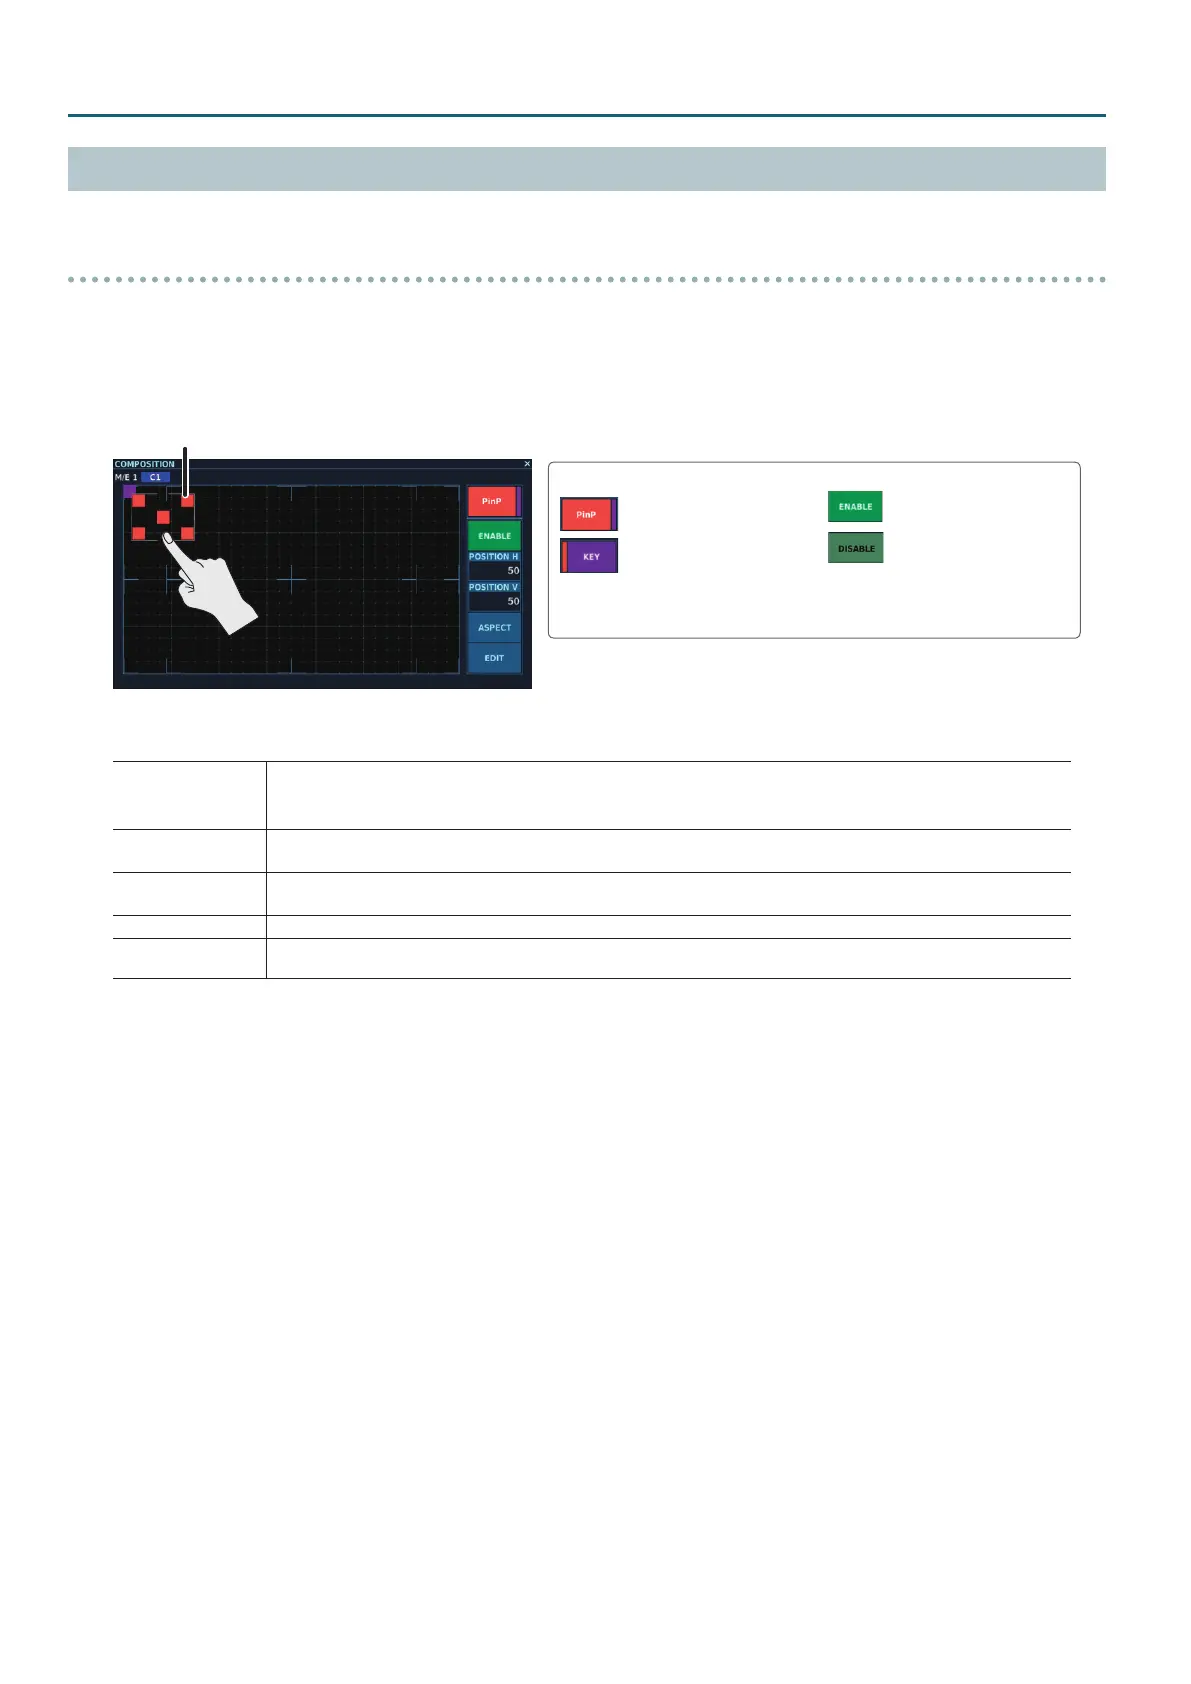
2. At the COMPOSITION screen, tap <EDIT> for the composition where you want to make the settings for the inset screen, making
the EDIT screen (p. 43) appear.
PinP setup mode
Key setup mode
Mode switch
If the mode switch is set to <KEY>, tap
<KEY> to change to the PinP setup
mode.
ENABLE/DISABLE switch
PinP disabled
PinP enabled
This switches between enabling and
disabling PinP.
Position window
3. Adjusts the position and size of the inset screen.
Position window
This adjusts the position and size of the inset screen.
5 Sliding the center square adjusts the position.
5 Sliding the squares at the four corners adjusts the size.
POSITION H
This adjusts the position of the inset screen in the horizontal direction.
The setting value indicates the position of the upper left square in the position window.
POSITION V
This adjusts the position of the inset screen in the vertical direction.
The setting value indicates the position of the upper left square in the position window.
<ASPECT> This selects the aspect ratio of the inset screen. Changing the setting makes the inset screen’s aspect ratio change automatically.
<EDIT>
Tapping this displays an editing screen for PinP. Here you make advanced settings for picture-in-picture, such as the inset screen’s border
color and border width.
4. Make the ENABLE/DISABLE switch light up, enabling PinP.
Each tap of the ENABLE/DISABLE switch switches between enabling PinP (lighted) and disabling PinP (dark).
* You can enable both PinP and key composition.
5. When you nish making the settings for the inset screen, exit the EDIT screen to return to the COMPOSITION screen.
 Loading...