Configuring Local Subnets
Configuring L2TP Connection Settings
Ruckus Wireless Outdoor AP 100.1.0 User Guide, 800-70863-001 Rev A 83
Configuring Local Subnets
Ruckus Wireless APs can be configured to provide routing/network address trans-
lation (NAT) functionality using the Local Subnets feature. When a Local Subnet is
enabled, the standalone AP serves as a gateway router that can manage its own
subnets, providing DHCP server and DNS cache functions for both wired and
wireless clients. These clients can be assigned private IP addresses from a user-
defined address pool. Traffic from the client station in private address space appears
on the outside as if generated by the AP itself. In this way, the AP performs Layer 3
packet forwarding not only for Hotspot/WISPr usage, but for standard usage as well.
Up to four IP subnets can be configured per AP, each with its own VLAN and address
range which cannot conflict with one another.
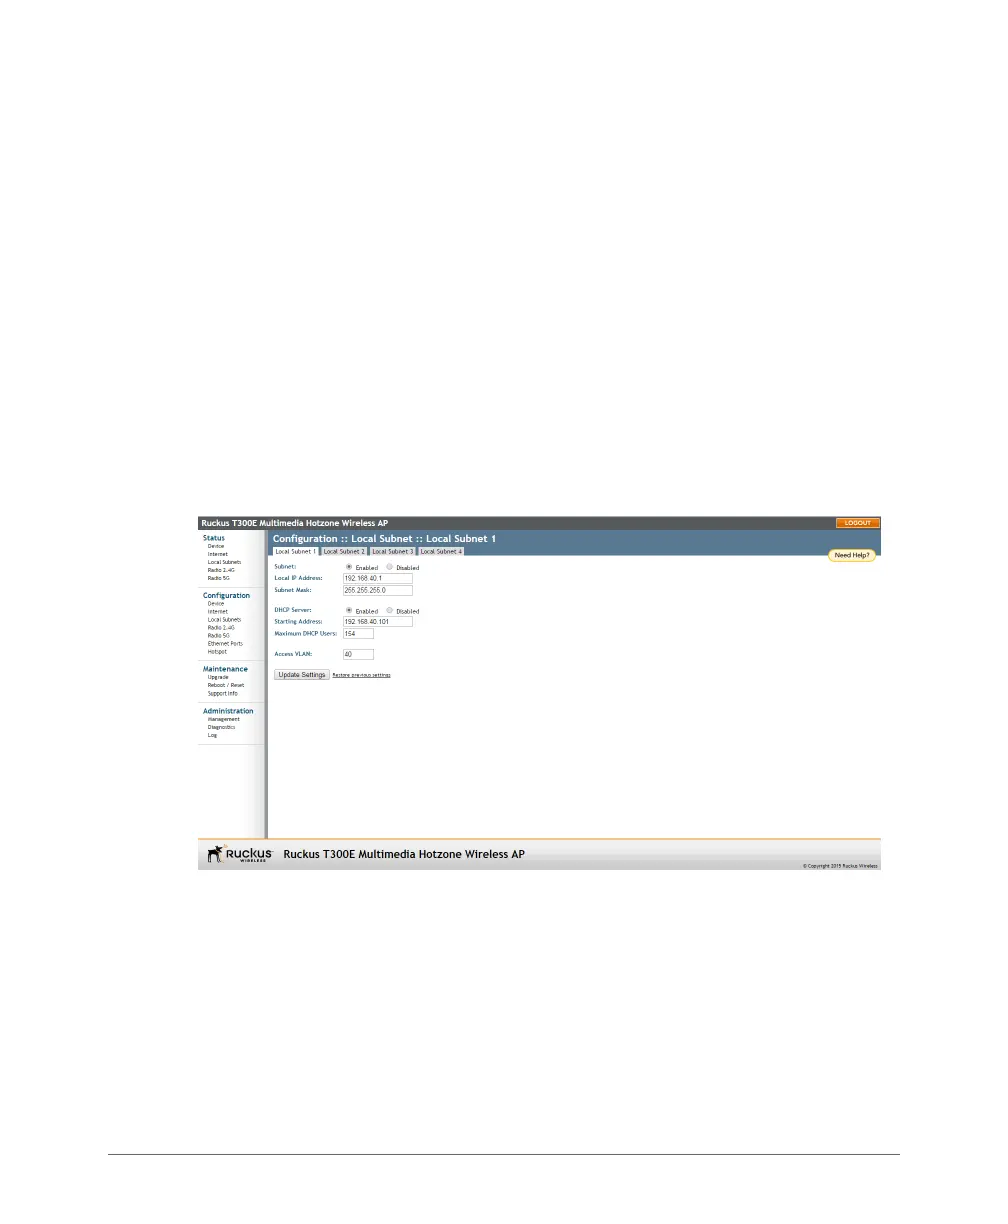
1 Go to Configuration > Local Subnets. The Local Subnet 1 through Local
Subnet 4 tabs allow you to configure each of the four subnets independently.
Figure 32. Configuring local subnets and enabling router mode
2 Click Enabled next to Subnet. The local subnet configuration options appear.
3 In Local IP Address, enter an IP address for the gateway. The default address
for Subnet 1 is 192.168.40.1. This address can be used to access the AP’s
Web interface for configuration and monitoring from devices connected to this
subnet.