2- Description and connection of router
F@ST 4310 Reference Manual Page 2-7
Sagemcom Broadband SAS document. Reproduction and disclosure prohibited
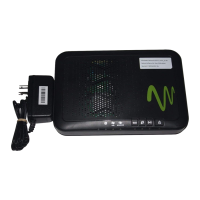
2.3 Installation of your F@ST 4310
2.3.1 Powering up
1. First connect the end of the mains adapter lead, supplied with the equipment, to the Power socket on
your router.
2. Connect the other end of the mains adapter lead to a nearby power outlet.
3. The router switches on automatically.
4. The LED will light up first, followed by the four Ethernet LEDs (1 to 4), then these last four LEDs will
be off. The and Ethernet (which corresponds to the connected interface) LEDs should be steady
and the LED blinks during the establishment of the ADSL link, then steadies like the LED.
The LED goes from blinking to steady when a PPP session has been created successfully.
2.3.2 Connecting the ADSL cable
1. Connect one end of the RJ11/RJ11 cable supplied with the equipment to the LINE socket of your
router.
2. Connect the other end of the cable as shown in the following figure.
Figure 2.3 - ADSL line / Power Supply Connection
Note
The powering up process lasts around one minute.

 Loading...