3.4
Section 3
Device Installation
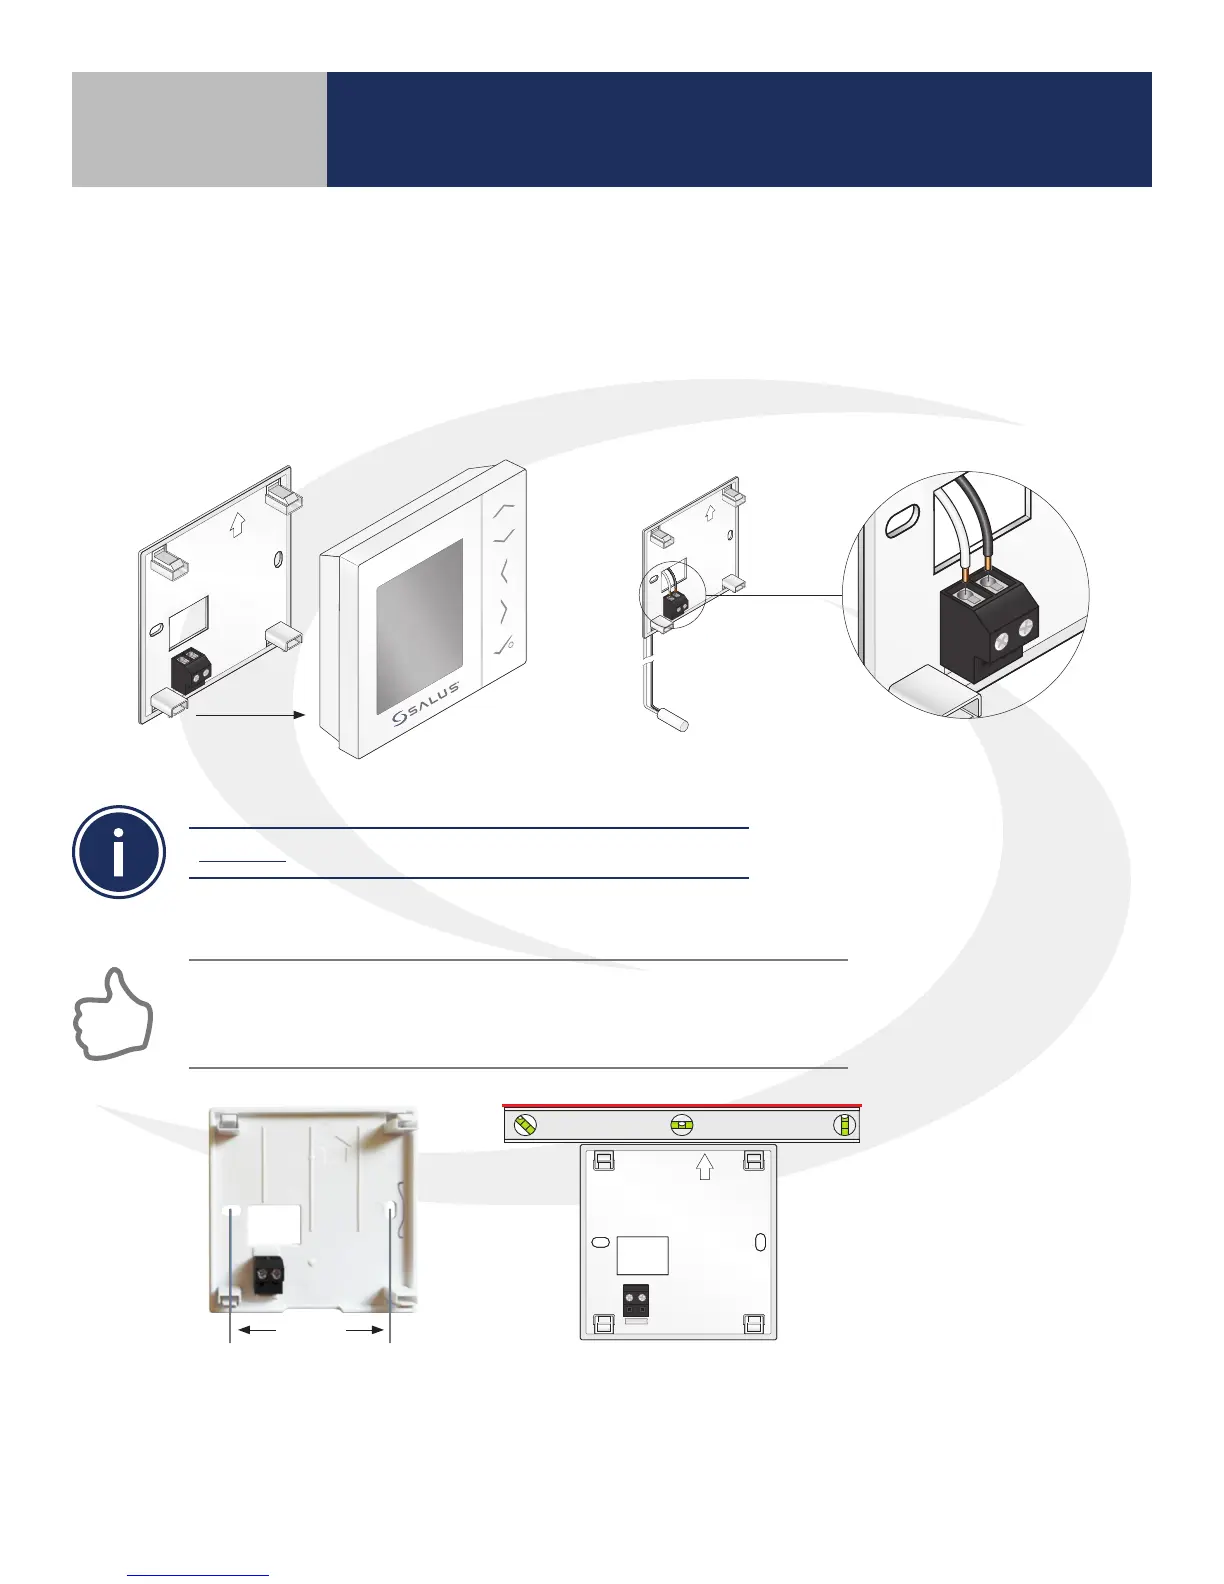
3. Connect an external 10 kΩ sensor (AFTS30M sold separately) if applicable
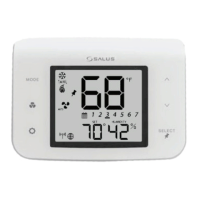
4. Secure the backplate to the wall using the provided screws and wall anchors
FOR BEST RESULTS, ensure that the backplate is level when mounting it.
NOTE THE ORIENTATION ARROW molded into the backplate. This must
be pointed upwards for correct mounting of the thermostat.
Terminals are provided for a remote air sensor or oor sensor
AVOID Mounting the AS20 Thermostat on an exterior wall.
1. Ensure that all required parts were included in the thermostat package: Thermostat
with backplate, (4) AAA Batteries, (2) Mounting Screws, (2) Wall Anchors, Installation
Instructions
2. Remove the AS20 Thermostat from the backplate by pulling out from the bottom
Floor sensor
5. Insert batteries into the thermostat assuring correct polarity
6. Attach the thermostat onto the backplate by hooking the top connections and pressing
rmly on the bottom. If the thermostat does not fully attach, make sure that the screws
provided were used to attach the backplate and that they are snug.
2.36 in
(5.9944cm)