69
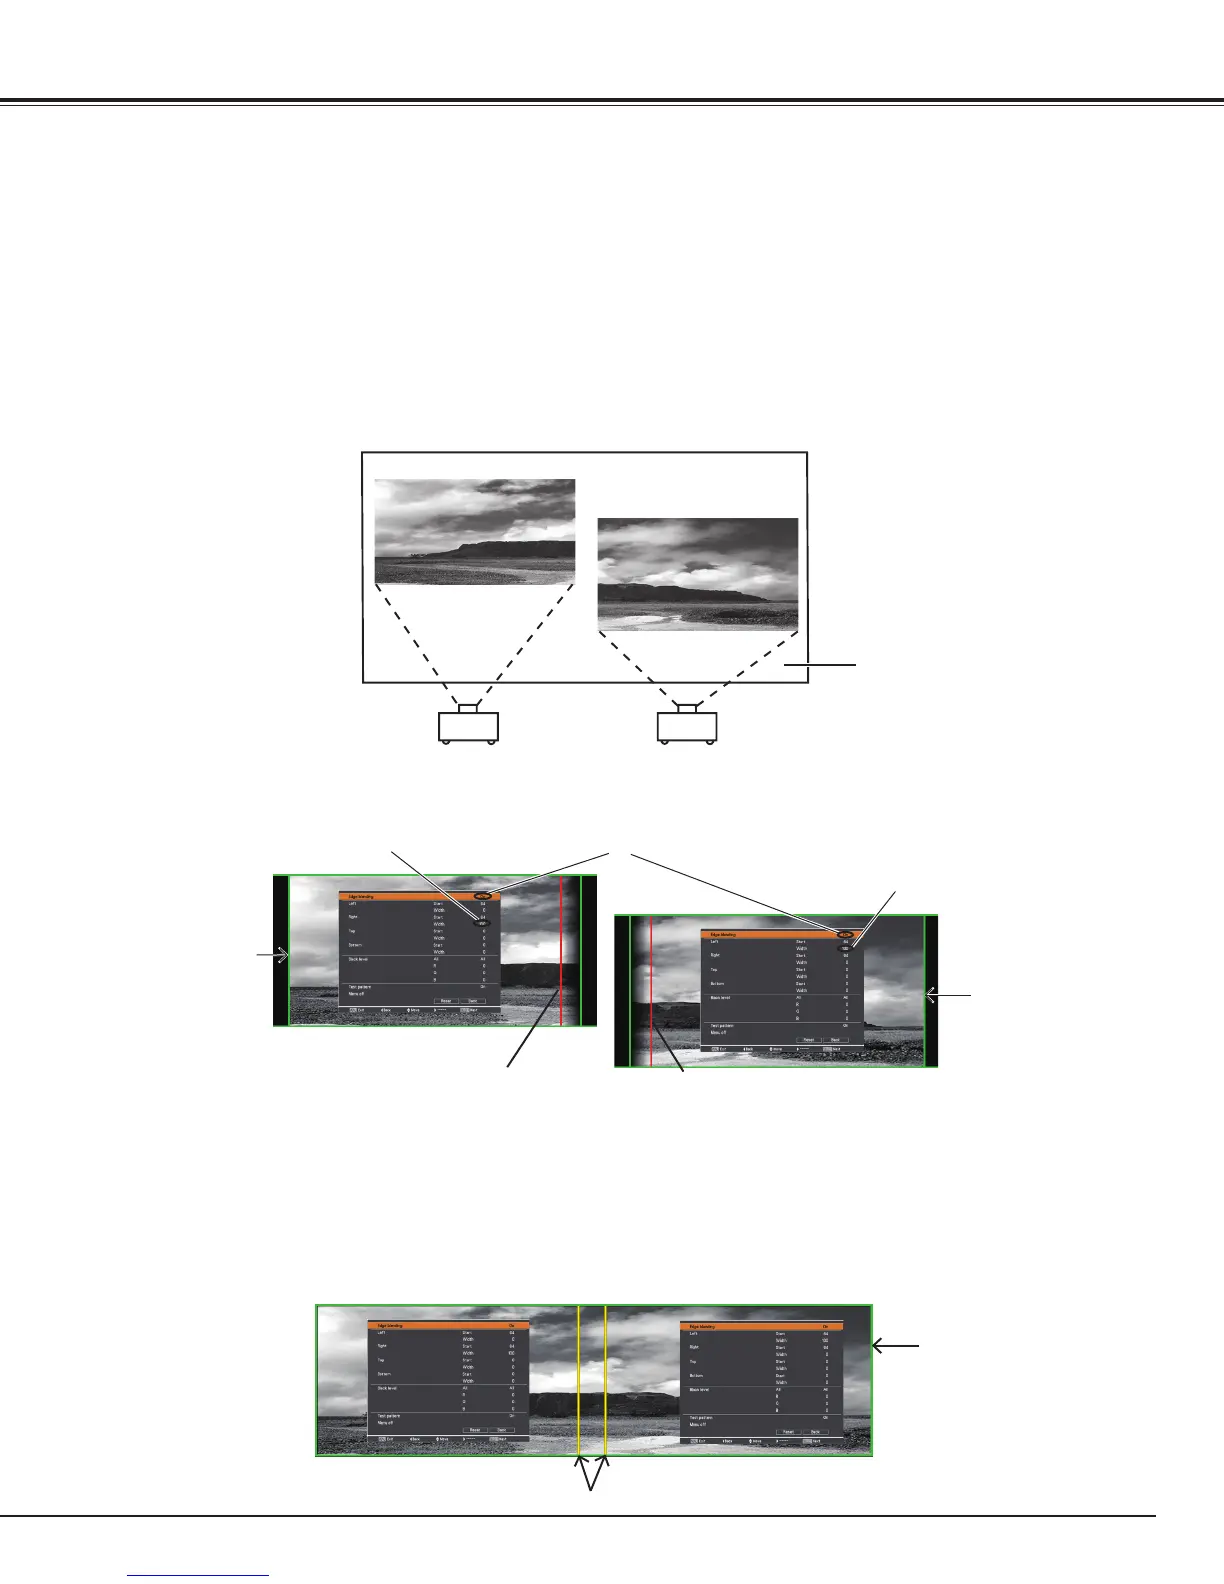
How to Overlap the Projection Images on a Screen
You can obtain a seamless image by using the Edge Blending function which blends the images projected from multiple
projectors and digitally dims the edges of the images and the Color Matching function which eliminates color unevenness.
Follow the steps from 1 to 5 (or 8 if necessary) below to adjust multiple projector images.
Configure the settings for screen size, image level, and lamp mode. These settings must match those for the rest
of the projectors. Select Constant mode from the Lamp mode menu and then specify the same Target value as the
projectors.
1
4
Adjust the position, focus and zoom of each image if necessary, and then overlap the shaded areas by using the lens
shift function. When the shaded areas are overlapped with each other correctly, the red lines turn yellow.
Edge blending
Display the images to be edge-blended on a screen.
(In the following example, two projectors: Projectors A and B are used.)
If black horizontal and/or vertical bar(s) on four sides of the images appear, adjust the Start values until they become
invisible and specify the values for Width to adjust the width of the area where the images overlap. (Refer to pages 57,
58 for operation procedure.)
2
3
• The blending widths for each projector (e.g., the Right width of Image A and the Left width of Image B) must be set
to the same value.
• The values in the figures are example .
• The
frame around an image is displayed in green, and red line(s) appear at the specified position(s).
• T
he areas to be overlapped are displayed in shaded color.
Projector A
Projector B
Image A
Image B
Screen
Image A
Image B
Red line
Yellow lines
Red line
Green frame
Green frame
How To Overlap the Projection Images
Change the Right width to 100.
Change the Left width to 100.
Set to On.
Green frame
 Loading...