Operating instructions for actuators type AB with SMARTCON control unit
OM-ENGLISH-CSC-V2.08-2019.11.07 5 Commisioning
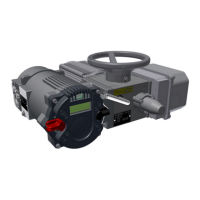
Figure 15: AB3, 5, 100, 200, 500
Figure 16: AB8, 18, 40, 80
5.3 Mechanical default settings, preparation
Instructions:
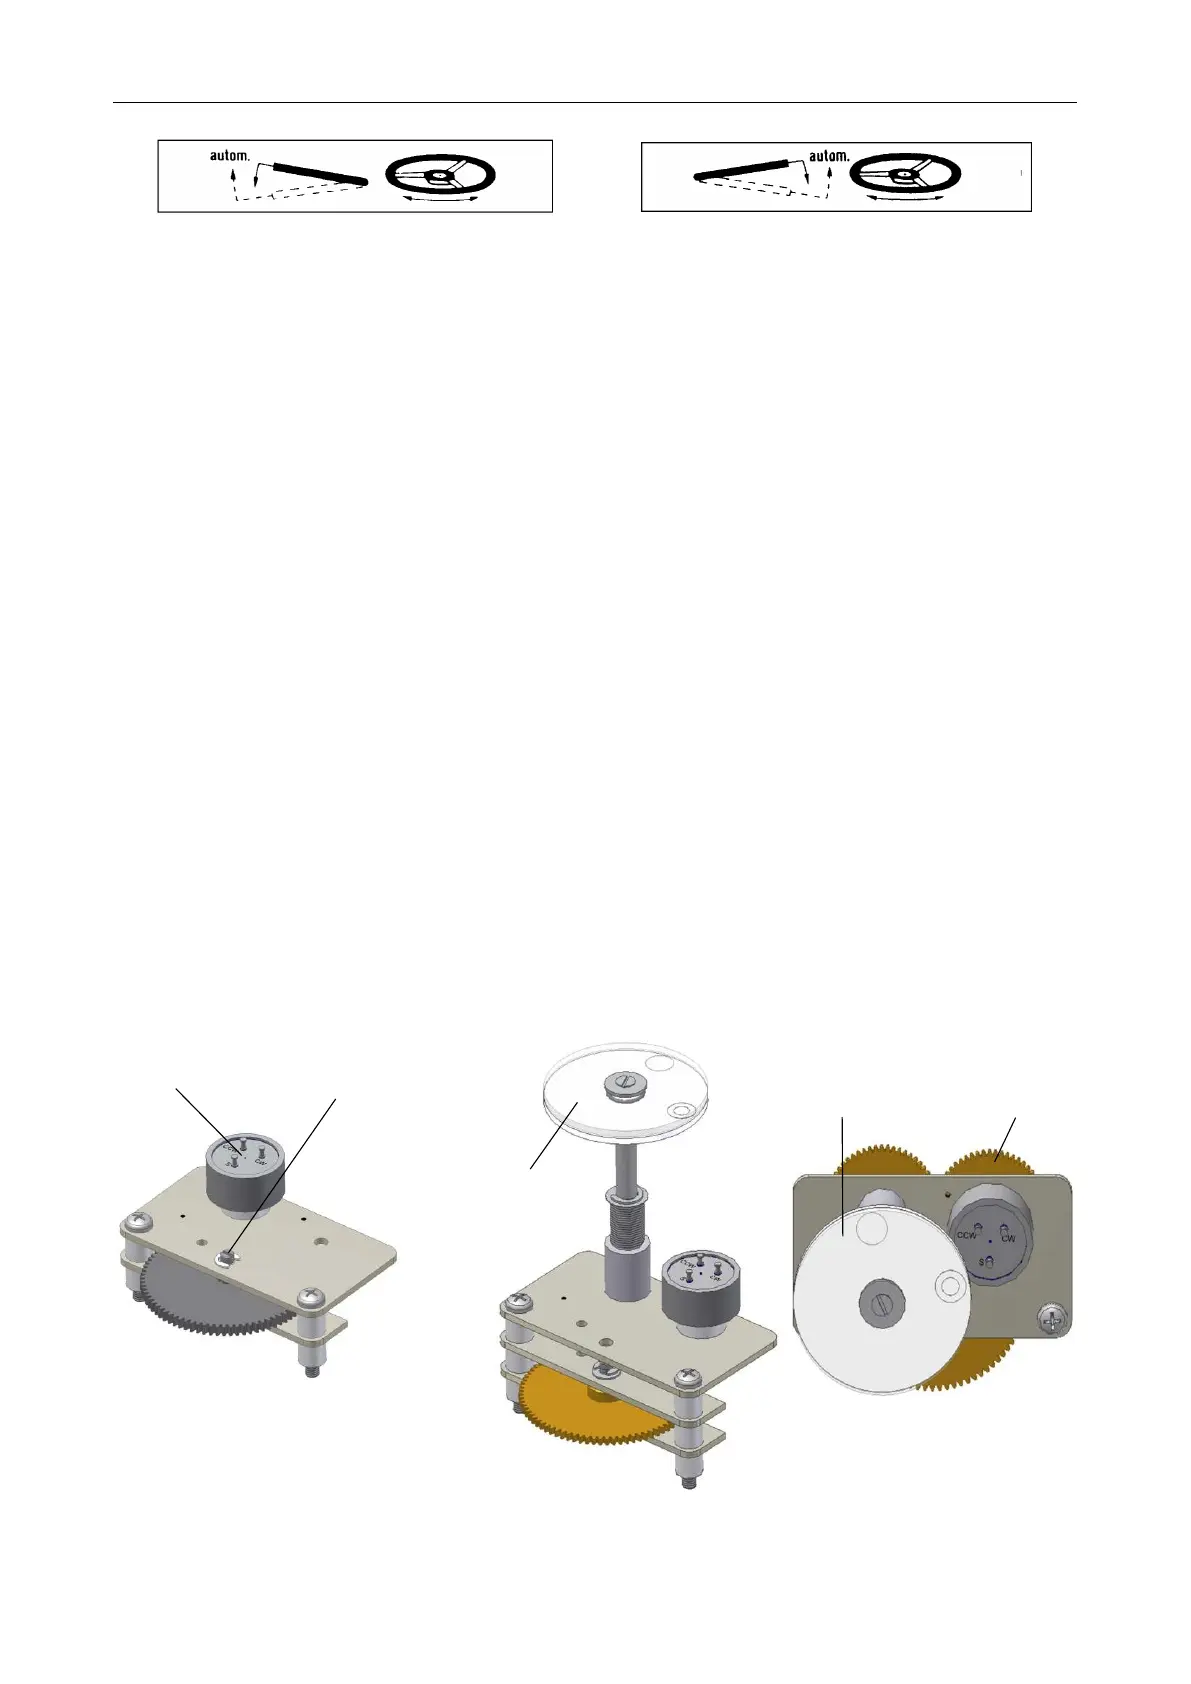
• Switch with the hand lever to manual operation (see section 5.2, page 12) and turn the actuator with the
handwheel to the next end position
• Remove cover of the signalling unit
• Switch with the control switch (black switch) to the status menu S4 (see section 8.1.4, page 43)
• For units without mechanical position indicator turn the slotted shaft (see Figure 17) with a screwdriver
carefully until the below value is reached (see Figure 20)
– when the actuator in in the closed position: Pos: 10.0
– when the actuator is in the open position: Pos: 90.0
• For units with mechanical position indicator turn the wheel (see Figure 18 and Figure 19) until the below
value is reached (see Figure 20)
– when the actuator in in the closed position: Pos: 10.0
– when the actuator is in the open position: Pos: 90.0
• Close cover of the signalling unit. Take special care upon reassembly so that seals are not damaged and
remain properly fastened
Figure 17: 1. . . potentiometer
for position sensing,
2. . . slotted shaft for
turning the poten-
tiometer
Figure 18: 1. . . mechanical
position indicator
Figure 19: 1. . . mechanical
position indicator,
2. . . wheel turning the
potentiometer
13