Assembly and settings
Mount sensor - position "Gripper open" or "Part gripped (I.D.
gripping)"
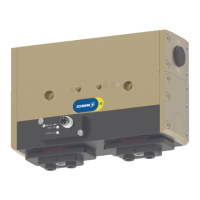
1. Loosen the screw(7) on the bracket(6).
2. Slide the sensor(1) to the stop into the bracket(6).
3. Tighten the screw(7) on the bracket (6).
✓ Tightening torque: 0.2Nm
4. Put product in the position in which it is to be set.
5. Position the bracket(6) together with the sensor(1) at one end
of the sensor rail(2). Slowly slide the bracket(6) from the
outside inwards until the sensor switches.
Secure the bracket(6) in this position with screw(8).
✓ Tightening torque: 0.2Nm
6. Bring the product into position "Gripper open" or "Part gripped
(I.D. gripping)" and test the function.
Mount sensor - position "Gripper closed" or "Part gripped (O.D.
gripping)"
1. Loosen the screw(7) on the bracket(6).
2. Slide the sensor(1) to the stop into the bracket(6).
3. Tighten the screw(7) on the bracket(6).
✓ Tightening torque: 0.2Nm
4. Put product in the position in which it is to be set.
5. Slide the bracket(6) together with the sensor(1) to the center
of the sensor rail(2). Slowly slide the bracket(6) outwards until
the sensor switches.
Secure the bracket(6) in this position with screw(8).
✓ Tightening torque: 0.2Nm
6. Bring the product into position "Gripper closed" or "Part
gripped (O.D. gripping)" and test the function.
3502.00 | PGL-plus-P | Assembly- and Operating Manual | en | 1508050