Page 166
STAT
IM
2000/2000S Service Guide
96-106775 Rev 5.0
8. Water Pumps, Reservoir, and Compressor
6. Cut the cable tie (8) holding the pump inlet tube (9) to the pump inlet fitting (10). Disconnect the
tube.
7. Using a 3/8-inch wrench disconnect the white Teflon™ tube (11) from the pump outlet fitting
(12).
8. Using a 9/16 inch wrench on the pump inlet fitting and a 9/16 inch wrench on the pump body
inlet fitting (10), unscrew the inlet fitting.
9. There is a mesh filter (14) inside the pump inlet fitting and a rubber seal (15) on the outside
threaded end of the fitting. From the threaded end of the fitting, insert a blunt instrument and
gently push the filter out. If the filter does not come out, soak the fitting until the deposits have
been dissolved.
10. Inspect the filter and remove any debris. If the filter is damaged, replace the pump inlet fitting.
If not, soak the fitting until the deposits have been dissolved. Rinse with clean water.
11. Insert the filter and reassemble the inlet fitting to the pump body inlet fitting. Ensure that the
rubber seal is in place. Tighten the fitting finger tight and using a 9/16 inch wrench, tighten one
half turn ONLY so as not to damage the internal thread of the plastic pump fitting.
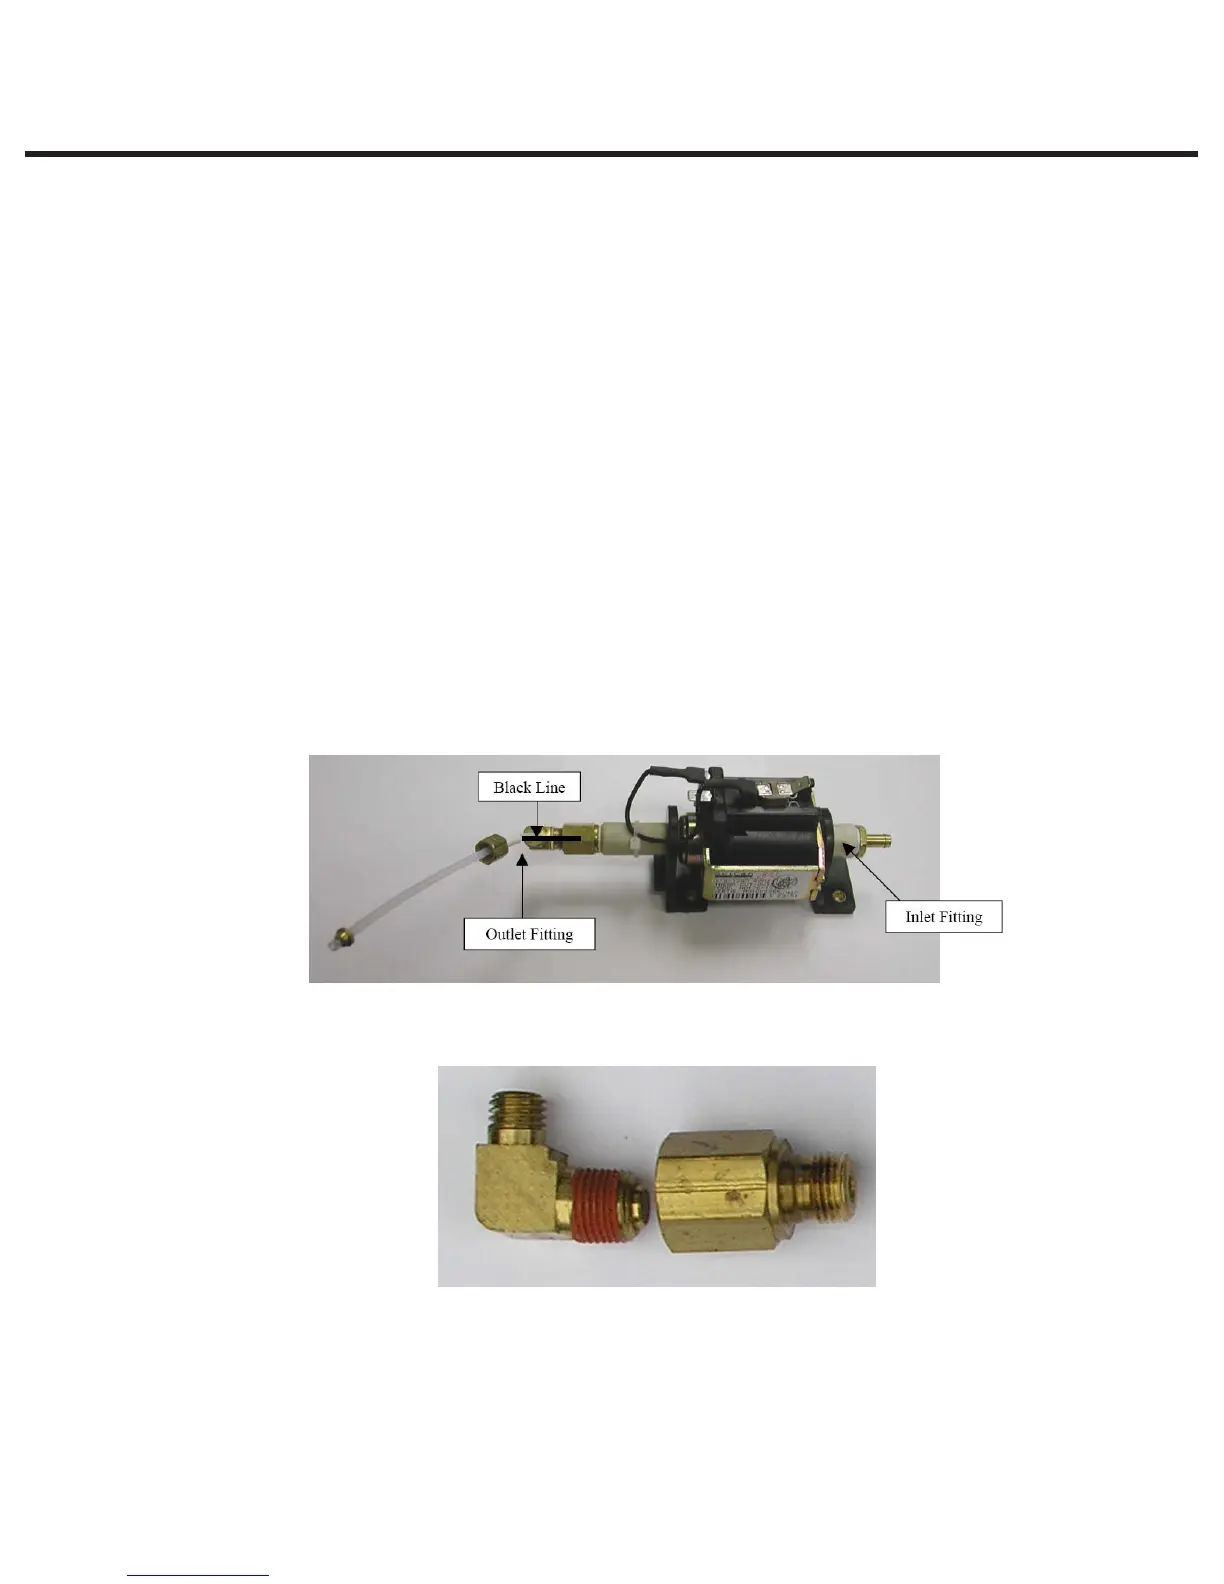
12. Using a 7/16 inch wrench, disconnect the right angle fitting and collar sub assembly while
holding the pump body outlet fitting (17) with a 9/16 inch wrench and clean the threads of any
debris. Note the orientation of the fitting relative to the steam generator (18).
Tip: Draw a black line through the three parts on the output side of the pump to ensure correct
orientation when re-assembling.
13. Clamp the right angled filter fitting using an adjustable wrench or a vice if available, and
unscrew the collar with a 9/16 inch wrench.
14. There is an insert (19) containing a fine mesh filter in the end of the right angle fitting. This filter
cannot be removed from the fitting. If there are any deposits on the mesh, clean off with a
stiff, non-metallic brush. If available, an air line can be used to purge the debris from the filter
Filter fitting and collar assembly (dis-assembly)
Figure 7
Figure 8
STATIM 5000/5000S/5000 G4 Service Guide