Page 175
STAT
IM
2000/2000S Service Guide
96-106775 Rev 5.0
8. Water Pumps, Reservoir, and Compressor
STATIM 5000/5000S/5000 G4 Service Guide
Reinstalling the SciCan Pump Assembly
To install the pump assembly follow, these steps (see Figure 16):
1. Slide the pump assembly, inlet side of the pump away from the steam generator, onto the
chassis. Position the rubber brackets (9) so that the mounting holes align with the threaded
holes in the chassis. Secure the four shoulder screws (10) using Locktite
®
Threadlock Perma-
lock compound LM113 or equivalent. Do not kink the Teflon
™
tube.
2. Push the open end of the rubber pump inlet tube (2) extending from the water reservoir on to
the pump inlet fitting (3) as far as it will go. Secure the tube to the fitting using a cable tie (1).
3. Thread the compression nut (4) on the Teflon
™
tube (5) to the inlet fitting (6) on top of the steam
generator (7) finger tight. Tighten this nut using a 3/8-inch wrench. Do not overtighten.
4. Connect the fast-on terminal connectors (8) to the pump. The white wire (11) is connected to the
pump body, the black wire (12) to the thermal fuse.
5. Reinstall the compressor assembly and (if present) the pressure transducer.
6. A dielectric strength test (Hi-Pot) and a protective bonding impedance test (ground continuity)
must be performed on the STATIM unit.
NOTE: These tests must be performed on the STATIM again once the work is completed and
the cover has been returned to the unit.
7. Make sure there is sufficient steam-process distilled water in the reservoir and activate the
pump using the Control Box for 5 seconds to ensure that the pump is functioning.
8. Run a sterilization cycle and observe all fittings and tubes for leaks. Check LCD read-outs for
messages indicating cycle status.
9. Reinstall the cover. See STATIM Cover Removal and Replacement.
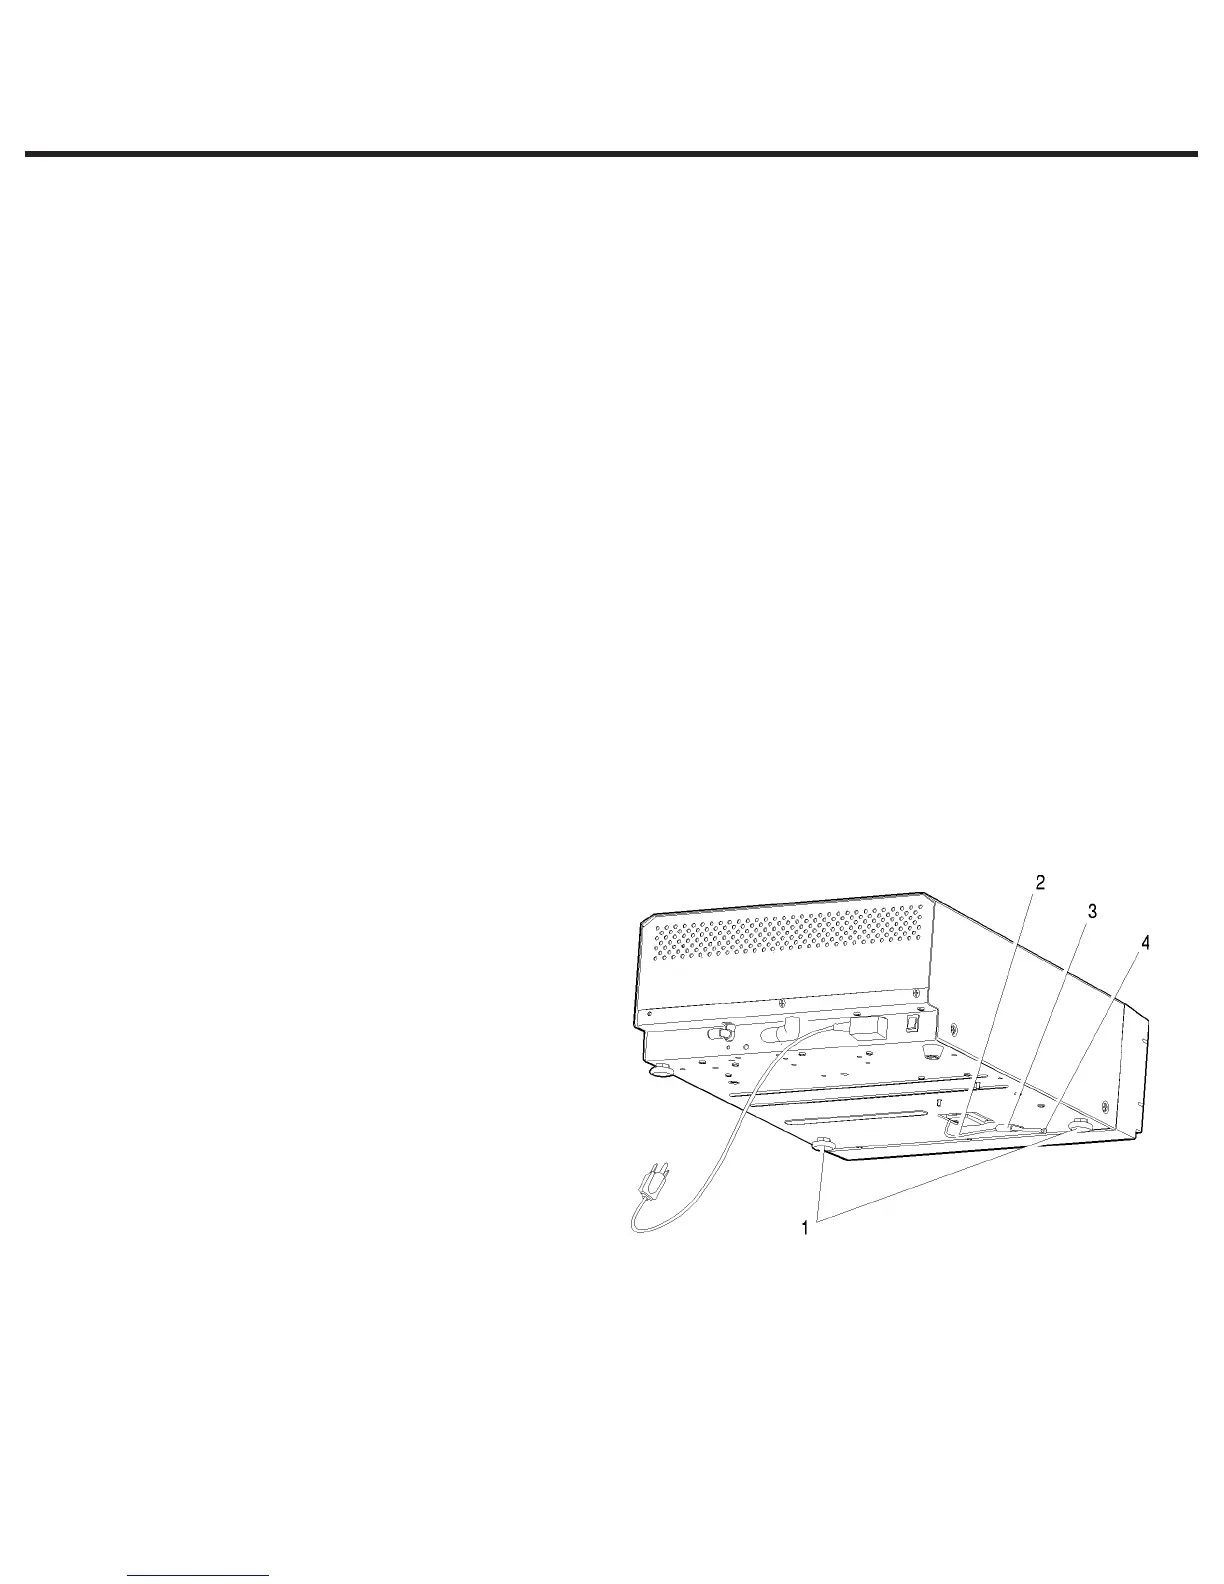
Priming STATIM 5000 /
5000S Pumps
To prime a STATIM 5000 / 5000S pump,
follow these steps (see Figure 17):
1. Be sure there is steam process
distilled water in the reservoir.
2. Move the STATIM unit to the edge of
the work surface. The front leveller feet
(1) should be approximately one half
inch from the edge so the unit remains
securely seated on the work surface.
3. Lift the front left corner of the unit
upward and remove the drain tube
(2) from the clip (3) located on the
underside of the unit. Gently pull the
tube out as far as possible so the free
end can be positioned over a water container after the unit is lowered back to the work surface.
4. Remove the stopper (4) from the end of the drain tube and allow the water to drain from the
reservoir. Allow a strong steady stream to flow into the container for a minimum of 30 seconds.
5. Replace the stopper.
6. Lift the front left corner of the STATIM unit upward and re-insert the tube into the clip on the
underside of the unit. Push the excess length of tubing back from where it came.
1. leveller feet
2. drain tube
3. clip
4. stopper
Figure 17