Page 263
STAT
IM
2000/2000S Service Guide
96-106775 Rev 5.0
13. Installation
Connecting STAT
IM
5000 G4 to a Network
The STAT
IM
G4 has a 10/100Base-T Ethernet port located at the back of the unit.
To connect it to a network using a router, follow these steps:
1. Connect the network cable to the Ethernet port at the back of the unit. If the customer’s
office uses a router, the router should automatically assign the unit an IP address. You will
know the IP address has been assigned when the red X over the Network icon disappears.
NOTE: In some circumstances, where there is no router, for example when using Windows
Network Sharing, you may have to assign a dedicated or ‘static’ IP address. To assign a static
IP address, contact your local network administrator.
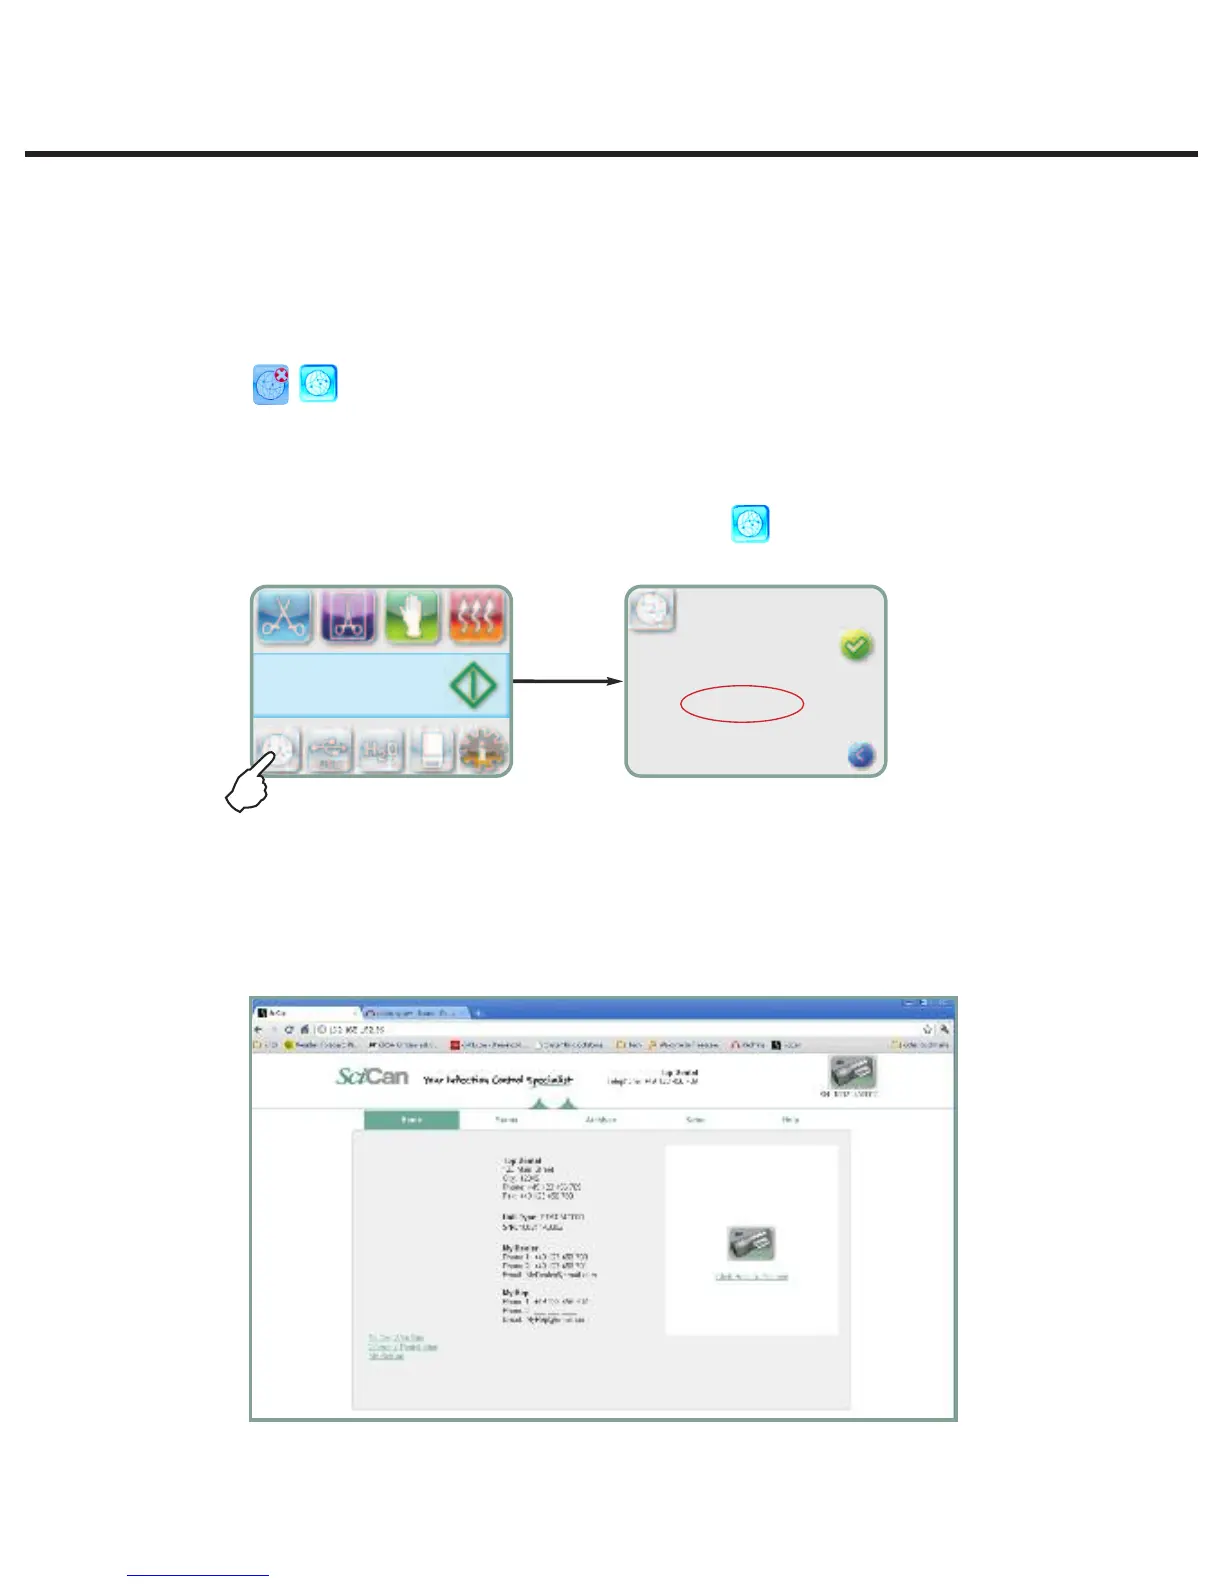
2. From the main screen, press the NETWORKING icon . The Networking screen displays
information about the STAT
IM
’S connectivity, including its IP address.
3. Type the IP address displayed on the touchscreen into the browser of any computer
connected to the same network as the STAT
IM
to access your unit’s web portal. You will know
that an IP address has been assigned when the red X over the Network icon disappears.
NOTE: Connection time will vary depending on the network speed, and making an initial
connection may take longer.
STATIM 5000/5000S/5000 G4 Service Guide
Page 13
STATIM 5000 G4 Service Guide
Connecting to a Network
The STATIM G4 has a 10/100Base-T Ethernet port located at the back of the unit.
To connect it to a network using a router, follow these steps:
1. Connect the network cable to the Ethernet port at the back of the unit. If the customer’s
office uses a router, the router should automatically assign the unit an IP address.
You will know the IP address has been assigned when the red X over the Network icon
disappears.
NOTE: In some circumstances, where there is no router, for example when using
Windows Network Sharing, you may have to assign a dedicated or ‘static’ IP address.
To assign a static IP address, contact your local network administrator.
2. From the main screen, press the NETWORKING icon . The Networking screen
displays information about the STATIM’S connectivity, including its IP address.
3. Type the IP address displayed on the touchscreen into the browser of any computer con-
nected to the same network as the STATIM to access your unit’s web portal. You will know
that an IP address has been assigned when the red X over the Network icon disappears.
NOTE: Connection time will vary depending on the network speed, and making
an initial connection may take longer.
mm/dd/yyyy hh:mm:ss
SELECT A CYCLE
MAC: xx:xx:xx:xx:xx:xx
DHCP
Link: On
Bind: dhcp
IP: xxx.xxx.xxx.xxx
MASK: xxx.xxx.xxx.xxx
GATE: xxx.xxx.xxx.xxx
DNS1: xxx.xxx.xxx.xxx