© 2014 SeaStar Solutions Optimus Installation Manual, Rev. E
5-13
REFER TO PAGE 5-14 THROUGH PAGE 5-17 FOR THE CORRECT
TORQUE SPECIFICATIONS FOR THE APPROPRIATE INSTALLATION.
FAILURE TO CORRECTLY INSTALL THE SMARTCYLINDER AND
TORQUE ALL SCREWS MAY RESULT IN STEERING FAILURE,
WHICH COULD RESULT IN PROPERTY DAMAGE, PERSONAL
INJURY AND/OR DEATH.
4. a) Screw the adjusting nut (Item 10) onto tilt tube. b) Place the
stainless washers (Item 11) and the plastic spacers (Items 7 &
8) on the support rod.
IT IS HIGHLY RECOMMENDED THAT THE TILLER BOLT HEAD
IS HELD IN PLACE WITH A WRENCH WHILE THE TILLER NUT
IS TORQUED TO THE PROPER SPECIFICATION. FAILURE TO DO
SO MAY RESULT IN LOSS OF STEERING CONTROL CAUSING
PROPERTY DAMAGE, PERSONAL INJURY AND/OR DEATH.
REFER TO THE SPECIFIC APPLICATION FIGURE FOR PROPER
ORIENTATION OF SPACERS ON BOTH SIDES OF THE ENGINE TILT
TUBE.
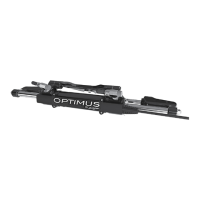
5. Attach and secure the support brackets (Item 12) to the support
rod and the cylinder shaft. Tighten using the nuts, bolts and
washers (Items 3, 4, 5 & 6) as illustrated in application figures.
6. Eliminate the free play in the support rod by turning the
adjusting nut (Item 10) counter clockwise until snug. Never use
a wrench on the adjusting nut. Always hand tighten. Lock the
adjusting nut in place by tightening the Hexagon set screw.
WARNING
WARNING
WARNING