Test Spin Page -2-
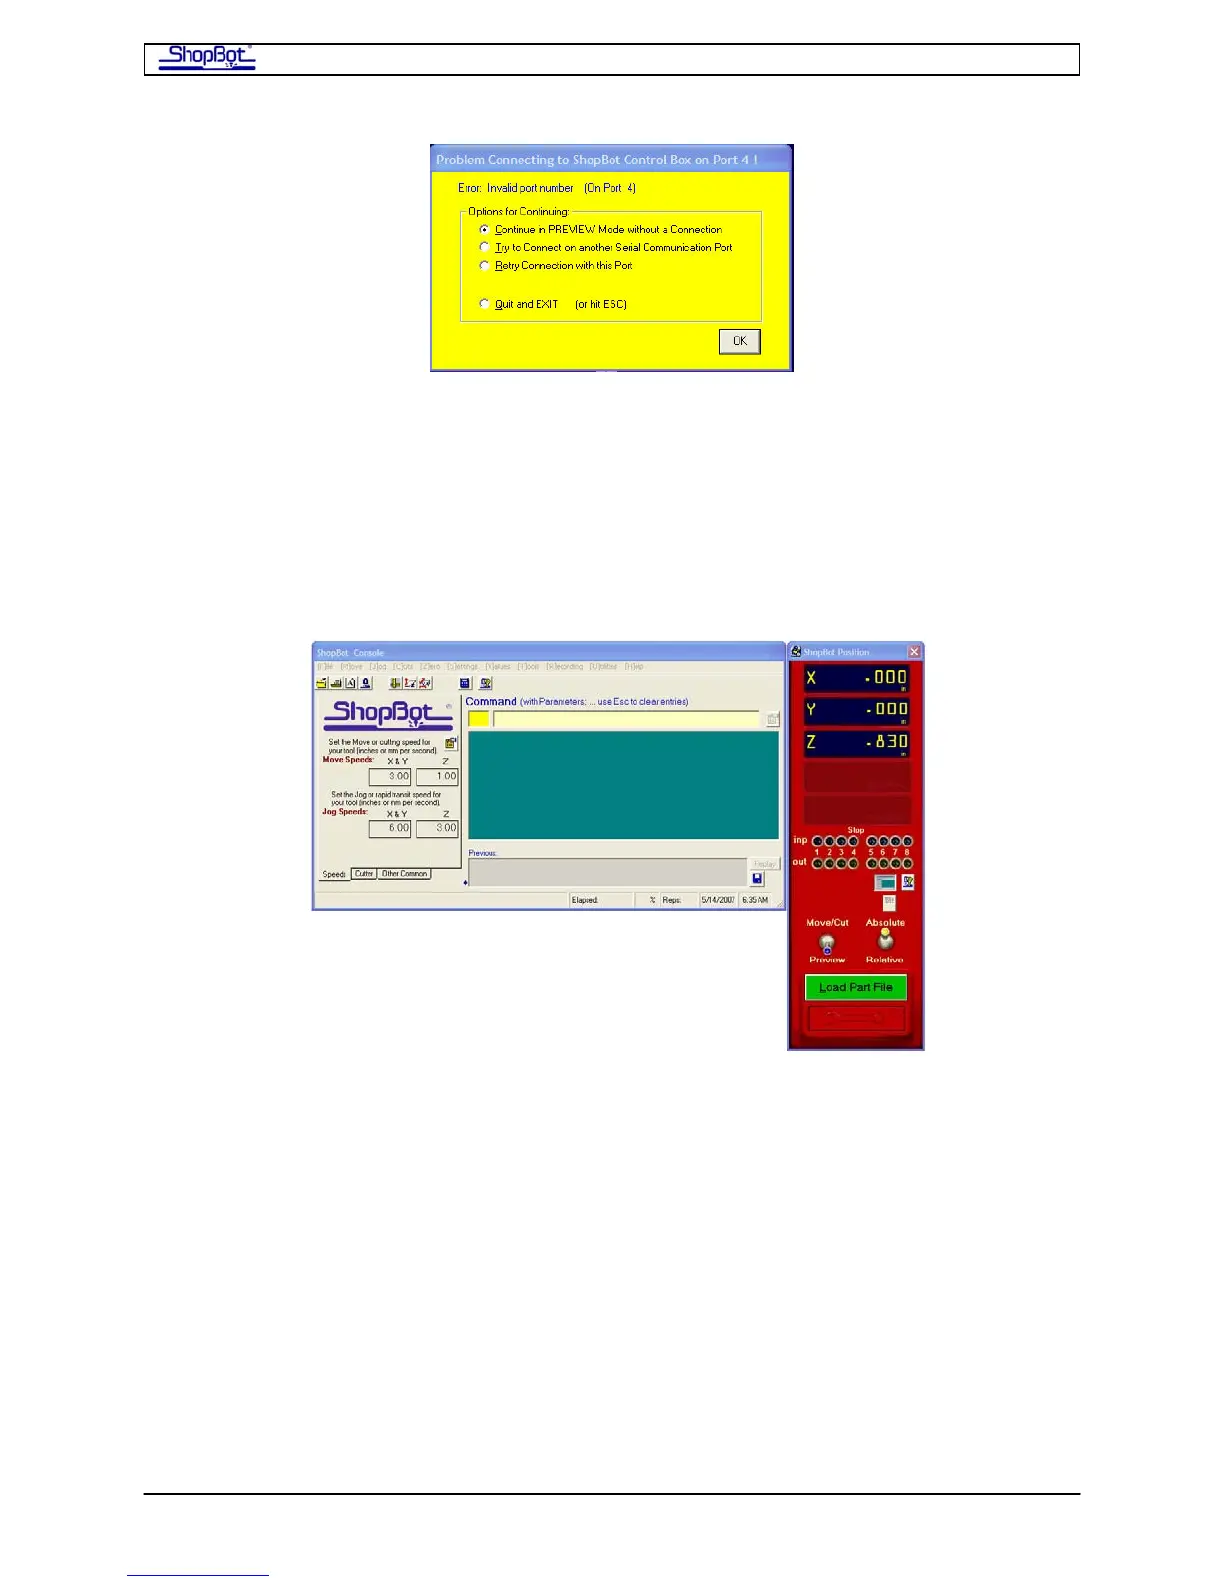
The software tries to establish a connection to your ShopBot on a default communications
port number (usually COM4). If the yellow screen appears, choose “Try to Connect on
Another Port” and hit OK. Then click the button to ‘Automatically Find’ your ShopBot. When
the correct port is located, click OK. The connection will be established and the port will be
remembered for future starts.
There is information in the README file on establishing connections is you have a problem,
and also in the Troubleshooting section under Help in the Software.
Once you are connected, the ShopBot Control Software will bring up two Windows. The red
one is the Locations Display for your tool. The second screen is the Control Console which is
the place you to enter Commands to tell your ShopBot what you would like it to do.
You can use the keyboard or mouse to select commands from the Main Menu bar, or you
can enter two letter ShopBot Commands right into the Command Box on the Console.
• Before starting, let’s just check a few settings. First, make sure that the Distance
Switch on the red panel is set to ‘Absolute’ (Up). And, then let’s set the current
location to zero by typing ‘Z3’ at the keyboard (the Location Display should now
show 0 in all axes).
• ‘Z3’ is an example of a ShopBot 'Command' instruction. From here on, and in the
manual Commands will be indicated with brackets, for example [Z3]. With ShopBot
Commands you only need to type the two letters in the appropriate space. There are
drop-down menus that remind you of the meaning of these Commands letters. This
is fun, so relax and enjoy.
TestSpinPRS080916 Copyright 2008 ShopBot Tools, Inc