Installing the Inverter
SolarEdge Installation Guide – MAN-01-00002-1.6
40
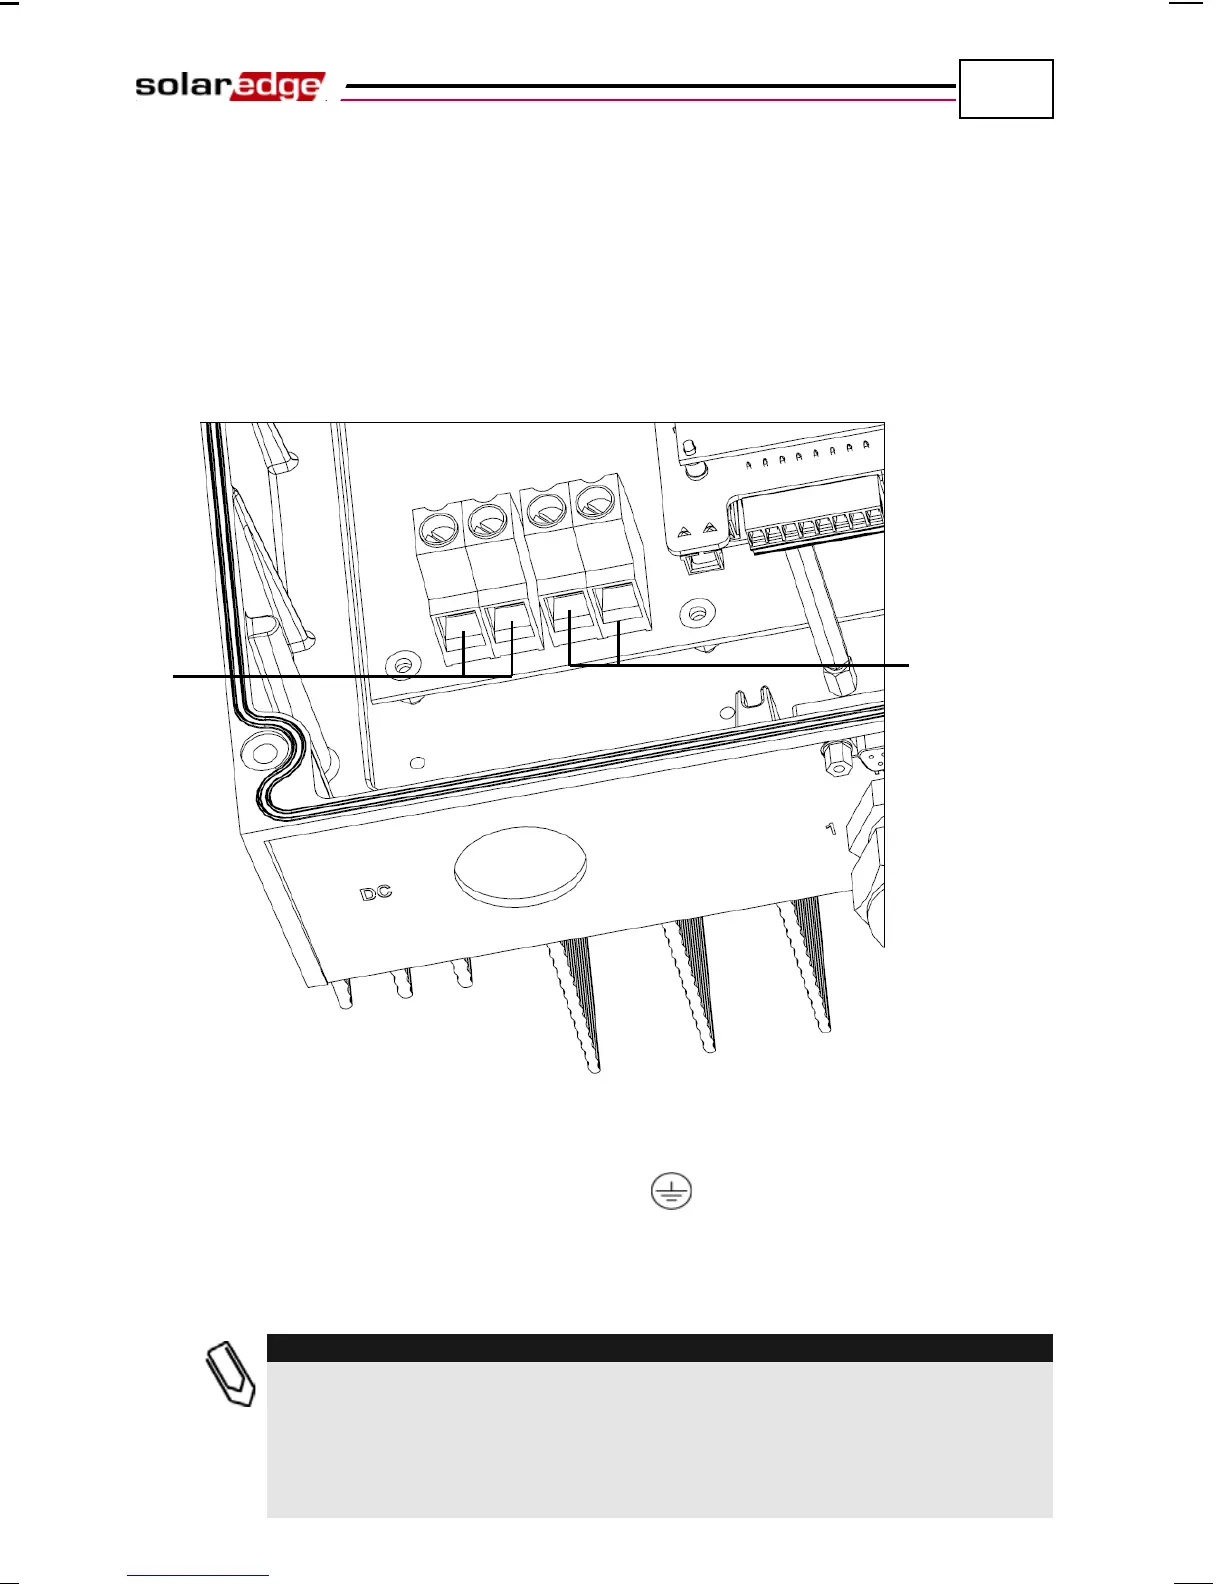
Connecting Cables to the Single Phase Inverter Chassis
► To connect DC cables to the Single Phase Inverter:
1 Connect the DC connectors from the photovoltaic installation to the DC+ and
DC- connectors as indicated.
Two strings may be connected in parallel to both DC inputs of the inverter.
They are simply wired together in the terminal block inside.
Figure 16: DC Cable Conduit Opening and Terminals
2 Connect the DC equipment grounding to the terminal block directly
connected to the chassis with the symbol .
If more than two strings are required, they can be connected in parallel in an
external combiner box before connecting a unified DC connection to the
inverter.
If more than two strings are connected each should be properly fused on both
DC+ and DC
- according to NEC690.35(B).
Due to the SolarEdge architecture, the parallel strings may be of different
lengths and therefore do not necessarily need to be connected to an identical
number of power optimizers.