24
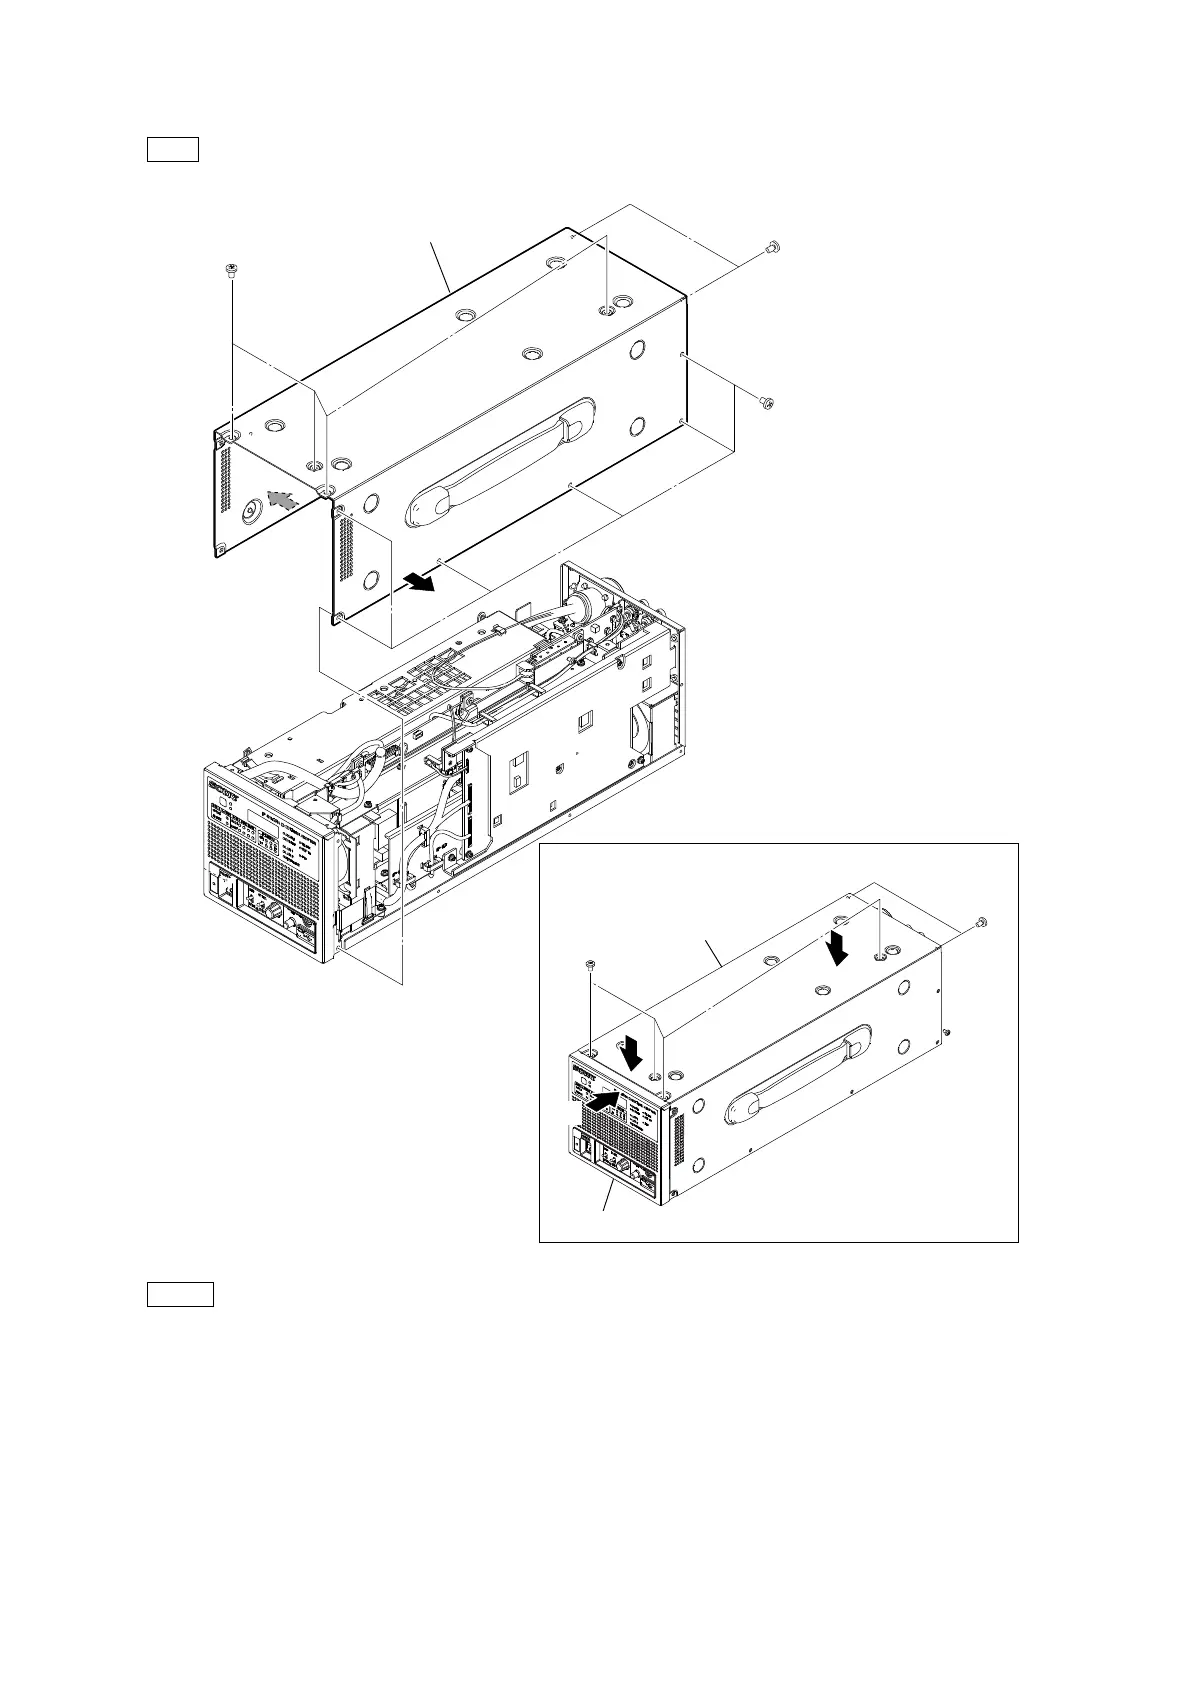
2. Remove the 12 screws, and then remove the top cover.
Tip
When removing the top cover, slightly extend it in the directions of the arrows (A).
Note
• At the time of the installation, tighten the screws in the following sequence: [a], [b], others.
• At the time of the installation, press the top cover in the direction of the arrow (B) and tighten the screws [a].
• At the time of the installation, press the front panel assembly and the top cover in the direction of the arrow (C) and tighten
the screws [b].
3. Install the removed parts by reversing the steps of removal.
B3 x 5
(A)
(A)
Top cover
Directions to press the top cover during installation
B3 x 5
[a]
B3 x 5
[a]
B3 x 5
[b]
B3 x 5
[b]
Top cover
Front panel assembly
(B)
(C)
(C)