50
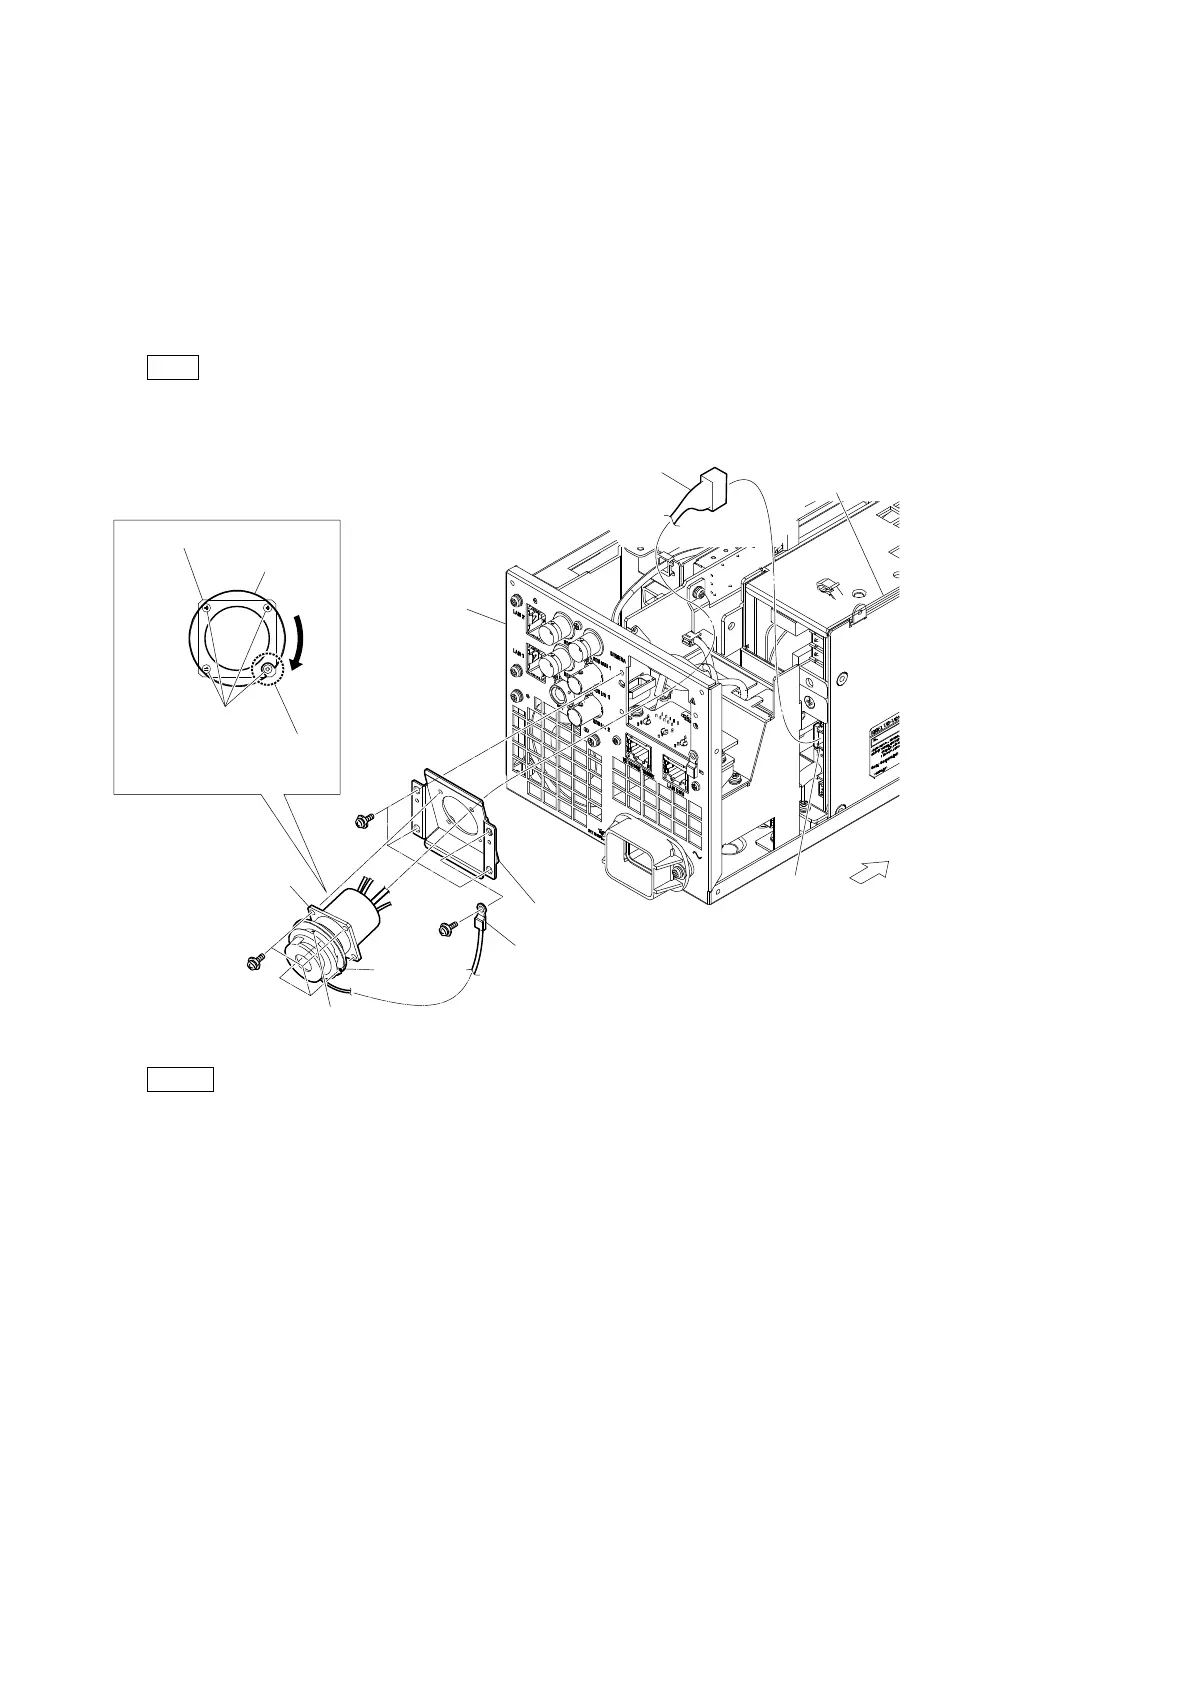
2-7-2. TAJIMI Connector Assembly
Preparation
1. Remove the top cover. (Refer to “2-2. Top Cover”.)
2. Remove the optical fiber cable. (Refer to steps 1 to 3 in “2-7-1. LEMO Connector Assembly”.)
Procedure
1. Disconnect the harness from the connector (CN5004) on the RE-345 board.
2. Remove the four screws, and then remove the TAJIMI connector assembly.
Tip
Align the notch of the ring with the screw position and remove the screws.
3. Remove the four screws, and then remove the lug terminal and TAJIMI CN bracket.
Note
• When attaching the TAJIMI connector assembly, install it with the red mark up.
• When attaching the TAJIMI connector assembly, secure the connector assembly temporarily using the four screws, then fully
tighten them.
4. Install the removed parts by reversing the steps of removal.
Front side
Ring
PSW
3 x 8
PSW
3 x 8
PSW
3 x 8
Rotate the ring, align the notch
with the threaded portion, and
remove the four screws.
Screws
Ring
CN5004
TAJIMI connector
assembly
TAJIMI connector assembly
Lug terminal
Red mark
TAJIMI CN bracket
Harness
Rear panel
assembly
RE-345 board