377
To select and set all outputs, place a check mark in the
Select All checkbox.
3
Adjust the conversion method.
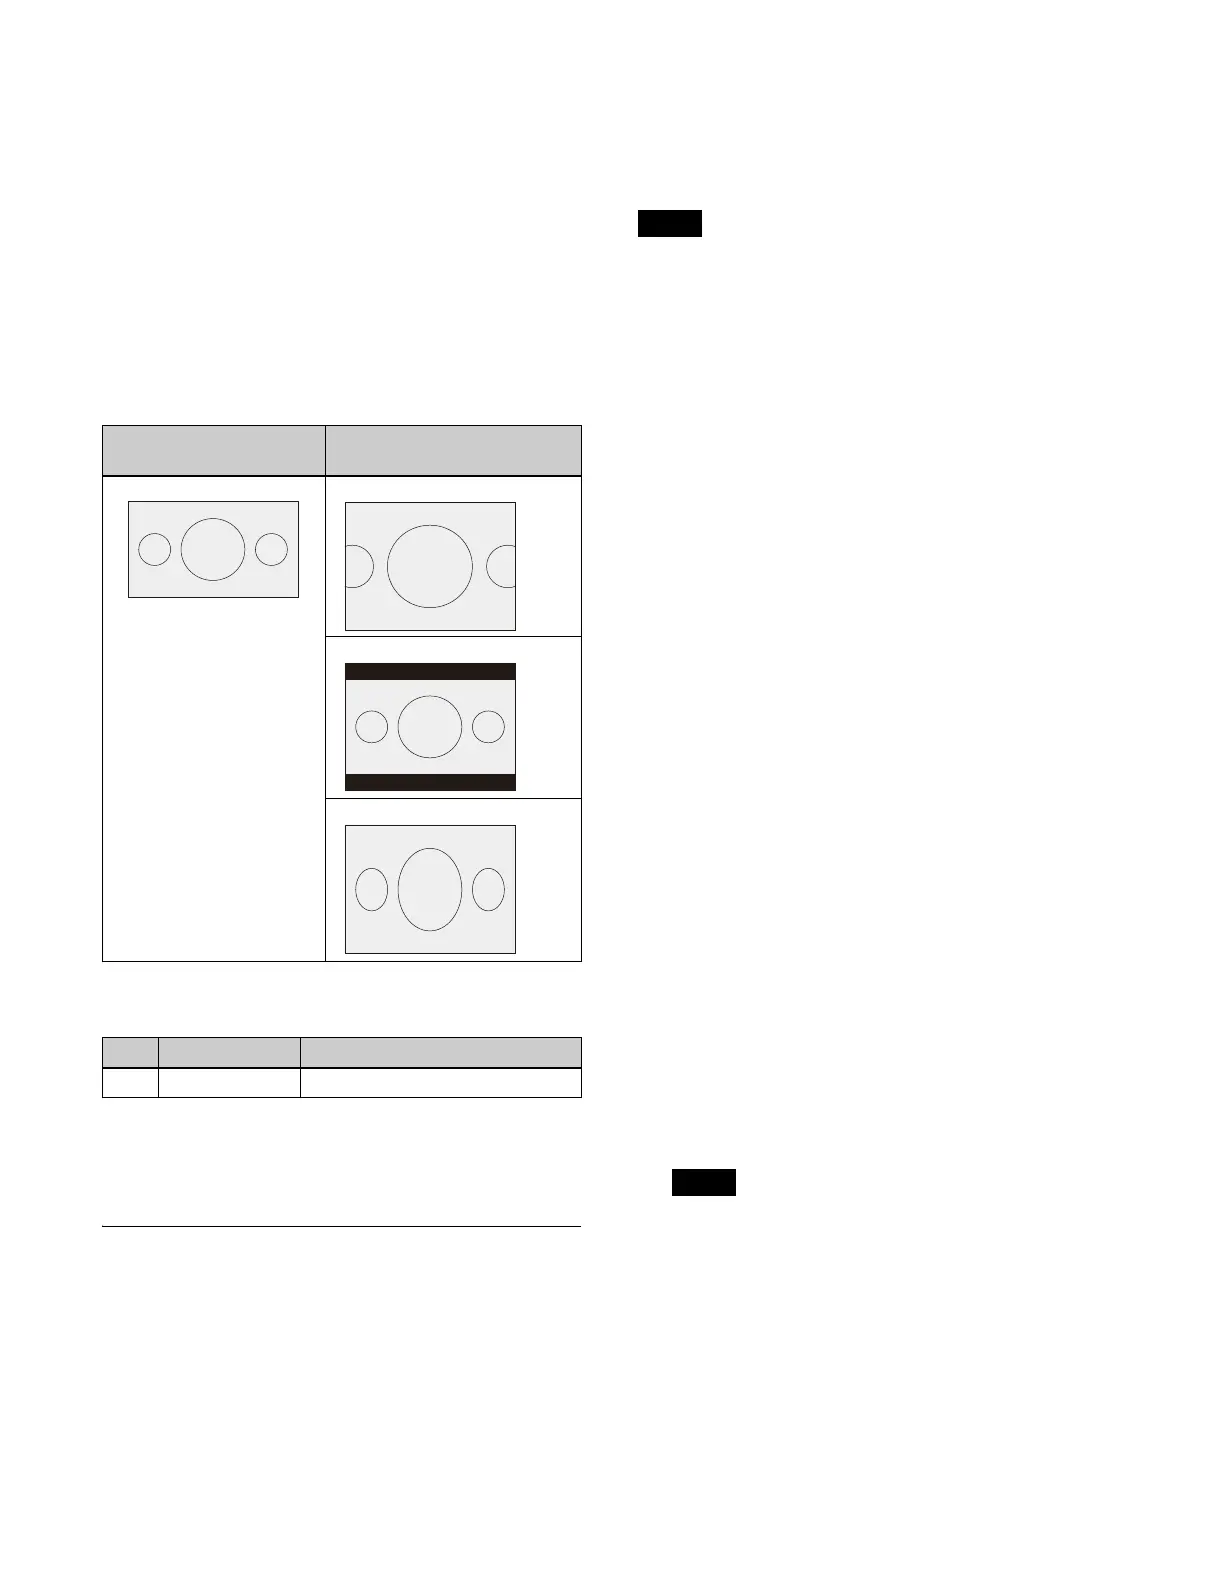
To set the down-converter aspect ratio
Press the [Aspect] butt
on and select an aspect ratio from
the pull-down list.
Edge Crop:
Crop the left and right sides of a 16:9 image
to convert it to a 4:3 image.
Letter Box: Ad
d black bars on the top and bottom of a
16:9 image to convert it to a 4:3 image.
Squeeze: Com
press a 16:9 image horizontally to covert it
to a 4:3 image.
When [Edge Crop] is selected, press the [Position] button
and se
t the following parameter.
To return the conversion method settings to the
defaults
Press the [Default] button.
Setting an HDR Converter
You can set the output signal OETF, color space, and
HDR converter for outputs that have color corrector/HDR
converter enabled.
For details about each HDR conversion item, see
“Setting HDR” (page 367).
For details about outputs that can be configured with a
color correct
or/HDR converter, see “Selecting Outputs
Configurable with a Color Corrector/HDR Converter”
(page 375).
• To use the HDR converter function, the XZS-G1750
HDR Converter License (option) is required.
• When the system signal format is 1080P, 1080i, or
720P, an HDR converte
r cannot be used.
1
Open the Home > Setup > System > Output > HDR
Converter menu (19101.46).
The system OETF, color space
, and HDR settings are
displayed in [System Settings].
2
Select the target output to set.
To select and set multiple outputs, place a check mark
besi
de the target outputs to set.
To select and set all outputs, place a check mark in the
Se
lect All checkbox.
3
Press the [Output Signal OETF] button and select an
OETF from the pull-down list.
Select [SDR], [HLG], [PQ], [S-Log3 (HDR)], or [S-
Log3 (Live
HDR)].
4
Press the [Color] button and select a color space from
the pull-down list.
Select [BT.709] or [BT.2020].
5
Enable/disable the system settings using the [Follow
System Settings] switch.
On:
Enable system settings. Apply the system
settings to the output signal.
Off: Di
sable system settings. Apply different settings
than the system settings to the output signal.
If the system settings are disabled, press the
[Adjust
Details] button and configure the HDR conversion
settings in the [HDR Converter] window.
When multiple outputs are se
lected, the [Follow
System Settings] switch settings do not change in
unison.
[HDR Converter] window > [Config] tab
Configure in the same way as for an input signal.
For details, see “[HDR Converter] window > [Config]
tab” (page 372).
Image before conversion
(16:9)
Image after conversion (4:3)
Edge Crop
Letter Box
Squeeze
No. Parameter Adjustment
1 EC Position Image position
Notes
Note