3
3
-
-
6
6
2
2
9
9
9
9
4
4
0
0
X
X
C
C
F
F
a
a
d
d
e
e
r
r
R
R
e
e
p
p
l
l
a
a
c
c
e
e
m
m
e
e
n
n
t
t
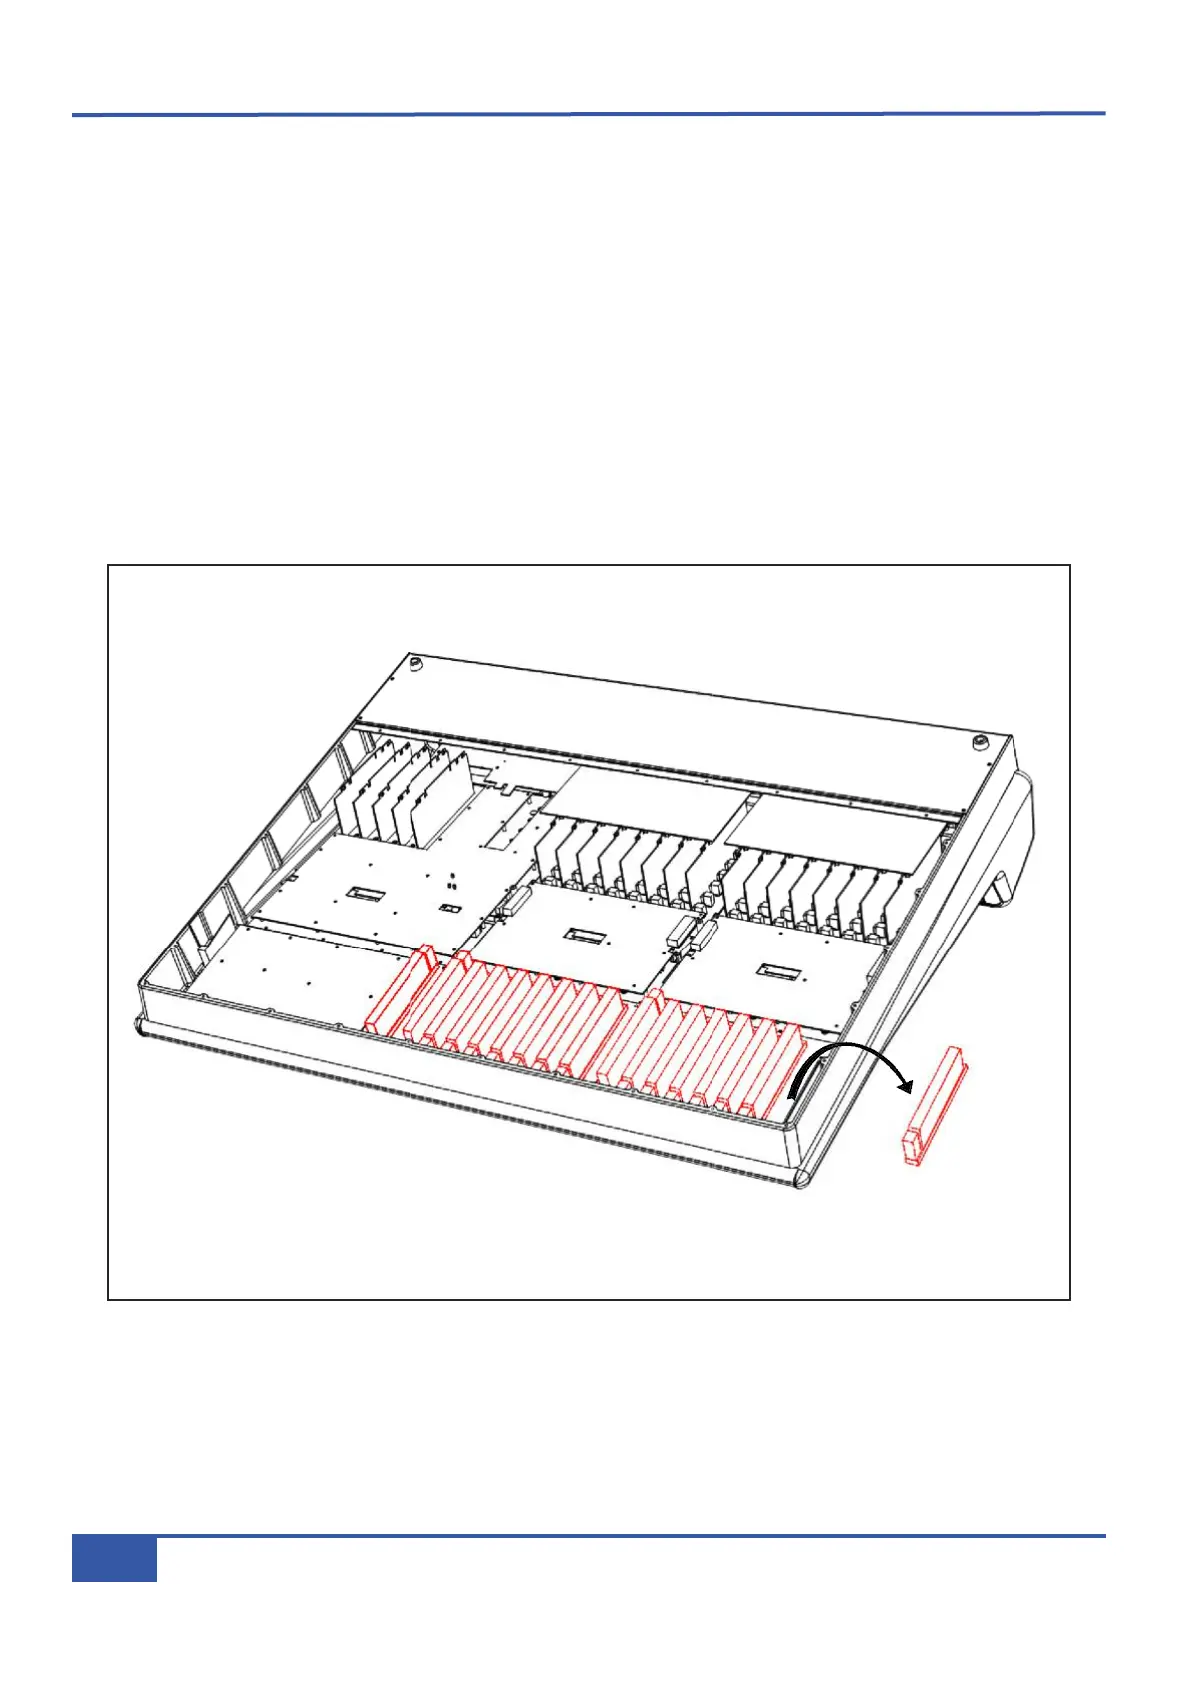
• Remove fader knob cap from the fader to be replaced.
• Loosen but do not remove the two hex screws located at the top and bottom of the fader on the front panel.
• Follow instruction #1 for base plate removal.
• Unplug the two connectors from the fader to the 629502XA assembly.
• Slide the front of the console over the edge of the work surface to gain access to the faders.
•
Remove the two loosened hex screws and remove the fader from the console.
• Fit the replacement part, ensure correct orientation and secure with the two hex screws.
• Connect the fader to the 629502XA assembly, refer to adjacent faders for correct connector order .
• Refit the back panel and rotate the console face upwards.
• Finally, fit the knob cap and test for correct operation.
• No user calibration of the fader is required.
Appendix G - Service
122
Matrix Owner’s Manual