A
A
s
s
s
s
i
i
g
g
n
n
i
i
n
n
g
g
D
D
e
e
v
v
i
i
c
c
e
e
s
s
a
a
n
n
d
d
C
C
h
h
a
a
i
i
n
n
s
s
t
t
o
o
C
C
h
h
a
a
n
n
n
n
e
e
l
l
I
I
n
n
s
s
e
e
r
r
t
t
s
s
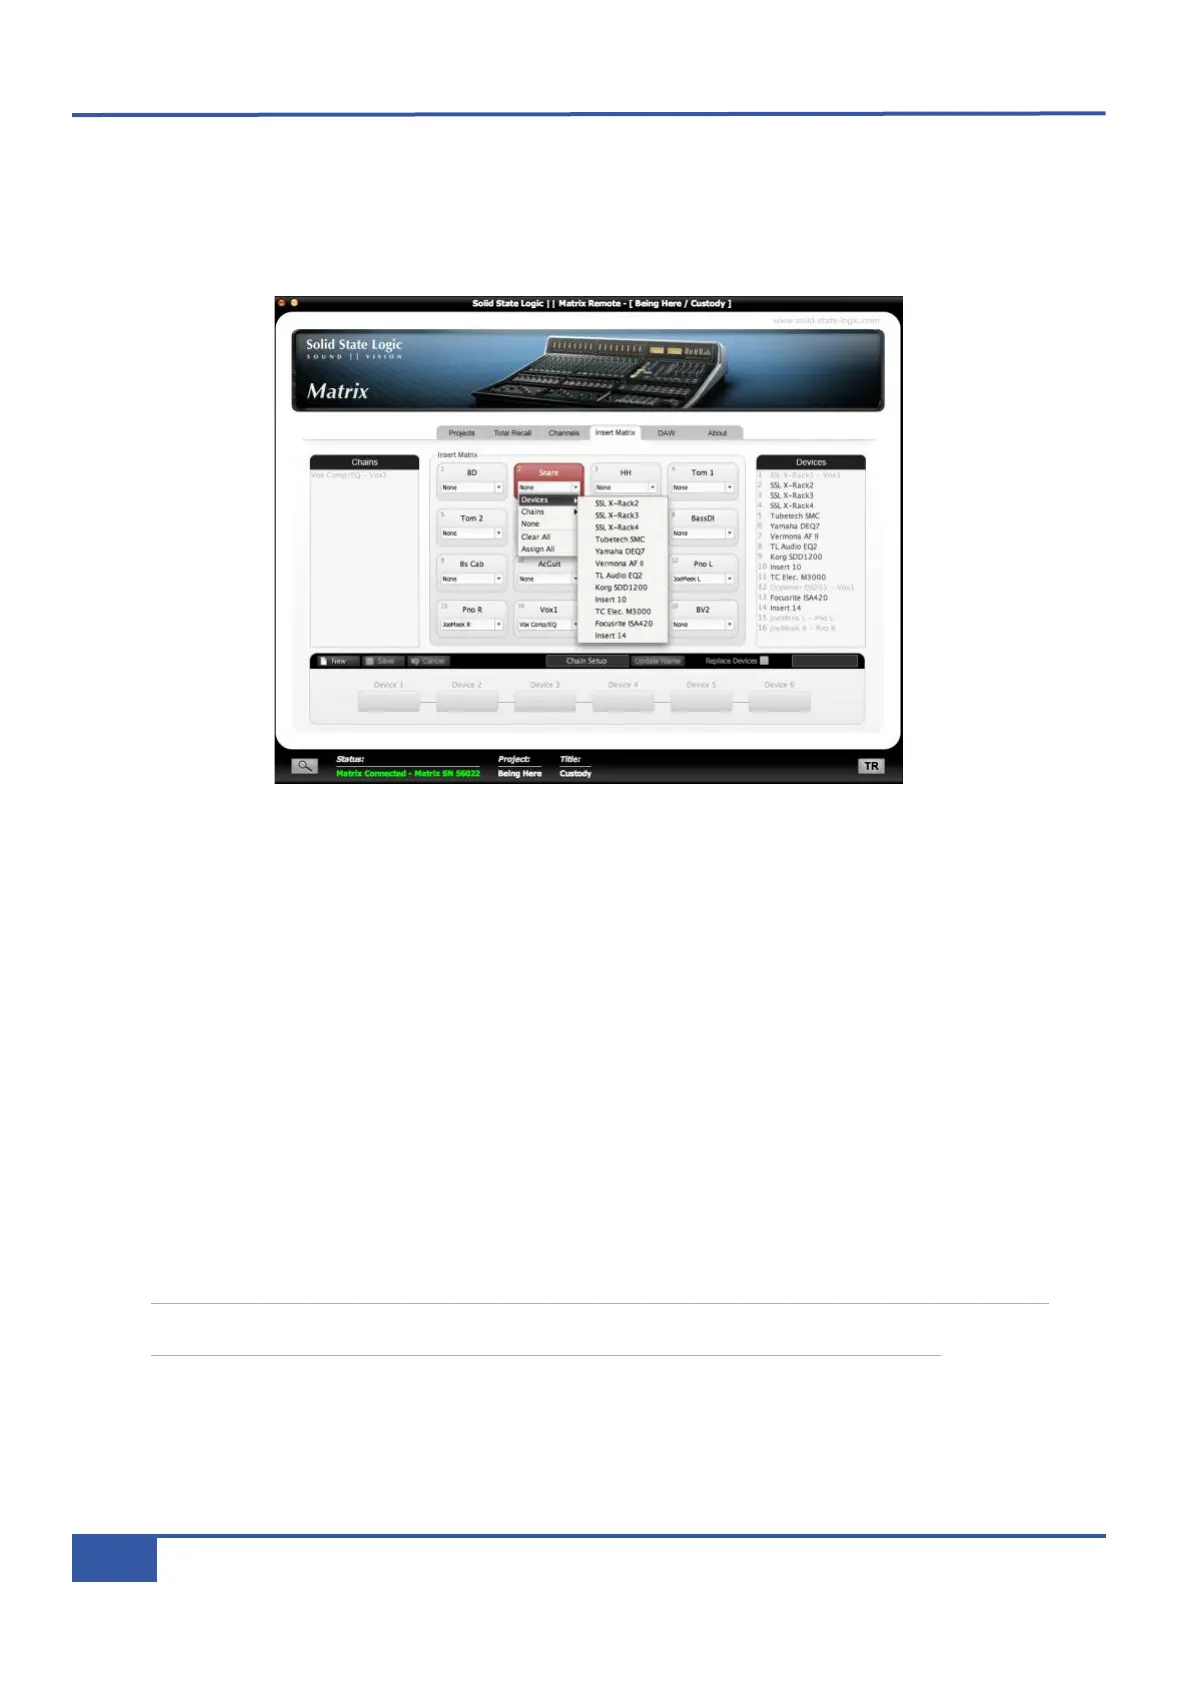
In the centre of the Insert Matrix tab are 16 buttons referring to the 16 Matrix channels, labelled with the names given to them
in the Channels tab. The current insert status of each channel is indicated in the centre of each button. To route a Device or
Chain to a channel’s insert point, press the down arrow in the relevant channel’s button, select Devices or Chains from the
drop-down menu which appears, and then select the specific Device or Chain you wish to insert:
Devices or Chains which have been used will not appear in the drop-down list. Selecting a new Device or Chain will automatically
remove any old assignments from that channel insert.
Assigned Devices and Chains will also be greyed-out from the lists on either side of the Insert Matrix tab and will have the
channel to which they are assigned added onto the end of their name.
Assign All
By default, all the channels are routed to their corresponding insert point, emulating typical patch-bay normalling: Insert 1 is
routed to Channel 1, Insert 2 to Channel 2 and so on. To return to this default routing at any time, select Assign All from any
of the channel drop-down menus and press OK in the warning pop-up which appears.
Clearing Devices and Chains
Individual Device assignments can be removed by pressing a channel’s down arrow and selecting None from the drop-down
menu.
In order to reset the whole Insert Matrix, select Clear All from any of the channel drop-down menus and press OK in the warning
pop-up which appears.
Note that once you have configured the external signal processing for a Matrix channel, you have to drop the Devices into
the channel path by pressing the channel’s INSERT button below the CHIP pot on the Matrix console.
Chapter 4 - Matrix Remote
62
Matrix Owner’s Manual