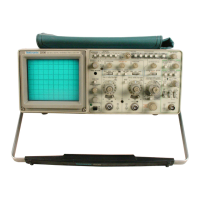
Adjustment Procedure—2230 Service
c. Move the cable from the CH 1 OR X input connector
to the CH 2 OR Y input connector. Set the VERTICAL
MODE switch to CH 2.
10. Adjust/Check Acquisition Vertical Position
Registration (R2138) and Horizontal Position
Registration (R6430 SN-B022102 & Above)
a. Set:
d. Repeat part b using the Channel 2 controls.
VERTICAL MODE BOTH and ALT
8. Check Input Coupling
a. Set both VOLTS/DIV switches to 10 mV.
VOLTS/DIV (both) 10 mV
AC-GND-DC (both) GND
ASEC/DIV 10 ms
b. Set the calibration generator to produce a 20 mV
signal.
b. Position both traces exactly on the center horizontal
graticule line using the Channel 1 and Channel 2 POSI
TION controls.
c. Set the bottom of the signal on the center horizontal
graticule line using the Channel 2 POSITION control.
c. Position the sweep start of the display to the left
most vertical graticule line using the Horizontal POSITION
control.
d. Set the Channel 2 AC-GND-DC switch to AC.
e. CHECK—Display is centered about the center hor
izontal graticule line.
/ 1 1 —. _ iL . -.11— ^ — — _ iL ^ I I A A rt W *.- i - -
A . .
d. Set STORE/NON STORE switch to STORE (button
in).
e. ADJUST—Vertical Acq Offset (R2138) to position
the traces exactly on the center horizontal graticule line.
f. Move the cable from the CH 2 OR Y input connector
to the CH 1 OR X input connector. Set the VERTICAL
MODE switch to CH 1.
NOTE
g. Repeat parts c through e using the Channel 1
controls.
Instruments with serial numbers below B022102;
skip to part g and continue with this step.
9. Check Position Range
a. Set both VOLTS/DIV switches to 50 mV.
f. ADJUST—Horizontal Acq Offset (R6430) to position
the sweep start of the display to the left most vertical gra
ticule line.
g. Set:
b. Set the calibration generator to produce a 0.5 V
signal.
VERTICAL MODE CH 2
STORE/NON STORE NON STORE (button out)
c. Adjust the CH 1 VOLTS/DIV Variable control to pro
duce a 4.4-division display. Set the CH 1 VOLTS/DIV
switch to 10 mV.
h. Set STORE/NON STORE switch to STORE (button
in).
d. CHECK—The bottom and top of the trace may be
positioned above and below the center horizontal graticule
line by rotating the Channel 1 POSITION control fully
clockwise and counterclockwise respectively.
i. CHECK—Trace remains within 0.5 division of the
center horizontal graticule line and the sweep start
remains within 0.5 division of the left vertical graticule line.
j. Set:
e. Move the cable from the CH 1 OR X input connector
to the CH 2 OR Y input connector. Set the VERTICAL
MODE switch to CH 2.
VERTICAL MODE CH 1
STORE/NON STORE NON STORE (button out)
f. Repeat parts c and d using the Channel 2 controls.
k. Repeat parts h and i for Channel 1 trace.
REV MAY 1987
5-9

 Loading...