ATTACHMENTS
12D-7
SECTION 12D. MOWER AND REEL ADJUSTMENTS
DOWN PRESSURE ADJUSTMENT
Each reel is equipped with a down pressure spring.
Down pressure improves cutting quality by ensuring
good contact between the reel and ground when cut-
ting uneven surfaces. Check and adjust down pressure
any time the cutting height has been changed (see
Figure 12D-1)
1. Lower reels to the ground. Engage the parking
brake, stop engine, and remove the key from the
ignition switch.
NOTE:
Reels must be lowered when measuring down
pressure.
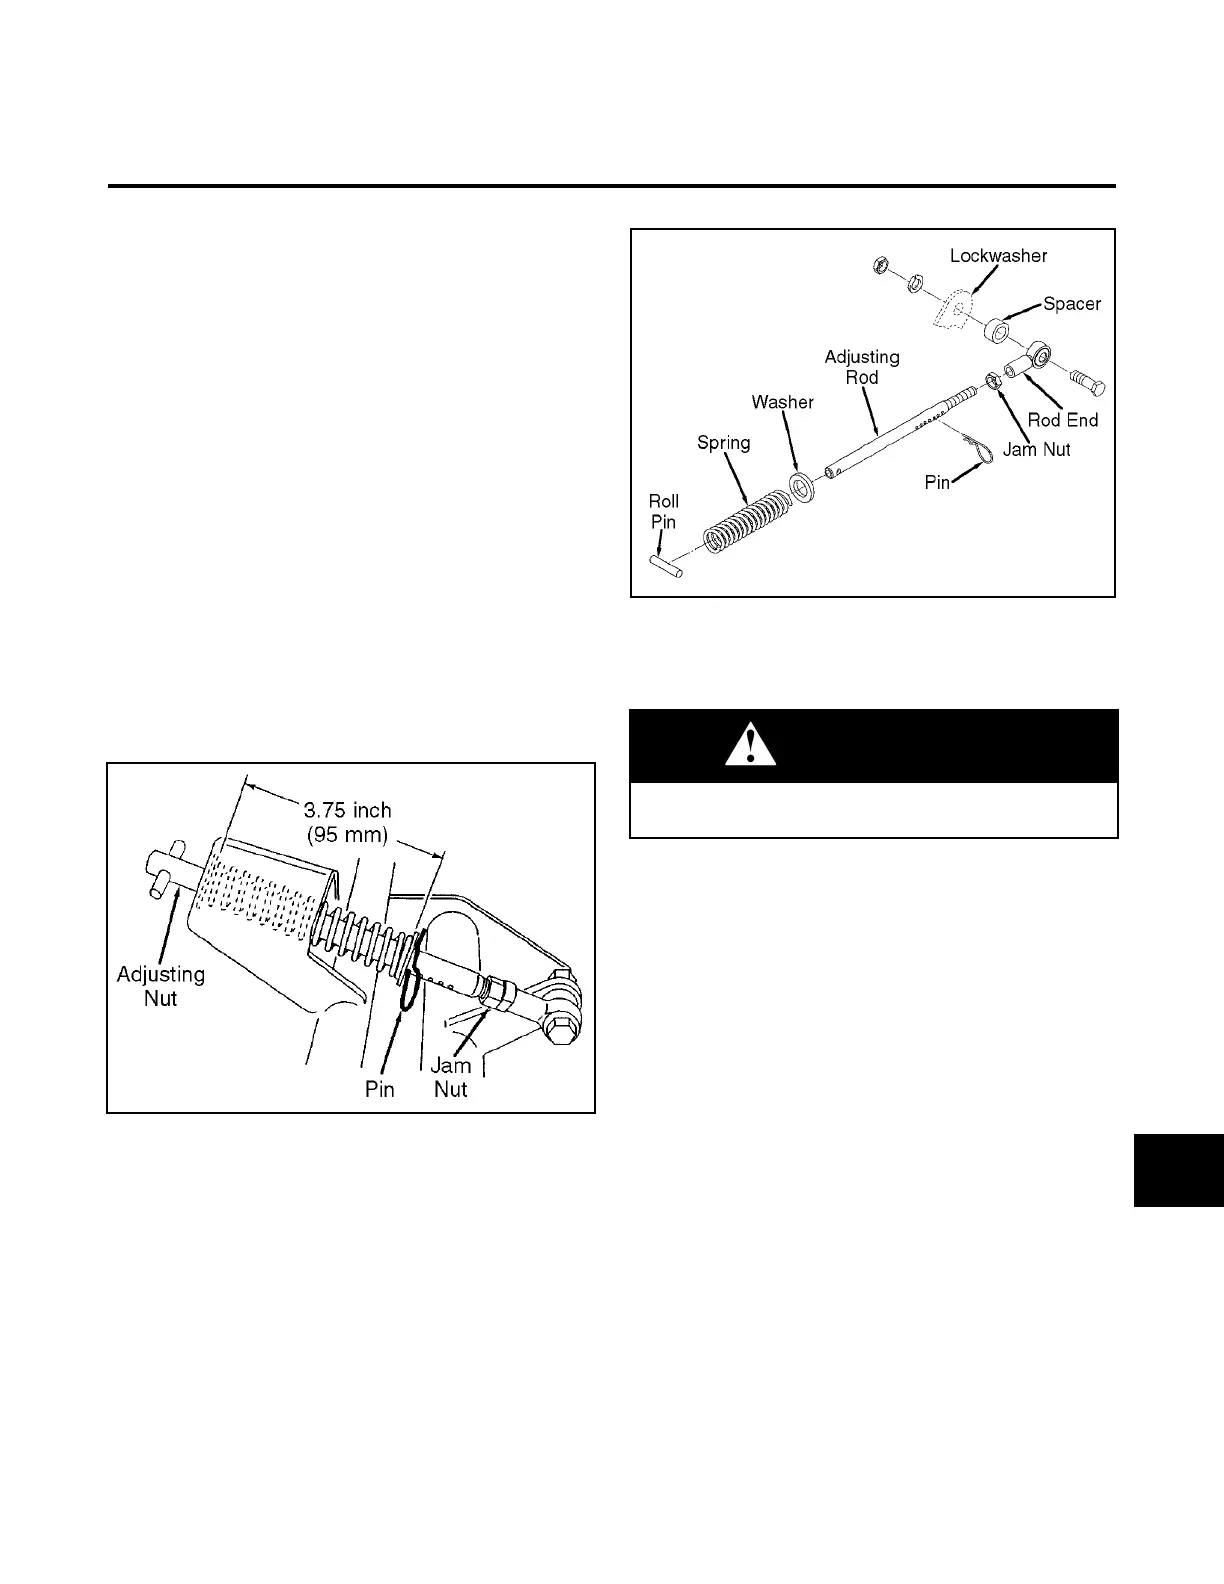
2. Measure the length of the spring as shown. Adjust
the spring to 3.75 ±0.06 in (95 ±1.5 mm).
To make fine adjustments, loosen the jam nut and
turn the adjusting rod in or out of the rod end.
Tighten the jam nut after the adjustment is made.
For adjustments greater than 0.25 in (6 mm), relax
spring tension by first raising the reels, then adjust
the pin.
Figure 12D-1. Down Pressure Adjustment
If the down pressure springs require replacement, dis-
assemble as shown in Figure 12D-2. Replace dam-
aged components, reassemble as shown and adjust as
described above.
Figure 12D-2. Down Pressure Springs Repair
BEDKNIFE-TO-REEL ADJUSTMENT
1. Reel bearings are self-adjusting. Check the reel
bearings for end play or radial play which would
indicate worn bearings. Replace bearings as
described in Section 12F.
2. Inspect the reel blades and bedknife to insure
good sharp edges without bends or nicks.
a. The leading edge of the reel blades must be
sharp, free of burrs, and show no signs of
rounding off.
b. The bedknife and bedknife backing must be
securely tightened. The bedknife must be
straight and sharp.
c. For the standard low profile bedknife, a flat sur-
face of at least 0.0625 in (1.5 mm) minimum
must be maintained on the front face of the
bedknife (see Figure 12D-3). Use a small disc
grinder to dress the bedknife.
WARNING
To prevent injury and damage to the cutting edges,
handle the reel with extreme care.
12D
 Loading...


