ATTACHMENTS
12E-14
REEL REPAIR AND GRINDING
Reel blades and bedknife that are slightly dull or have
minor nicks or high spots can be reconditioned quickly
and easily by lapping. Grinding is required when more
severe wear or damage exists. If a wave has devel-
oped in the bedknife, lapping will not solve the problem
and the mower reel and bedknife must be ground or
replaced.
NOTE:
A reel worn or one incorrectly ground to a conical
shape instead of a cylindrical shape will cause a
wavy bedknife.
Prior to grinding the reel, clean, inspect, and repair the
reel as follows:
• Steam clean or wash the reel.
• Clean the reel thoroughly by scraping off all dried
material from the blades.
• Inspect the back of each reel blade for irregular
surface which could cause the guide finger to hang
while grinding. Remove any irregularities.
• Inspect the welds at the spiders. If any have cracked
or broken loose, reweld using a #7018 low hydrogen
welding rod.
• Straighten any bent reel blades by hammering into
shape with a block of steel and a hammer.
The method of grinding will depend upon the grinding
equipment being used (Figure 12E-5). Set up and
operate the grinding machine in accordance with the
manufacturer’s instructions.
Figure 12E-5. Reel Grinding Procedure
1. Before mounting the bedknife on the grinding
machine, thoroughly remove all dried material,
rust, and scale from the bedknife.
2. Hand held grinders can be used to grind the bed-
knife while it is installed in the mower unit. Other
grinding machines require the removal of the bed-
knife from the mower. Refer to the grinding
machine manufacturer’s instructions for mounting
the bedknife and operating the grinder.
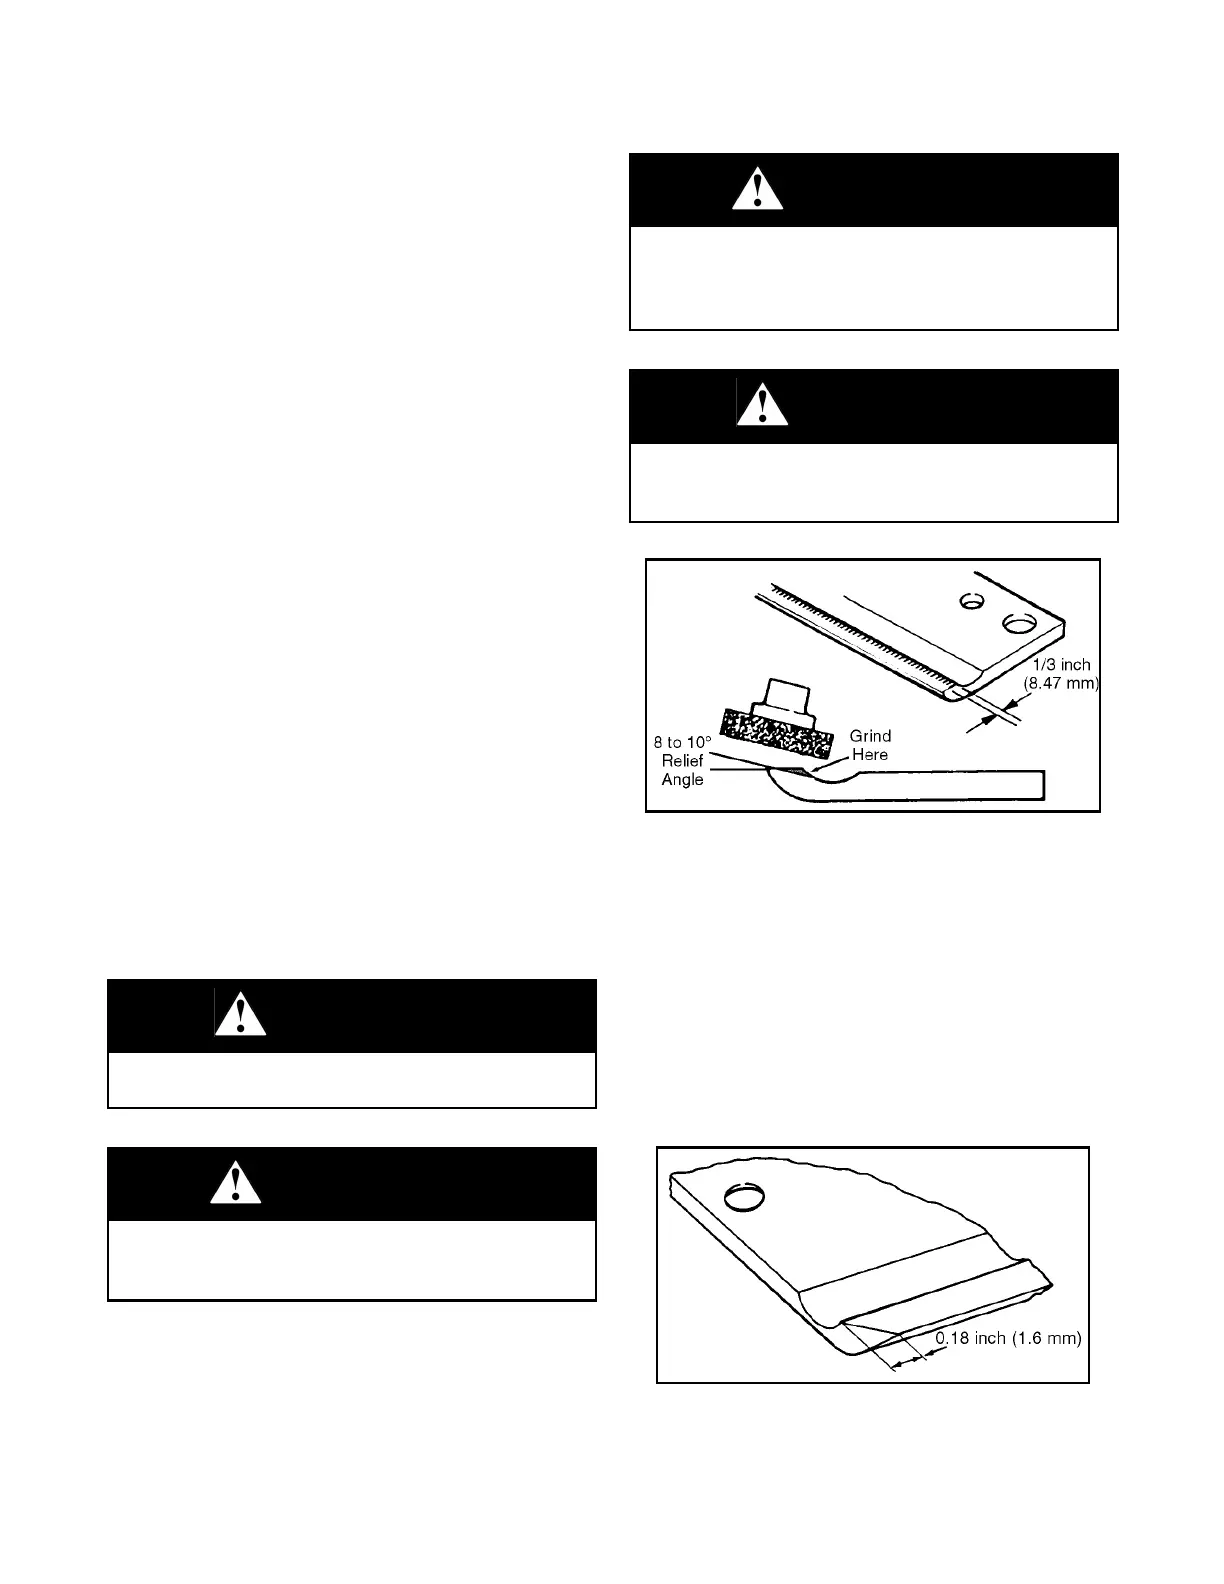
3. Tilt the grinding head so the stone contacts the
bedknife at the rear one third of the top surface.
This will give proper set up to grind the bedknife
correctly (Figure 12E-6).
Figure 12E-6. Bedknife Grinding Angle
DANGER
Always wear eye protection when operating a grind-
ing machine.
CAUTION
Handle and store grinding wheels carefully. Discard
grinding wheels that are cracked, badly chipped, or
have been dropped.
CAUTION
Always install blotter washers between the grinding
wheel and the flanges. Do not overtighten the flange
nut on the grinding wheel. Do not run a grinding
wheel faster than specified on the wheel blotters.
DANGER
Do not stand in line with a grinding wheel the first
three minutes it is run. Never jam a grinding wheel
into the work piece.