OPTIONS
13C-8
4. Install the nilos ring onto the shaft.
5. Install the bearing, seal side first, onto the shaft.
6. Install the flat washer, lockwasher, and nut.
Torque the nut to 20 ft-lbs (27 Nm).
7. Press the shaft subassembly into the roller.
NOTE:
The seal must be pressed so it just clears the
snap ring groove in the roller.
8. Press the seal (seal lip to the inside) into the roller.
9. Install the snap ring.
10.Install the grease fitting and one shaft nut.
Installation
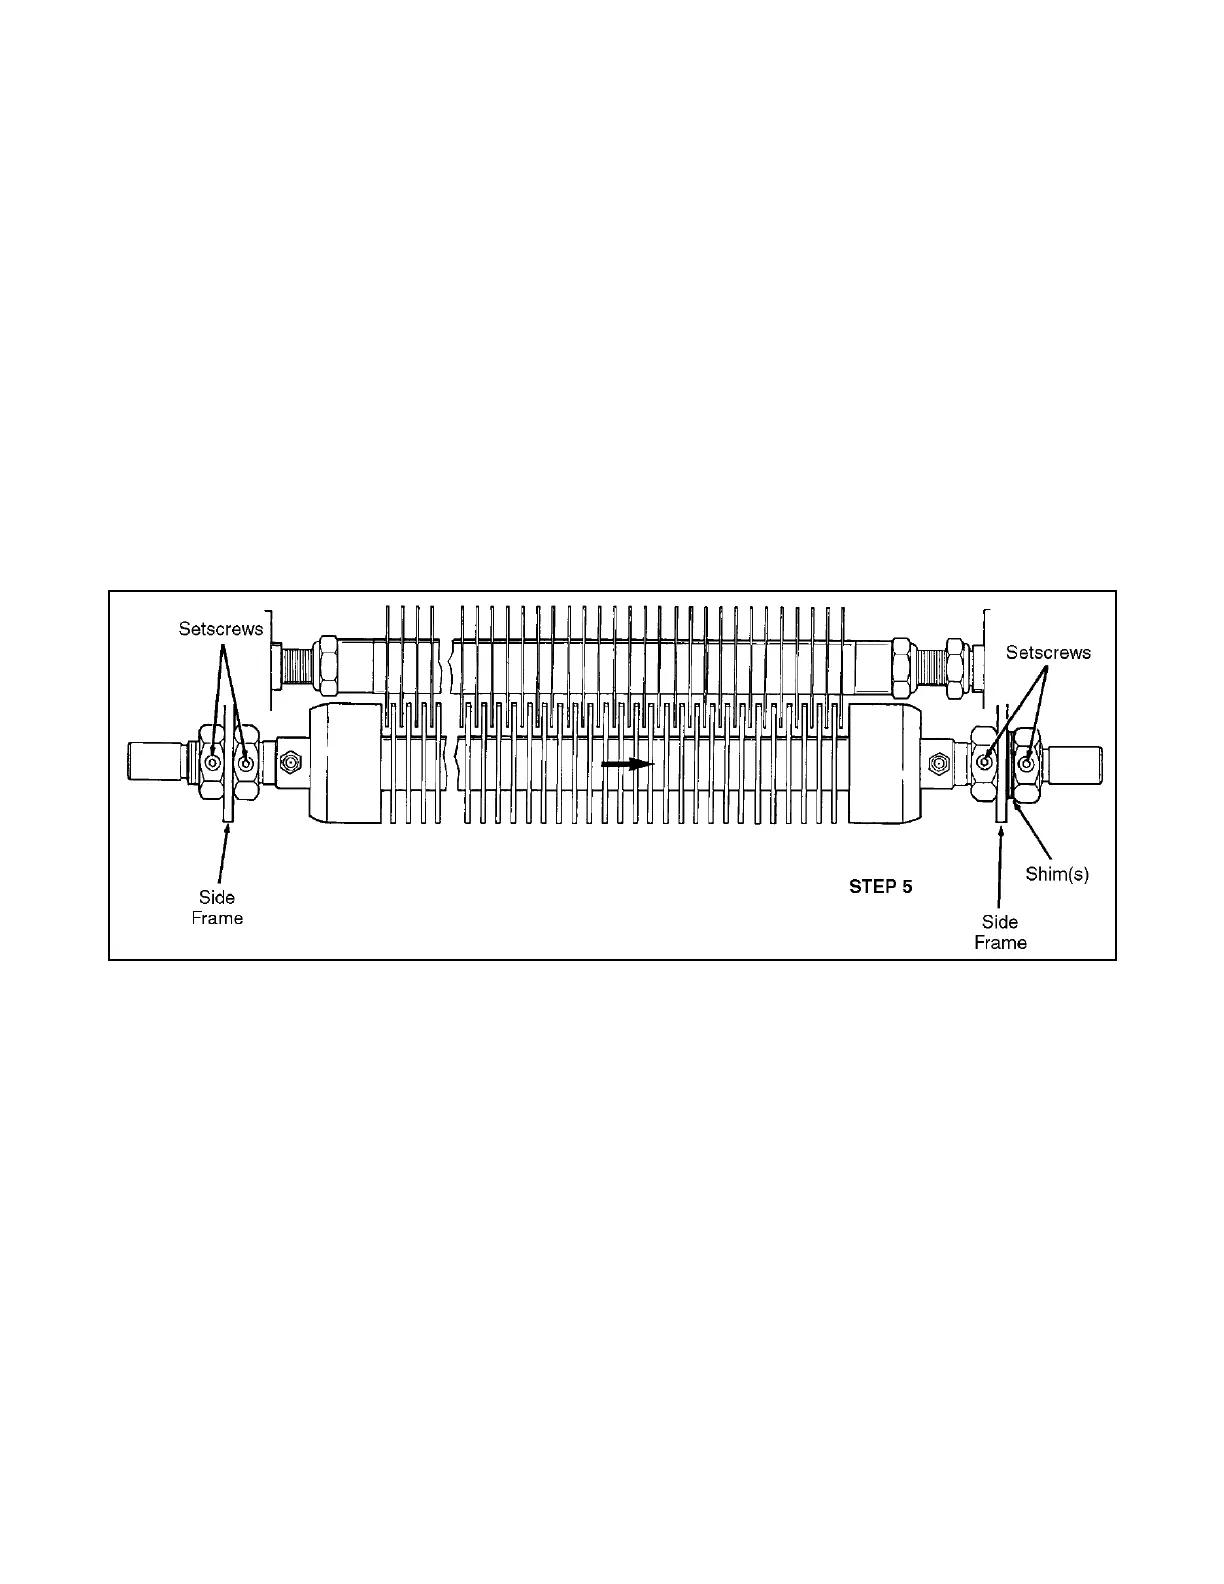
1. Loosen the setscrews in the roller nuts
(Figure 13C-3).
2. Position the roller end in the groomer side frame.
3. Install the groomer side frame on the motor end,
tighten hardware as shown.
4. Using the two inside roller nuts, center the
groomer blades between the roller discs.
5. Install shims and the outer nuts.
NOTE:
Install the required amount of shims necessary so
that when the outer nut is tightened there are no
threads exposed beyond the nut. Each shim is
0.60 in (15.24 mm) thick.
6. Tighten the roller shaft outer nuts and the nut set-
screws.
Figure 13C-3. Roller Installation Alignment
GROOMER SHAFT ASSEMBLY
Removal
1. Remove the belt case cover and loosen the belt
adjusting eccentric. Remove the bearing retainer
capscrew (Figure 13C-4).
2. Remove the clutch, drive key, and spacer.
3. Remove the drive gear and belt.
NOTE:
Do not pry on the pulley flange.
4. On the motor end, remove the bearing retainer
capscrew.
5. Remove the quick height pivot screw and nylon
clamp.
 Loading...


