ATTACHMENTS
12F-17
SECTION 12F. LF-1880 MOWER UNITS
REMOVAL
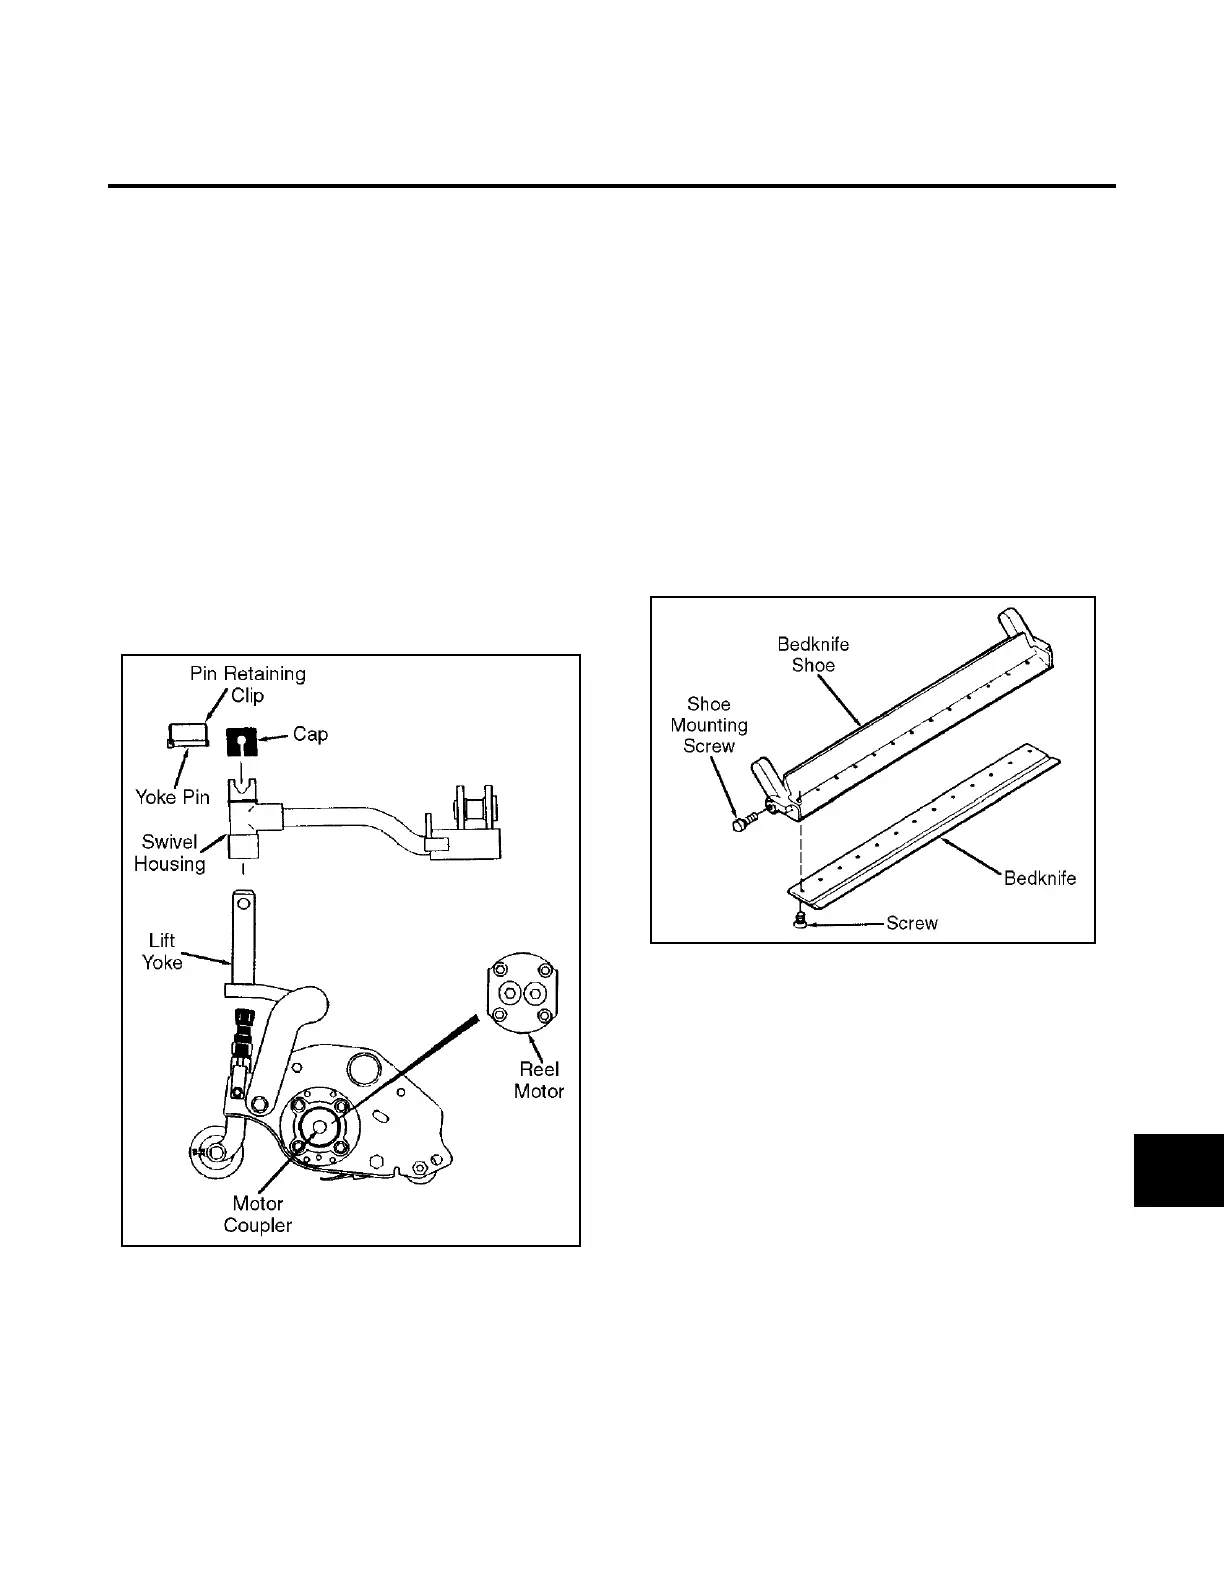
1. Lower the mower units to the ground. Mark or note
the position of the down pressure adjustment pins
(see Section 12D). Remove the down pressure
adjustment pins.
2. Lift the quick release pin and turn it forward to
release the reel motor.
3. Pull the reel motor straight out from the mower
housing.
4. Carefully place the reel motor and its hoses away
from the mower unit. Cap or cover the bearing
housing cavity to prevent contamination and/or
damage to internal mower components.
5. Remove the cap on the lift arm. Unfasten the pin
retaining clip and remove the yoke pin.
6. Carefully raise the lift arm to clear the lift yoke and
remove the mower unit.
Figure 12F-1. Mower Unit Removal/Installation
BEDKNIFE REPLACEMENT
Bedknives that cannot be repaired by lapping or grind-
ing should be replaced. The bedknife is held to the
bedknife shoe by flat head screws. When replacing a
bedknife, the bedknife should be lightly ground to level
the cutting edge.
1. When a bedknife is installed, clean the backing
prior to installation.
2. Secure the installed bedknife by tightening the
mounting screws, starting with those at the center
and working out to the ends.
3. A new bedknife must be ground to assure straight-
ness and parallelism with the reel cylinder (see
Section 12D).
Figure 12F-2. Bedknife Removal and Replacement
DISASSEMBLY
1. Remove the lift yoke attaching the hardware and
lift yoke.
2. Refer to Figure 12F-3 (sheet 1 of 2). If not previ-
ously removed, remove the throw shield.
3. Remove the bedknife assembly from the mower
frame (see Figure 12F-3, sheet 2).
4. Using a block of wood, block the reel so it will not
turn.
5. Using a suitable puller, remove the reel motor
coupler.
6. Remove the remaining components as shown in
Figure 12F-3, sheets 1 and 2.
12F