Refrigeration Service Operations
140
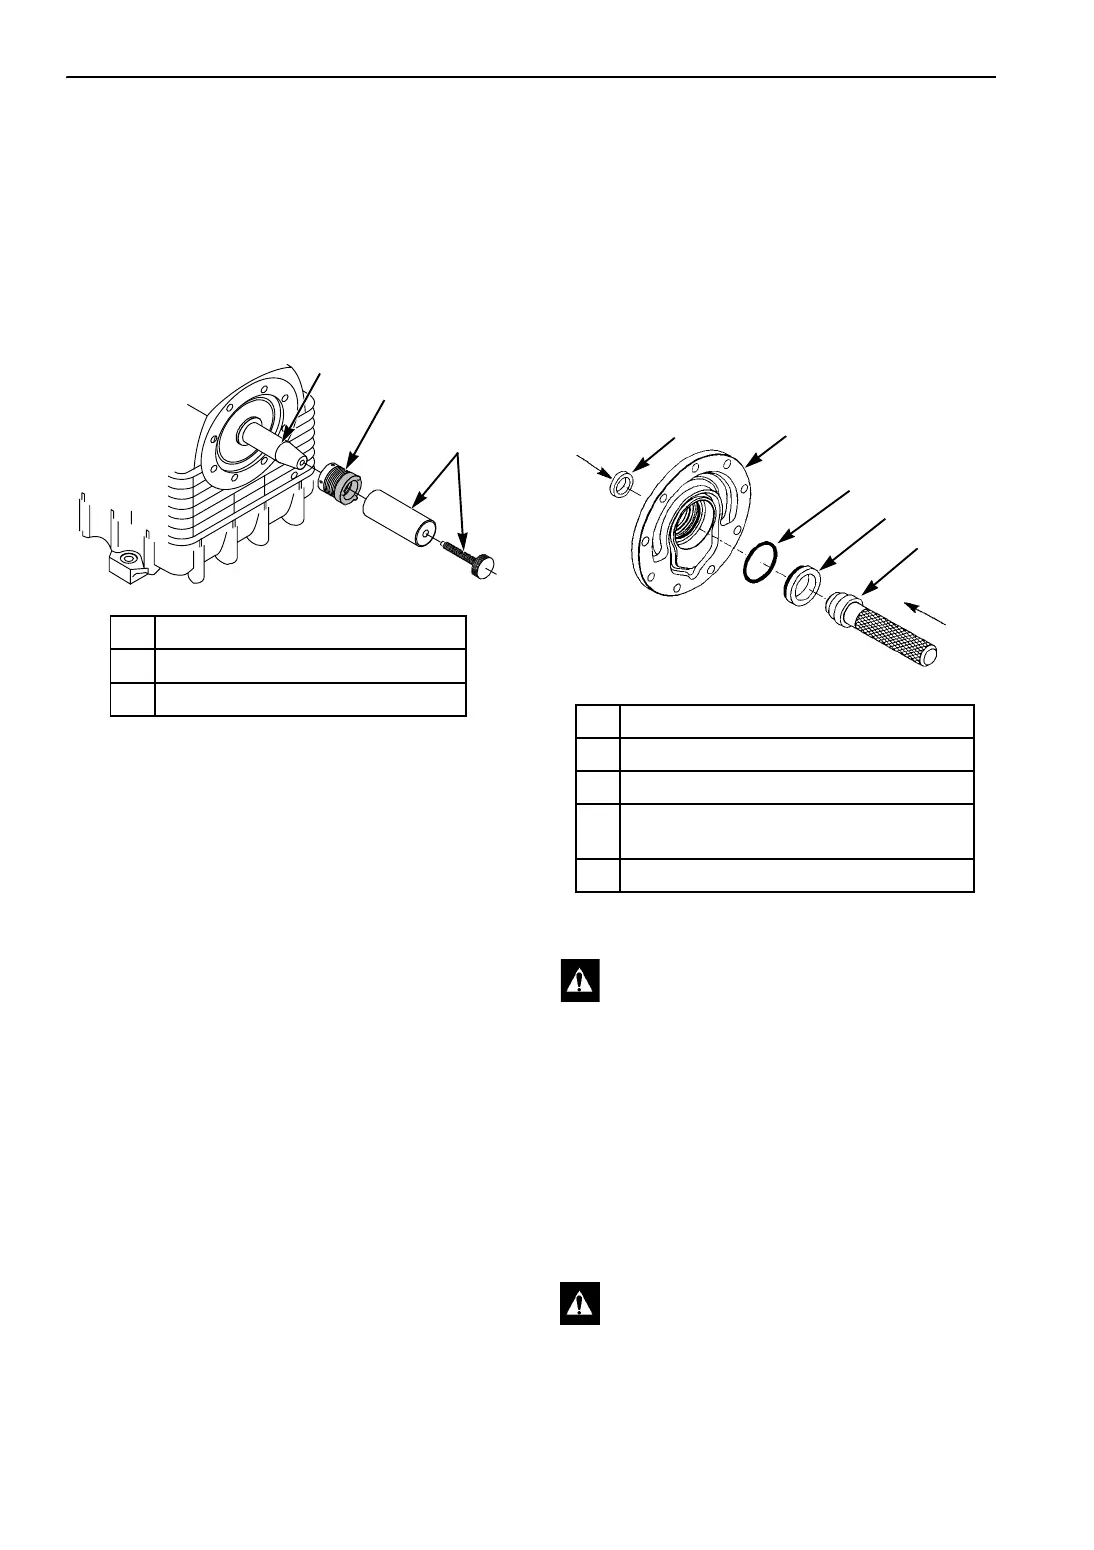
13. Use seal installation tool (P/N 204-995) to
install the bellows squarely on the shaft. Clean
the seal installation tool and place it on the
shaft. Turn the knob until the tool bottoms out.
NOTE: The following illustration shows the
seal installation tool being used on a
reciprocating compressor. The same
procedure applies to the scroll compressor.
14. Tighten the set screws to approximately
45 in.-lb (5.0 N•m) with the Allen wrench
provided.
15. Remove the seal installation tool.
16. Install the new dust seal in the seal cover with
the lip side facing out and the flat side facing
toward the compressor.
17. Apply clean compressor oil to the new o-ring
and install it in the seal cover. Apply clean
compressor oil to the new hard ring. Ensure
that the hard ring installation tool
(P/N 204-953) is clean. Use the hard ring
installation tool to push the hard ring (with the
polished surface toward the installation tool)
fully into the seal cover. Do not pinch the
o-ring.
If the installation tool is not available, use the pad
in the new seal packaging to protect the polished
surface of the hard ring during assembly. A
substitute installation tool should have a diameter
approximately the same size as the O.D. of the
polished surface.
NOTE: The following illustration shows the seal
installation tool being used on a reciprocating
compressor seal cover. The same procedure
applies to the scroll compressor seal cover.
18. Remove the orange protective cap. Clean the
hard ring and the primary ring (bronze ring)
with the alcohol wipes found in package
labeled “1”. Then clean the polished mating
surfaces of both rings with the lint free dry
wipes from package number “2”. Apply clean
compressor oil to polished surfaces of the seal
and to the lip seal from package number “3”
before assembling.
1. Crankshaft
2. Bellows
3. Seal Installation Tool
Figure 165: Bellows Installation with Tool
1
2
3
AGA1256
1. Dust Seal
2. Seal Cover
3. O-ring
4. Hard Ring—Install with Polished Surface
Toward Compressor
5. Hard Ring Installation Tool
Figure 166: Lip Seal and Hard Ring Installation
CAUTION: Do NOT touch or damage the
polished seal face surfaces.
CAUTION: Oil applied to the seal faces
must be absolutely clean.
1
2
3
4
5
AGA575
 Loading...