5
5-8
Replacement
To replace a faulty gauge, meter or switch in the dash
panel:
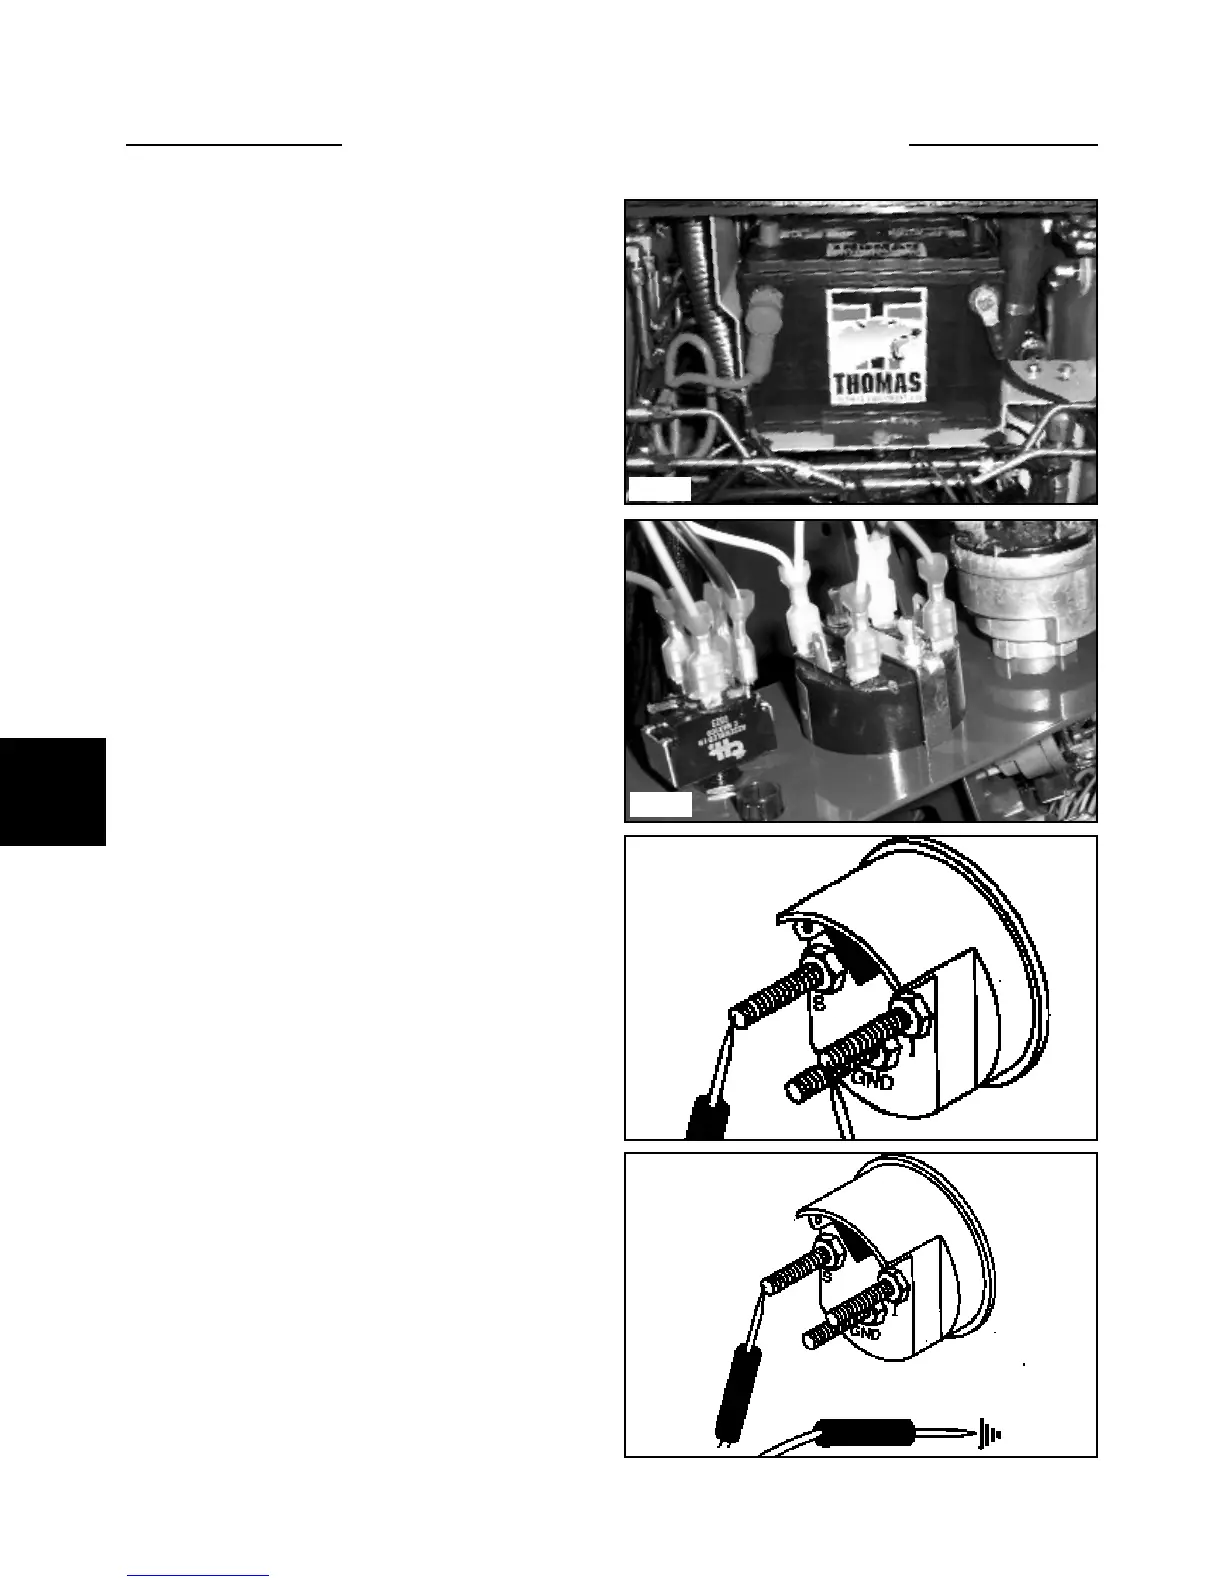
1 Disconnect the battery cable connection. (fig. C5105)
2 Remove the 6 screws retaining the dash panel to the
dash pod.
3 Access the rear of the dash panel. (fig. C5090)
4 Remove the wiring from the effected part.
5 Both the fuel gauge and the combined fuel
gauge/hour meter are retained by a bracket and 2 mount-
ing nuts. Remove the nuts and the gauge can be replaced.
6 The ignition switch is retained by the knurled nut on
the outside of the dash panel. Remove the nut and the
switch can be replaced.
7 Up to LB002499, the hour meter is retained in the
dash panel with molded in tabs. Pull the tabs outward and
the hour meter can be replaced.
Testing the Fuel Gauge
Up to serial number LB002499
1 Remove the dash panel to access the gauge. (fig.
C5090)
1 With the ignition switch off, connect an ohmmeter
between the “S” terminal and the other end to ground.
2 An ohmmeter reading of 50 to 500 ohms is normal.
A higher or lower reading means the wire going to the
“S” terminal is faulty.
NOTE: If the test is good, check the fuel sending unit in
the fuel tank for failure.
2 With the ignition switch off, connect an ohmmeter
between the “S” terminal and the “I” terminal. (fig.
C307)
3 An ohmmeter reading of 150 to 250 ohms is normal.
A higher or lower reading means the gauge is faulty and
needs to be replaced.
NOTE: If the fuel gauge test results were good and the
gauge still fails to function do the following test.
INSTRUMENTATION 5.3
C5105
C5090
C307
C308