48
OPTIONAL OPERATIONS
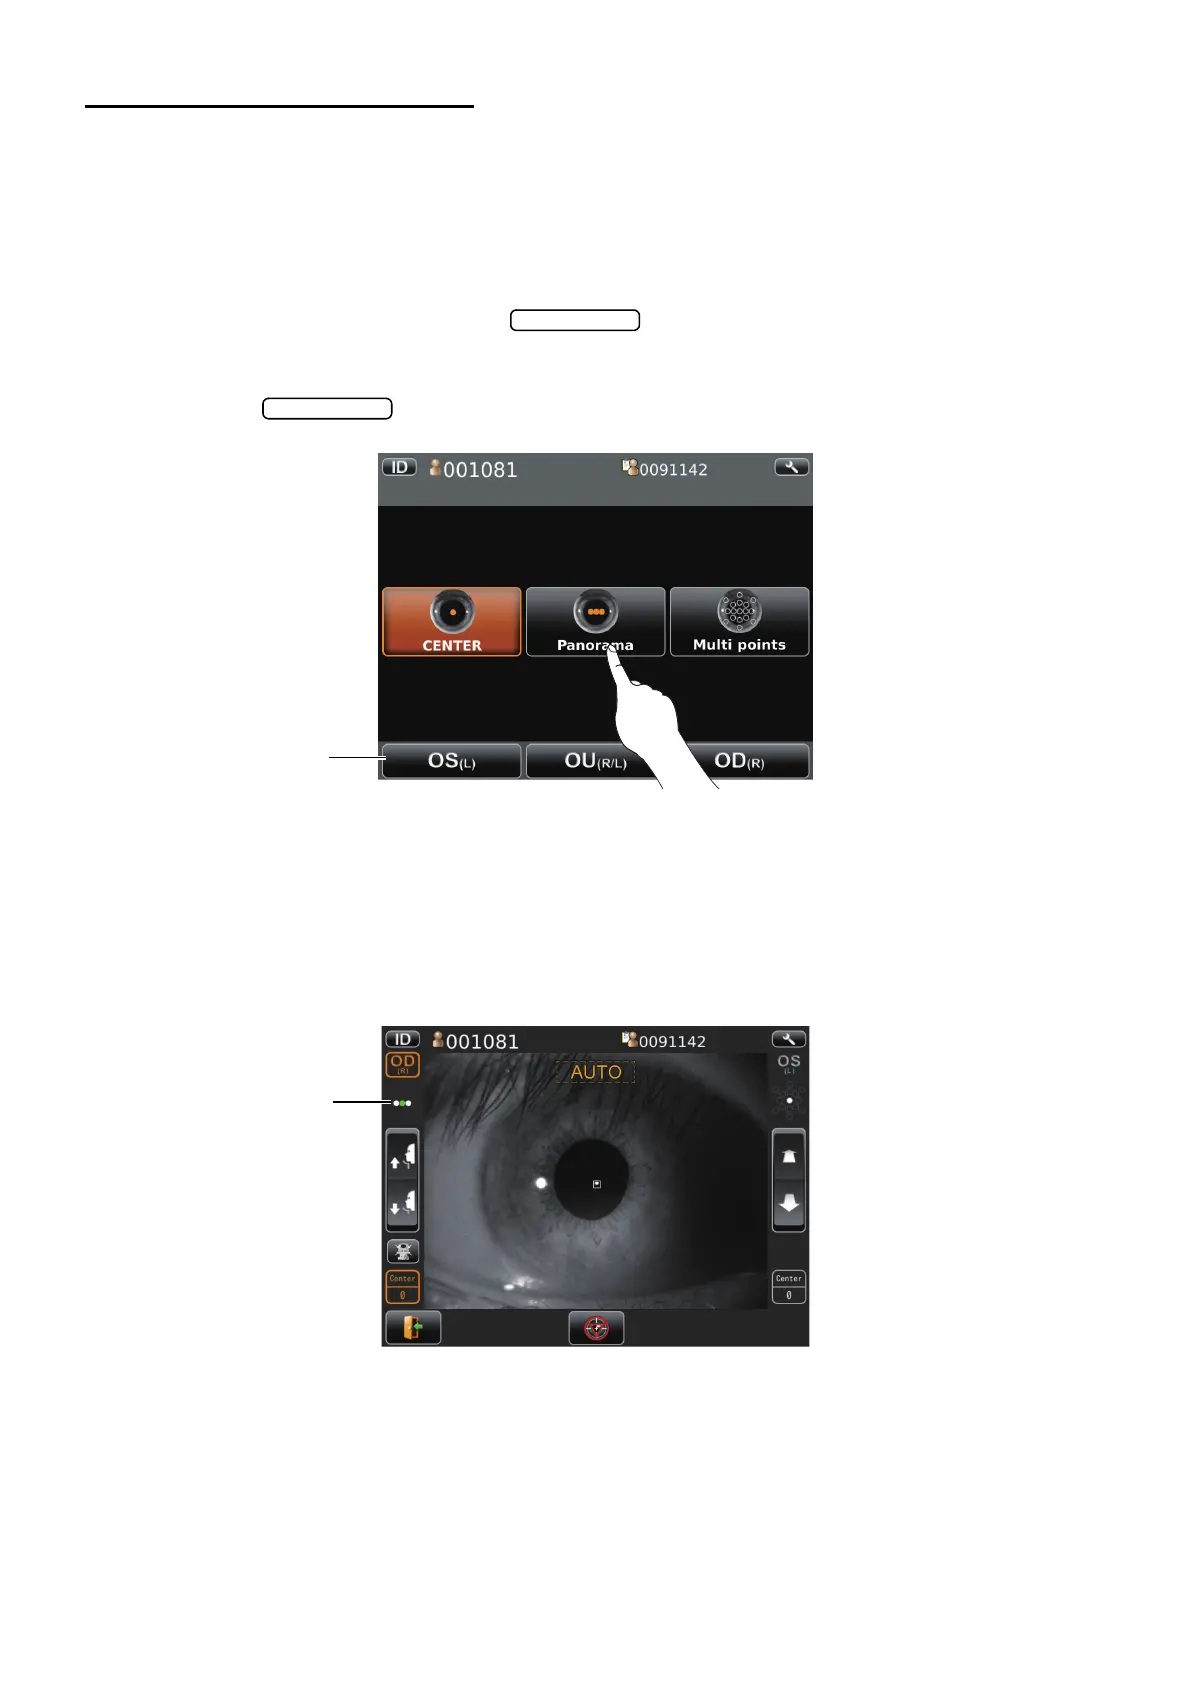
PANORAMA PHOTOGRAPHY
Photograph 3 points-center, ear side and nose side. Those images are combined automatically and
observation of large area can be performed.
• In the case of sequence course, preparation and photography are carried out as the follow-
ing procedure.
• In the case of free style course, preparation and photography are carried out from following
procedure 4 after tapping the button in the Photographing position.
1 Set Patient ID. (Refer to page 35)
2 Tap the button.
3 Select the patient's eye by tapping the button to select patient's eye.
Then move to the screen for observation.
4 Please prepare to photograph for patient. (Refer to page 37)
5 Have the patient look at the fixation target (green) in the photographing window.
6 Tap the pupil on the screen.
The alignment is performed automatically and photographs.
• Changing the patient ID or patient name is impossible after tapping the screen.
7 Preview of result of photography is shown.
Until photographing next point, the patient has a break.
Button to select
patient's eye
01
Please touch pupil
on the screen.
Please touch pupil
on the screen.
Please touch pupil
on the screen.
Current photographing
position