TEW-821DAP
25
© Copyright 2015 TRENDnet. All Rights Reserved.
Creang a WDS Bridge
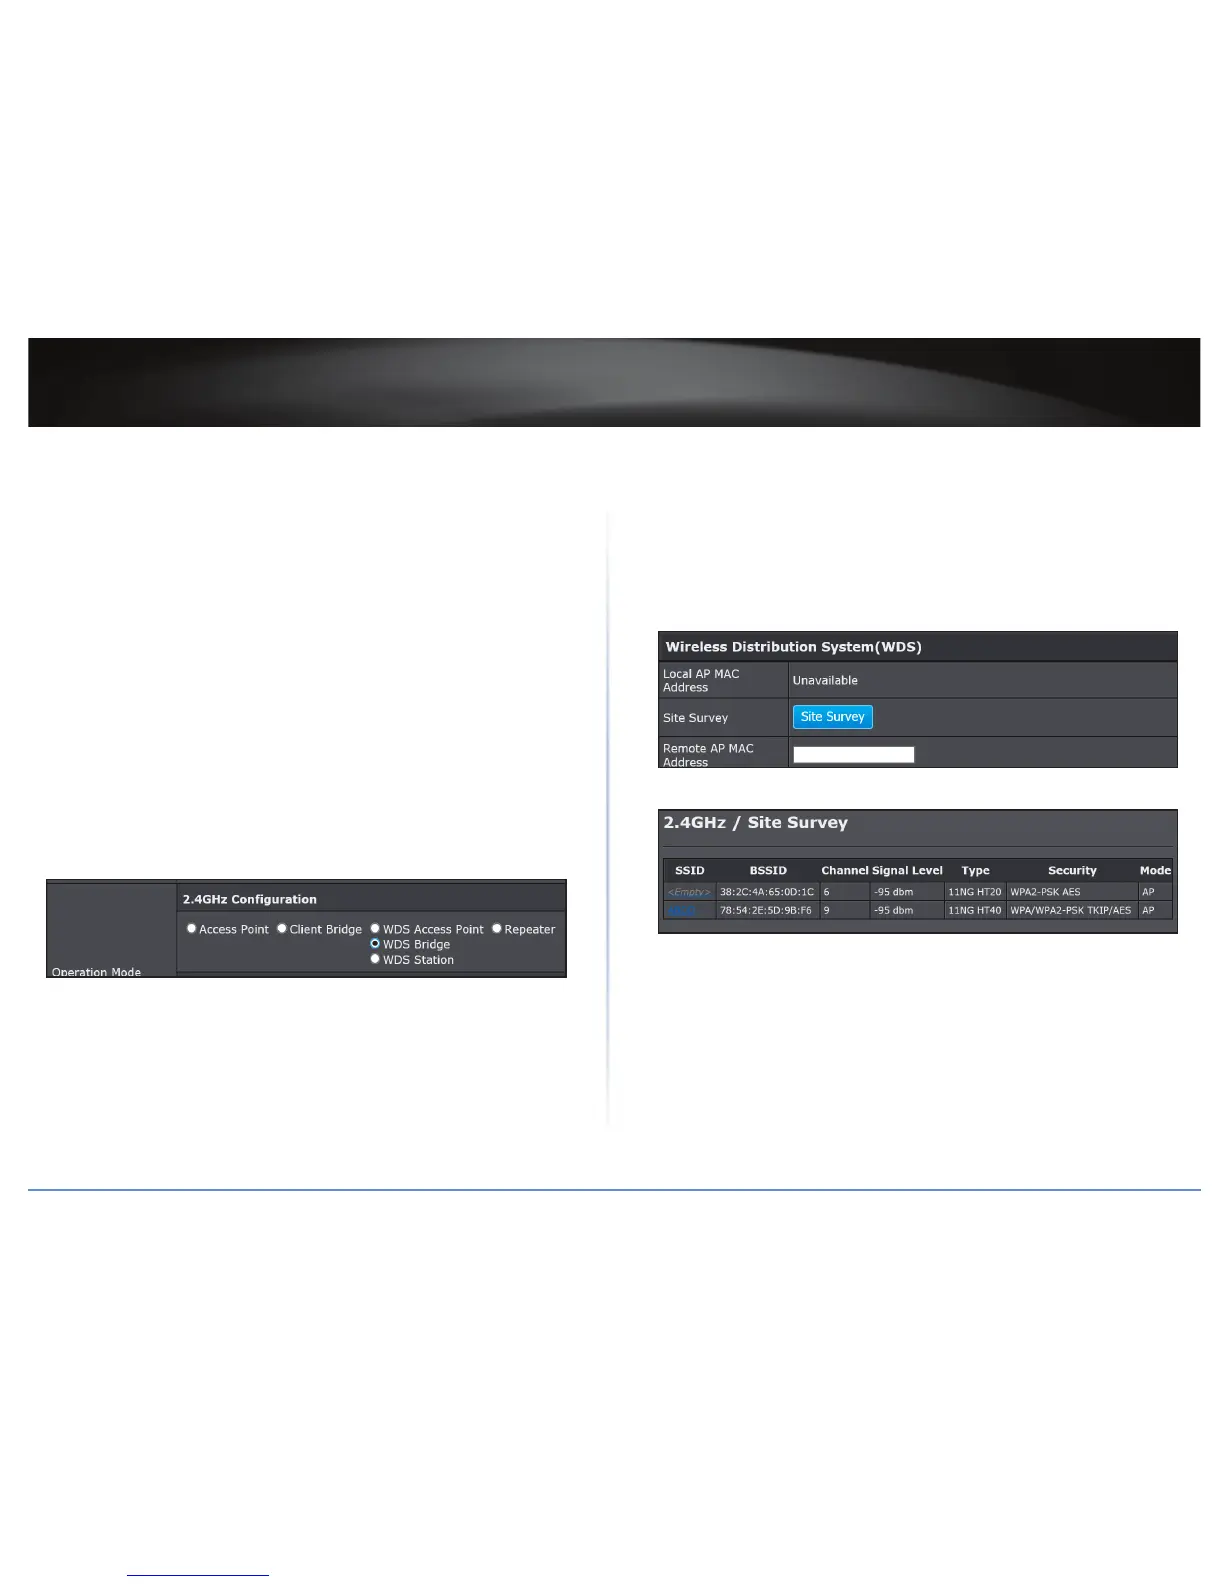
System > Operaon Mode
ÍNote: By default, your access point is congured with a predened wireless network
name (SSID) and security key using WPA-Personal. The predened wireless network
name and security can be found on the scker on the side of the access point or on the
device label at the boom of the access point.
To congure a WDS bridge between two TEW-821DAP access points:
• Make note of the wireless MAC address of both access points. Refer to “System
Informaon” on page 28 for checking the status page.
ÍNote: Please note that 2.4GHz and 5GHz bands will have two dierent MAC
addresses. If using the 2.4GHz band wireless MAC address, please use the 2.4GHz
wireless MAC address for all other WDS supported devices to bridge and if using the
5GHz band wireless MAC address, use the 5GHz wireless MAC address for all other
WDS supported devices to bridge.
• Make sure the IP address on each WDS supported access is point is dierent and on
the same IP network/subnet. Please refer to “Congure IP Sengs” on page 30 for
changing access point IP address.
1 Log into your access point management page (refer to “Log in to Management Page”
on page 10).
2 Click System > Operaon Mode.
3 On Operaon Mode secon, select WDS Bridge.
4 Click Apply to save changes or Cancel to discard the changes.
Using a WDS Bridge
Wireless 2.4GHz or Wireless 5GHz > WDS Link Sengs
1 Log into your access point management page (refer to “Log in to Management Page”
on page 10).
2 In Wireless 2.4GHz or Wireless 5GHz > Wireless Link Sengs > Remote AP MAC
Address secon, do on of the following:
• Specify the remote AP MAC address manually, and click Apply or
• Click Wireless 2.4GHz or Wireless 5GHz > Wireless Link Sengs > Site Survey.
3 The available networks are listed. Select a network to connect to.
ÍNote: If you are unable to nd your wireless network in the list, click Refresh to rescan
for the available networks.
4 Click on the SSID eld to connect to the selected wireless network.
5 Click Apply to save the wireless network.
 Loading...